
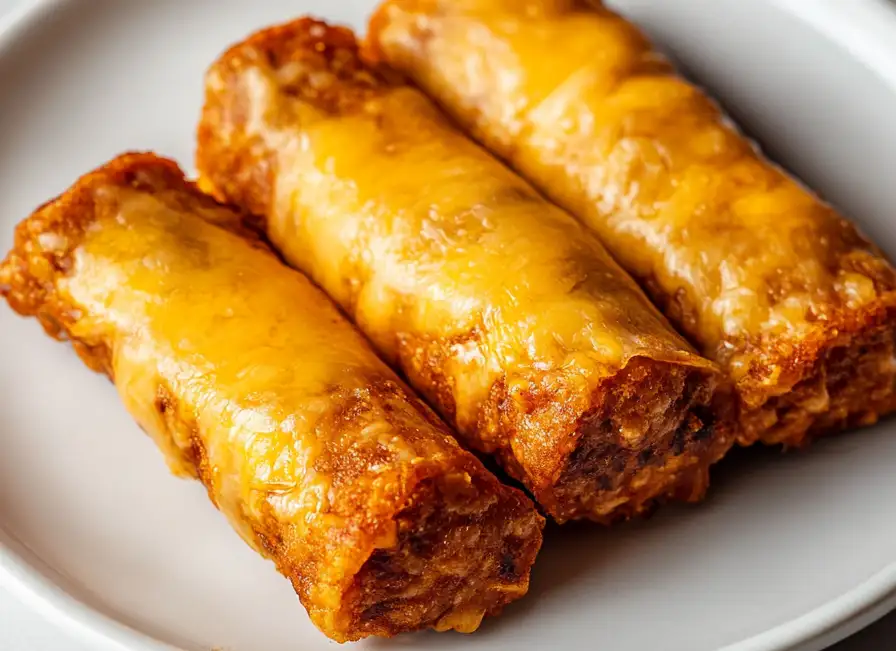
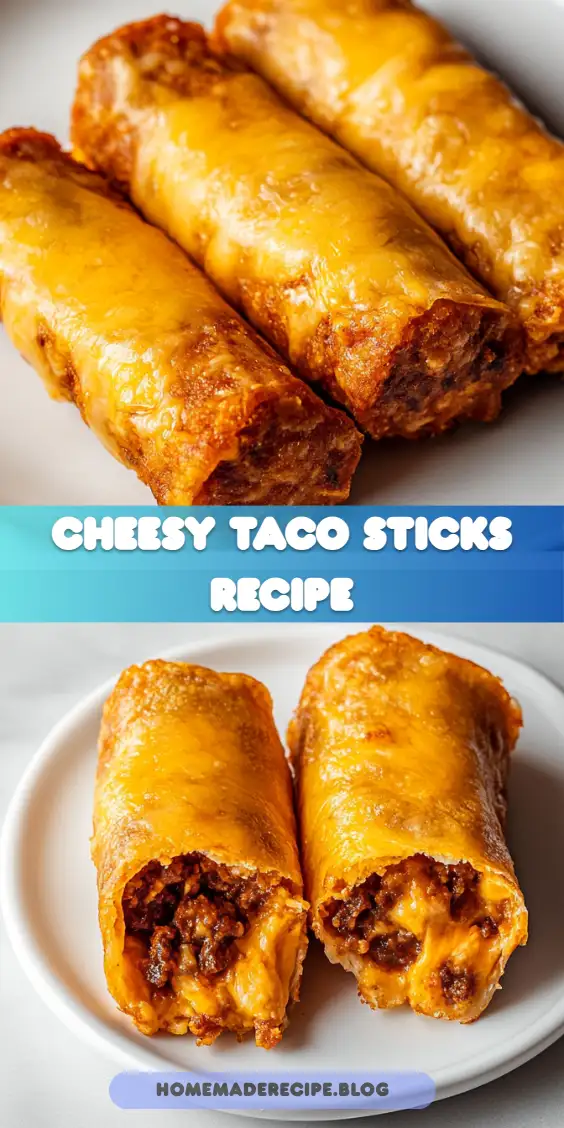
Cheesy Taco Sticks bring together the comforting flavors of tacos and the fun, shareable nature of finger foods. Perfect for parties or a fun family dinner, this recipe combines seasoned ground beef, gooey cheeses, and a buttery crust for a satisfying treat everyone will love. I adore making these for a weekend movie night or a simple gathering with friends. They’re easy to prepare and even easier to devour!
For those interested in tweaking the recipe, consider exploring different types of cheeses that melt well and add unique flavors to your taco sticks. Additionally, understanding the nutritional value of your ingredients can be beneficial, especially if you’re aiming for a balanced meal. You can find helpful information on how to incorporate leaner proteins like turkey or chicken to make the dish lighter while still satisfying.
Table of Contents
Why You’ll Love This Recipe
These Cheesy Taco Sticks are the ultimate comfort food. Not only are they deliciously cheesy and packed with flavor, but they are also incredibly convenient to make. The whole family will enjoy the familiar flavors of tacos in a new and exciting form. Here’s why you’ll love them:
- Quick and Easy: With only 30 minutes total time, you can whip these up with minimal effort. This makes them perfect for a last-minute appetizer or a spontaneous gathering. Having a recipe that doesn’t require hours of prep work means you can focus more on enjoying your time with family and friends.
- Kid-Friendly: Kids love anything they can eat with their hands, and these taco sticks are no exception. The handheld nature of these sticks makes them particularly appealing to children, who often prefer foods that are fun and easy to manage. Plus, you can sneak in some extra veggies into the filling if you want to boost the nutritional value without them even noticing!
- Customizable: Feel free to experiment with different cheeses or add your favorite toppings for a personalized twist. If you’re a fan of spicy foods, try adding some jalapeños or a dash of hot sauce to the filling. Alternatively, swap out the ground beef for turkey or chicken for a lighter version. The possibilities are endless, and each variation brings a new layer of flavor to the dish.
- Perfect for Sharing: Whether it’s a party or a casual dinner, these are great for serving a crowd. Their shareable nature makes them an ideal choice for entertaining. Not to mention, they look pretty impressive on a platter, earning you bonus points as a host!
The Recipe
For the Filling:
| Amount | Ingredient | Notes |
|---|---|---|
| 450 g | ground beef | |
| 1 | small onion | finely diced |
| 2 | cloves garlic | minced |
| 1 tbsp | olive oil | |
| 1 tbsp | chili powder | |
| 1 tsp | ground cumin | |
| 0.5 tsp | smoked paprika | |
| 0.5 tsp | salt | |
| 0.25 tsp | black pepper | |
| 60 ml | water |
For Assembling:
| Amount | Ingredient | Notes |
|---|---|---|
| 390 g | refrigerated pizza dough | |
| 170 g | shredded mozzarella cheese | |
| 110 g | shredded cheddar cheese |
For Topping:
| Amount | Ingredient | Notes |
|---|---|---|
| 2 tbsp | melted butter | |
| 0.5 tsp | garlic powder | |
| 0.5 tsp | dried parsley |
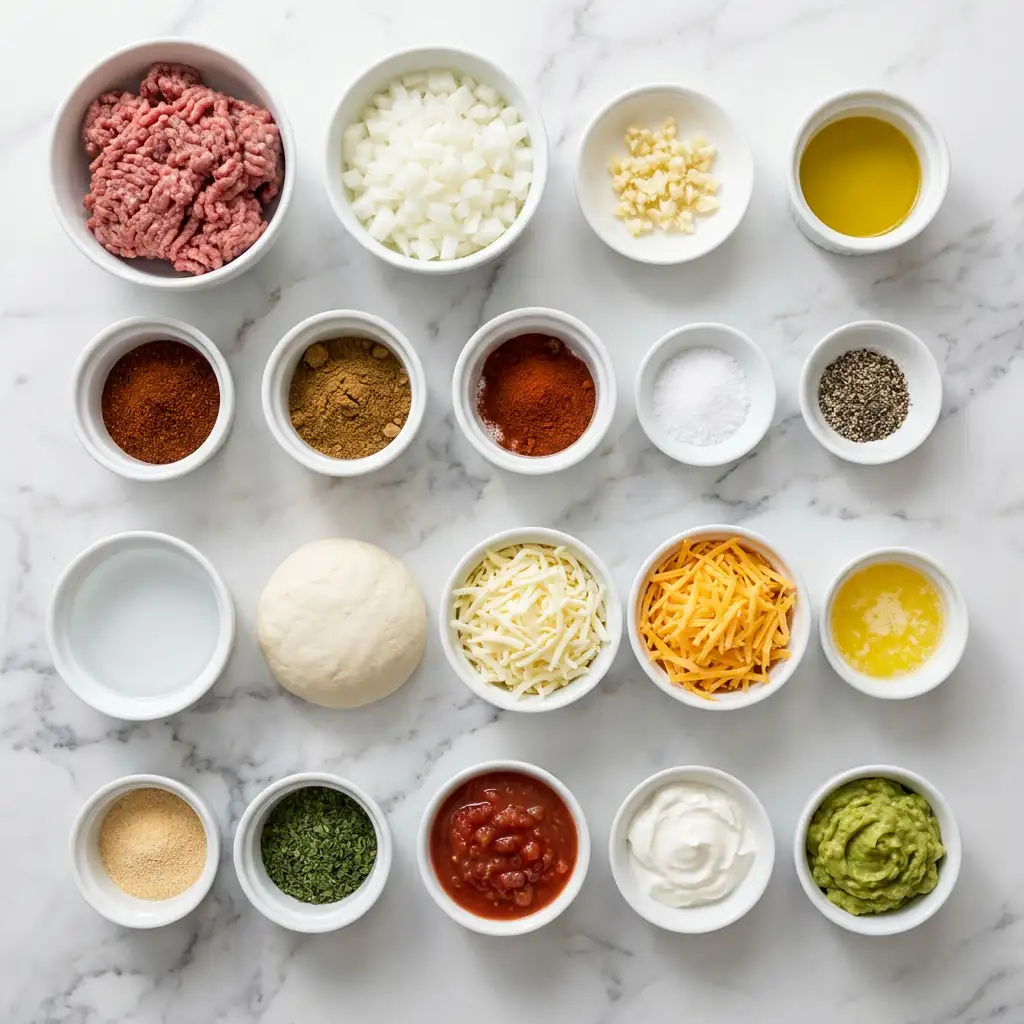
Optional for Serving:
- Salsa
- Sour cream
- Guacamole
Instructions:
- Heat the olive oil in a skillet over medium heat. Add the onion and cook for 2–3 minutes until softened. Add the garlic and cook for another 30 seconds. The aroma of onions and garlic will fill your kitchen, setting the stage for the delicious meal to come.
- Add the ground beef to the skillet and cook until fully browned, breaking it up as it cooks. Drain excess fat if necessary. This ensures your filling isn’t greasy, which could make the dough soggy.
- Stir in the chili powder, cumin, smoked paprika, salt, and pepper. Add the water and let it simmer for 2–3 minutes until the mixture thickens. Remove from heat and let it cool slightly. This cooling step is crucial as it helps the flavors meld together and prevents the dough from becoming too warm when assembling.
- Preheat your oven to 375°F (190°C). Line a baking sheet with parchment paper. Roll out the pizza dough into a rectangle and cut it into 10 equal strips. This ensures even cooking and a consistent look for each stick.
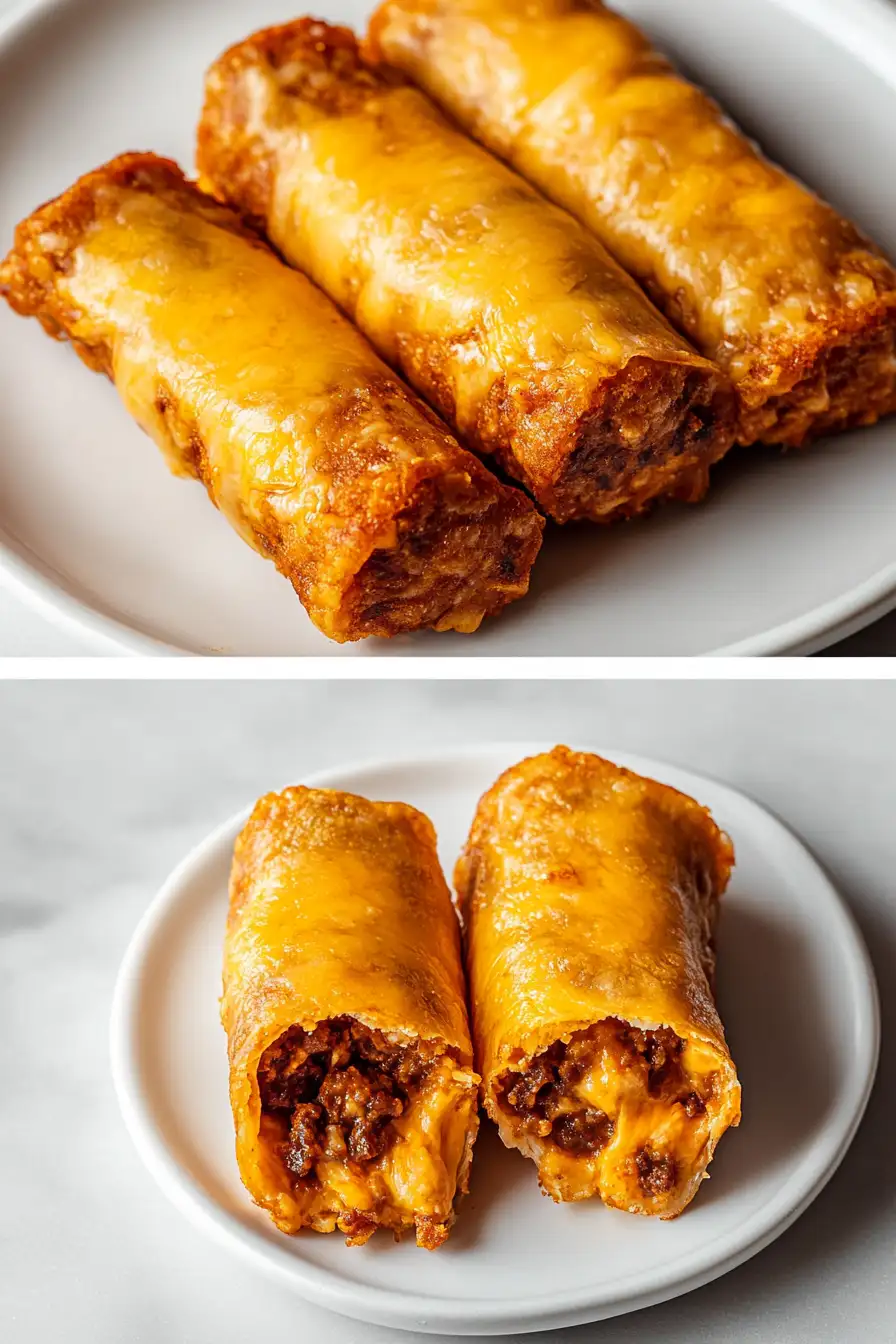
- Spoon the taco filling down the center of each dough strip. Sprinkle mozzarella and cheddar cheese over the filling. Fold the dough over the filling and pinch the edges to seal them into sticks. The combination of cheeses provides a delightful melt and stretch in every bite.
- Place the sticks seam-side down on the baking sheet. Brush with melted butter and sprinkle with garlic powder and dried parsley. This step adds a layer of flavor and a beautiful golden color to the crust.
- Bake for 12–15 minutes, or until golden brown and cooked through. The smell of buttery pastry and savory filling will have everyone eagerly waiting by the oven.
- Allow to cool slightly before serving warm with your favorite dipping sauces like salsa, sour cream, or guacamole. These sauces complement the richness of the taco sticks and add a refreshing element to each bite.
Kitchen Tools You’ll Need
| Tool | Why you need it |
|---|---|
| Skillet | For cooking the ground beef filling |
| Baking Sheet | To bake the taco sticks evenly |
| Parchment Paper | Prevents sticking and makes for easy cleanup |
| Rolling Pin | To roll out the pizza dough evenly |
| Pastry Brush | For applying the melted butter and seasoning |
Having the right tools on hand can make all the difference in the kitchen. A good skillet ensures even cooking of the beef, while a quality rolling pin helps you achieve the perfect thickness for your dough.
The Benefits of Each Ingredient
| Ingredient | What it does here |
|---|---|
| Ground beef | Provides a hearty, protein-rich filling |
| Onion | Adds sweetness and depth to the flavor |
| Garlic | Enhances the savory taste |
| Mozzarella | Melts beautifully, adding gooey texture |
| Cheddar | Offers sharpness and a distinct cheesy flavor |
| Pizza dough | Serves as the perfect vessel for the filling |
Each ingredient plays a crucial role in the overall taste and texture of the dish. The ground beef offers a robust base, while the cheeses and spices add layers of flavor that make these taco sticks irresistible.
What to Serve With These Cheesy Taco Sticks
| Idea | Why it pairs well |
|---|---|
| Salsa | Adds a fresh and tangy contrast to the cheesy flavor |
| Sour Cream | Provides a cool, creamy balance to the spices |
| Guacamole | Offers a rich, buttery flavor that complements the beef |
These accompaniments not only enhance the flavor of the taco sticks but also add a vibrant splash of color to your serving platter, making the dish as visually appealing as it is delicious.
Storage & Leftover Tips
| Method | How long | Tip |
|---|---|---|
| Refrigerator | 3 days | Store in an airtight container to maintain freshness |
| Freezer | 1 month | Freeze individually on a tray before storing in a freezer bag |
| Reheat | Until hot | Reheat in the oven at 350°F (175°C) for about 10 minutes for best texture |
Proper storage ensures you can enjoy these taco sticks even after the party is over. Reheating them in the oven maintains their crispy texture, unlike microwaving, which can make them soggy.
I hope you enjoy making and sharing these Cheesy Taco Sticks as much as I do. They’re sure to become a favorite in your household, just like they are in mine. Remember, the key is to have fun and make them your own with different toppings and sauces. The joy of cooking is in the creativity and sharing it with those you love. Whether you’re enjoying them fresh out of the oven or sneaking a late-night snack, these taco sticks are a delightful treat that brings people together.
FAQs About Cheesy Taco Sticks
Can I make these Cheesy Taco Sticks ahead of time?
Yes, you can prepare the filling in advance and store it in the refrigerator for up to 3 days. Assemble and bake the sticks just before serving to ensure they stay crisp.
How do I store leftovers?
Store any leftover taco sticks in an airtight container in the refrigerator for up to 3 days. Reheat them in the oven for the best texture.
Can I substitute the ground beef?
Absolutely! You can use ground turkey or chicken for a leaner option, or even try a plant-based meat substitute if you’re looking for a vegetarian alternative.
Cheesy Taco Sticks
Ingredients
Equipment
Method
- Heat olive oil in a skillet over medium heat. Add onion and cook for 2–3 minutes until softened. Add garlic and cook 30 seconds.
- Add ground beef and cook until fully browned, breaking it up as it cooks. Drain excess fat if needed.
- Stir in chili powder, cumin, smoked paprika, salt, and pepper. Add water and simmer for 2–3 minutes until thick. Remove from heat and let cool slightly.
- Preheat oven to 375°F (190°C). Line a baking sheet with parchment paper. Roll pizza dough into a rectangle and cut into 10 equal strips.
- Spoon taco filling down the center of each strip. Top with mozzarella and cheddar. Fold dough over the filling and pinch edges to seal, forming sticks.
- Place seam-side down on the baking sheet. Brush with melted butter and sprinkle with garlic powder and parsley.
- Bake for 12–15 minutes, or until golden brown and cooked through.
- Let cool slightly and serve warm with your favorite dipping sauces.