
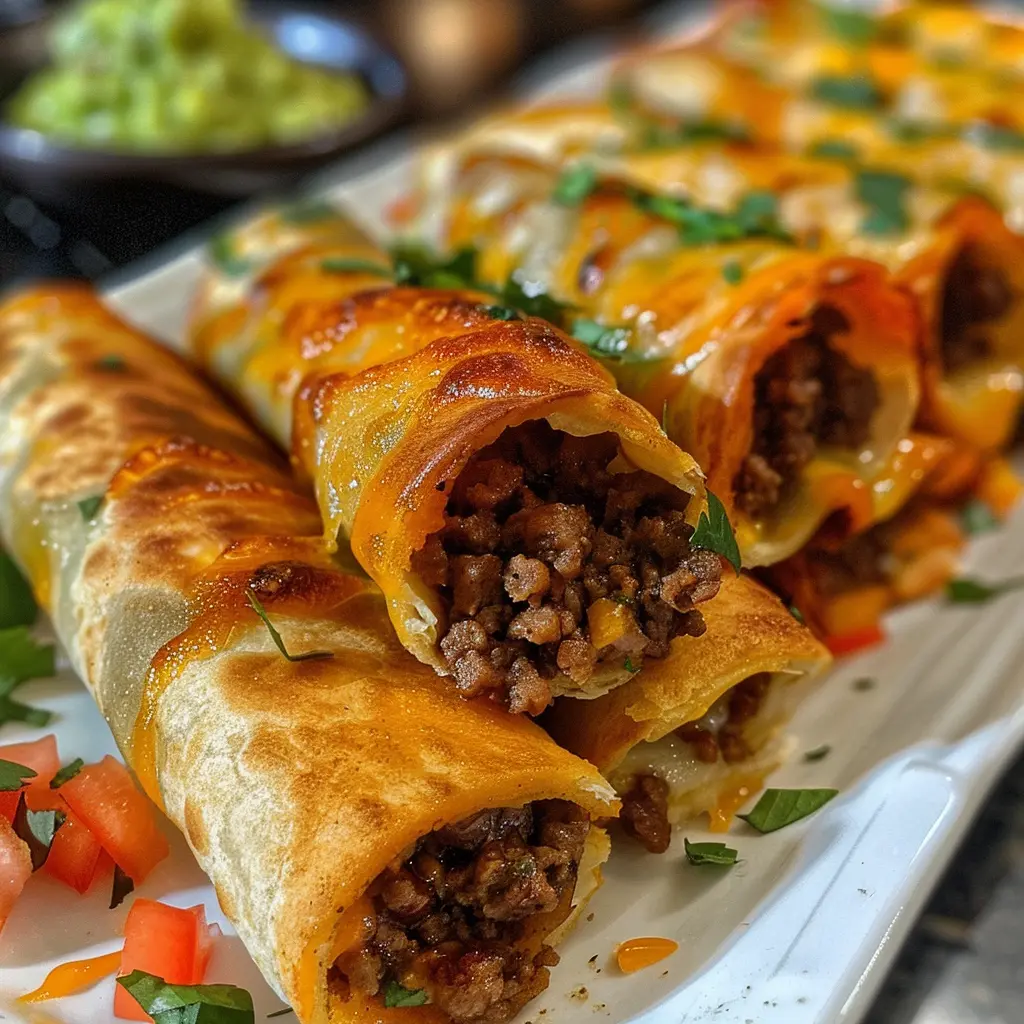
Golden garlic butter burger taquitos fill flour tortillas with seasoned taco beef and shredded cheese, roll them tight, brush them generously with melted garlic butter, and bake at 400 degrees F until the exterior is golden, crispy, and caramelized from the butter. They’re quicker than tacos, more satisfying than a simple quesadilla, and the garlic butter finish is what elevates them from standard baked taquitos to something that genuinely stands out on a dinner table or a game day spread.
| Detail | Info |
|---|---|
| Prep Time | 15 minutes |
| Bake Time | 15 to 20 minutes |
| Total Time | 35 minutes |
| Servings | 4 to 6 (about 10 to 12 taquitos) |
| Difficulty | Easy |
| Cuisine | American / Tex-Mex |
Why This Recipe Works
Brushing the rolled taquitos with garlic butter before baking rather than plain oil is the choice that separates these from every standard baked taquito recipe. Plain oil produces a crispy, golden exterior — good, but neutral. Garlic butter produces a crispy, golden exterior that’s simultaneously rich, aromatic, and deeply savory, because the butter’s milk solids caramelize in the 400 degree F oven and the garlic’s oils bloom as they heat, infusing the flour tortilla’s surface with flavor that penetrates slightly into the tortilla rather than just coating it. Every bite starts with a buttery, garlicky crunch that plain oil simply can’t replicate.
Flour tortillas rather than corn tortillas are the right choice for oven-baked taquitos for two reasons. Corn tortillas produce the more traditional taquito and have a distinctive flavor, but they’re more prone to cracking when rolled tightly around a filling and require more careful warming before they can be rolled without splitting. Flour tortillas are more pliable at room temperature, roll without cracking, and develop an excellent crispy exterior under direct butter-basted oven heat. The flour tortilla’s neutral, slightly wheaty flavor also allows the garlic butter’s flavor to come through clearly rather than competing with the corn’s stronger taste.
Warming the tortillas in the microwave for 20 to 30 seconds before filling and rolling is the prep step that prevents cracking during rolling. Cold flour tortillas are stiff and brittle at their edges and can split when rolled tightly. Warm tortillas are pliable and flexible — they roll around the filling cleanly and maintain their tight roll through the transfer to the baking sheet and through the full bake without unwrapping. This 30-second step eliminates the most common taquito assembly frustration.
Simmering the taco seasoning with the beef and a splash of water for 1 to 2 minutes produces a thick, clingy, properly integrated seasoning layer on the beef rather than a powder-dusted, inconsistently flavored crumble. Taco seasoning contains starches and thickeners that activate with liquid and heat, creating a sauce that coats every piece of beef and keeps it moist and flavorful inside the taquito through the 15 to 20 minute bake. Unsimmered seasoning on beef produces a drier filling that can taste powdery rather than properly seasoned in the finished taquito.
Placing the taquitos seam-side down on the baking sheet is the positioning choice that keeps them rolled closed through the bake without any toothpicks or additional securing. The seam pressed against the baking sheet is held closed by the weight of the taquito itself and by the butter-sealed surface that forms as it bakes. A taquito placed seam-side up has nothing to hold the seam closed and will often unroll as the filling heats and expands. Seam-side down every time, and they’ll come out of the oven intact and perfectly shaped.
Ingredients
| Ingredient | Quantity | Notes |
|---|---|---|
| Ground beef or ground turkey | 1 pound | Beef for richer flavor; turkey for a leaner version |
| Taco seasoning | 1 packet (about 1 oz) | Old El Paso or equivalent; simmered with water until thick |
| Shredded cheese | 1 to 2 cups | Cheddar for classic flavor; mozzarella for stretch; a blend for both |
| Flour tortillas | 1 package | Small (6-inch) or medium (8-inch); warmed before rolling |
| Garlic butter, melted | 2 to 3 tablespoons | Store-bought or homemade (butter + minced garlic + optional parsley); brushed generously over the rolled taquitos before baking |
| Optional add-ins | ||
| Bell pepper, diced | 1/2 cup | Sauteed with the beef for color and sweetness |
| Onion, chopped | 1/4 cup | Cooked with the beef until soft |
Step-by-Step Instructions
Phase 1: Cook the Filling
- Preheat the oven to 400 degrees F. Line a baking sheet with parchment paper or foil.
- In a large skillet over medium heat, cook the ground beef, breaking it into fine crumbles, until fully browned. If using bell pepper or onion, add them with the beef and cook until softened. Drain the excess grease.
- Add the taco seasoning packet and a splash of water — about 2 to 3 tablespoons. Stir to coat the beef evenly in the seasoning. Simmer for 1 to 2 minutes, stirring, until the liquid has absorbed and the beef is coated in a thick, saucy seasoning. Remove from heat and let cool slightly — very hot filling can steam and soften the tortilla before rolling.
Phase 2: Fill and Roll
- Warm the tortillas in the microwave for 20 to 30 seconds, covered with a damp paper towel, until pliable and soft. Work with a few at a time — they cool quickly.
- Lay a warm tortilla flat. Spoon a line of seasoned beef along the lower third of the tortilla, keeping it away from the edges. Sprinkle a generous amount of shredded cheese over the beef.
- Roll the tortilla tightly around the filling from the bottom, pressing firmly as you roll to keep it snug. Place seam-side down on the prepared baking sheet. Repeat with the remaining tortillas and filling.
Phase 3: Butter, Bake, and Serve
- Brush the melted garlic butter generously over the top and sides of each taquito. Don’t skimp — full, generous coverage is what produces the golden, caramelized exterior that makes these special.
- Bake for 15 to 20 minutes until the taquitos are golden brown and crispy on top, with the seam side golden from direct contact with the pan. Check at 15 minutes — the exact time depends on the size of the tortillas and how generously the butter was applied.
- Serve immediately with salsa, guacamole, and sour cream for dipping.
Chef Tips for Perfect Results
Make your own garlic butter for the most flavor. Store-bought garlic butter works well, but homemade is simply better: melt 3 tablespoons of unsalted butter and stir in 2 cloves of finely minced garlic and a pinch of salt. For extra color and flavor, add a teaspoon of chopped fresh parsley or a pinch of paprika. The garlic in fresh garlic butter blooms more intensely under the oven heat than the garlic in commercial versions.
Don’t overfill. The temptation to add more filling is real, but overfilled taquitos can’t be rolled tightly enough to hold their shape, and the filling can push out the ends during baking. A line of filling no more than an inch wide in the lower third of the tortilla rolls cleanly and produces the right filling-to-wrapper ratio in every bite.
Brush butter on all exposed surfaces. The top and visible sides of the taquito need butter to become golden and crispy — areas that missed the butter brush will remain pale and soft. Be generous and methodical, covering every surface you can reach.
Add a second butter brush halfway through baking. For an even more golden, caramelized exterior, pull the taquitos out at the 10-minute mark, brush with another layer of garlic butter, and return to the oven for the remaining bake time. The second coat produces a noticeably more golden, more flavorful crust.
Use a cheese blend for both flavor and melt. Sharp cheddar alone provides great flavor but is less stretchy. Mozzarella alone provides great melt but less flavor. A half-and-half blend of both produces a filling that melts thoroughly and tastes boldly cheesy — the best of both properties.
Common Mistakes to Avoid
Not warming the tortillas before rolling. Cold tortillas crack at the edges when rolled. Twenty seconds in the microwave makes them pliable. Don’t skip this step.
Placing taquitos seam-side up. Seam-side up taquitos unroll as the filling heats. Always seam-side down.
Skimping on the garlic butter. A thin brush of butter produces a pale, minimally flavored crust. A generous coat is what produces the golden, caramelized, deeply buttery exterior the recipe promises. Be generous.
Not simmering the seasoned beef. Dry, powdery taco seasoning on beef produces uneven flavor. The 1 to 2 minute simmer with water activates the seasoning’s thickeners and produces a proper, clingy taco filling.
Pulling them too early. Pale, soft taquitos at 12 minutes are not done. They need the full 15 to 20 minutes for the flour tortilla to genuinely crisp from the garlic butter basting. Golden brown is the target, not light tan.
Variations and Substitutions
Cheesy jalapeño version: Add two tablespoons of diced pickled jalapeños to the beef filling and use a pepper jack and cheddar blend for the cheese. The heat from both sources builds through every bite and pairs naturally with cool sour cream for dipping.
BBQ beef version: Replace the taco seasoning with two tablespoons of BBQ sauce stirred into the browned beef. Add mozzarella and a thin strip of bacon per taquito. The BBQ-beef-bacon-mozzarella combination inside a garlic butter-baked flour tortilla is unexpectedly excellent.
Chicken version: Replace the ground beef with two cups of shredded rotisserie chicken tossed with the taco seasoning (no cooking needed since the chicken is already cooked). The rotisserie chicken’s built-in flavor pairs naturally with the seasoning and produces a slightly lighter, equally satisfying taquito.
Air fryer version: Place butter-brushed taquitos in a single layer in the air fryer basket, seam-side down. Air fry at 400 degrees F for 8 to 10 minutes, turning once at the 5-minute mark, until golden and crispy. The air fryer produces an excellent result in half the oven time.
Serving Suggestions
Serve immediately from the baking sheet while the garlic butter crust is at its crispiest. Arrange on a platter with small bowls of salsa, guacamole, and sour cream alongside. For a complete meal, add a simple green salad or Mexican rice on the side. For a party or game day spread, keep a second batch warm in a 200 degree F oven on a wire rack while the first batch is eaten — they hold their crispiness better on a rack than flat on a baking sheet.
Storage and Reheating
Refrigerator: Store in an airtight container for up to 3 days. The tortilla softens in the refrigerator but reheats back to crispy very well.
Reheating: The oven and air fryer both restore crispiness that the microwave can’t. Reheat in a 375 degree F oven for 8 to 10 minutes, or in an air fryer at 375 degrees F for 4 to 5 minutes. Brush with a small amount of additional garlic butter before reheating for the best result.
Freezer: Freeze unbaked assembled taquitos on a parchment-lined baking sheet until solid, then transfer to a zip bag for up to 3 months. Bake directly from frozen at 400 degrees F for 20 to 25 minutes, brushing with garlic butter before baking. Frozen taquitos are one of the most practical make-ahead freezer meals.
Nutritional Information
| Nutrient | Per Taquito (approx., based on 12) |
|---|---|
| Calories | 210 |
| Protein | 12g |
| Carbohydrates | 16g |
| Fat | 11g |
| Saturated Fat | 5g |
| Fiber | 1g |
| Sodium | 380mg |
Nutritional values are estimates based on ground beef and standard ingredient brands. Values will vary based on tortilla size and specific cheese brand used.
FAQ
Can I use corn tortillas instead of flour?
Yes, with extra care. Corn tortillas are more prone to cracking when rolled and require more thorough warming before they’re pliable enough to roll without splitting. Warm them for 30 seconds wrapped in a damp paper towel and work quickly before they cool. The corn tortilla version produces a more traditional taquito flavor and a slightly different texture — crispier and more brittle than the flour version. Both are excellent; the flour version is more forgiving for beginners.
Can I make these ahead and freeze them?
Yes — and it’s one of the best make-ahead freezer options in this format. Assemble the taquitos completely, place on a parchment-lined baking sheet, and freeze until solid before transferring to a zip bag. Bake directly from frozen, adding 5 minutes to the bake time. Do not brush with garlic butter before freezing — brush just before baking for the freshest garlic flavor and best browning.
How do I keep them from unrolling in the oven?
Three things: roll tightly pressing out air as you go, place seam-side down immediately, and don’t overfill. Overfilled taquitos have internal pressure from the filling that pushes against the seam. A properly filled, tightly rolled, seam-down taquito stays closed through the full bake without any securing needed.
Can I make homemade taco seasoning instead of a packet?
Yes. Combine 1 tablespoon chili powder, 1.5 teaspoons cumin, 1 teaspoon garlic powder, 1 teaspoon onion powder, half a teaspoon paprika, half a teaspoon oregano, half a teaspoon salt, and a quarter teaspoon black pepper. This produces approximately one packet’s worth of seasoning with full control over the salt level and no additives. Use exactly as you would the packet.
What’s the difference between a taquito and a flautas?
The terms are often used interchangeably in American cooking, but technically: taquitos are made with corn tortillas and flautas are made with flour tortillas. In practice, both refer to rolled, fried or baked tortillas filled with seasoned meat and cheese. This recipe uses flour tortillas and could legitimately be called either, depending on where you grew up eating them. The garlic butter finish is what distinguishes it regardless of the name.
Conclusion
Golden garlic butter burger taquitos are the recipe that earns its keep by delivering maximum flavor for minimum effort — the seasoned beef and cheese filling is satisfying on its own, and the garlic butter baked crust elevates the whole thing into something genuinely craveable. Make a batch for a weeknight dinner, double the recipe for a party, or freeze a batch for the nights when dinner needs to be ready in 25 minutes and nobody wants to think about it. Either way, they disappear fast.