
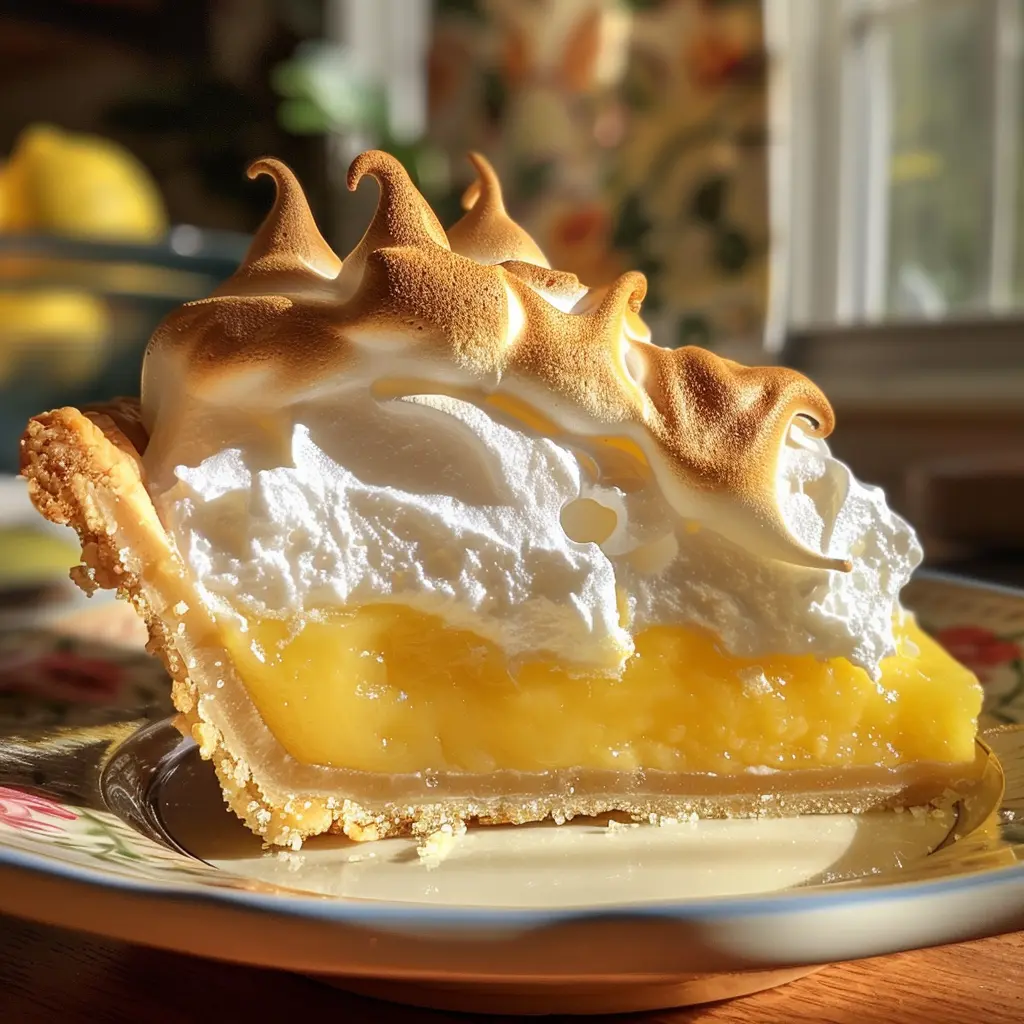
Classic lemon meringue pie is a dessert of dramatic contrasts: a crisp, buttery pastry shell holding a vibrant, silky, citrus-forward lemon filling, all crowned with a lofty, billowy layer of toasted meringue. It’s the ultimate high-low dessert—simple pantry staples like sugar, eggs, and lemons transform into a centerpiece that looks as impressive as it tastes. This recipe focuses on the crucial techniques that ensure the filling holds its shape on the fork and the meringue remains stable, glossy, and weeping-free.
| Detail | Info |
|---|---|
| Prep Time | 25 minutes |
| Bake Time | 30 to 35 minutes |
| Chill Time | 4 hours |
| Servings | 8 slices |
| Difficulty | Medium |
| Cuisine | American |
Why This Recipe Works
The secret to a perfect lemon meringue pie lies in balancing the acidity of the lemon with the sweetness of the meringue, all while managing the structural integrity of the egg-based components. Tempering the yolks—slowly adding hot liquid to the eggs before heating them—is the fundamental technique that prevents the filling from scrambling. This results in a smooth, thick curd that is rich and satisfying without being grainy.
The “hot-fill” method used here is a baker’s safeguard against the common problem of a weeping meringue. By spreading the meringue over the lemon filling while the curd is still steaming hot, the bottom layer of the meringue is instantly cooked, creating an airtight seal against the curd. This prevents moisture from seeping upward, which is the primary cause of sugar “sweat” (syrup beads) on the surface of the meringue. Anchoring the meringue to the edges of the crust ensures the topping doesn’t shrink or pull away during the bake, keeping your pie beautiful from first slice to last.
Ingredients
| Ingredient | Quantity | Notes |
|---|---|---|
| Pie crust | 1 | Unbaked 9-inch crust; store-bought or your favorite butter recipe |
| Granulated sugar | 2 cups | Divided: 1 1/2 cups for filling, 1/2 cup for meringue |
| Cornstarch | 1/3 cup | Essential thickening agent for a sliceable, set filling |
| Salt | 1/4 teaspoon | Balances the sweetness; helps round out the citrus flavor |
| Water | 1 1/2 cups | Base for the lemon curd |
| Egg yolks | 4 large | Must be tempered to avoid scrambling; save the whites |
| Unsalted butter | 2 tablespoons | Adds silkiness and mouthfeel to the curd |
| Fresh lemon juice | 1/2 cup | Freshly squeezed is non-negotiable for the right acid level |
| Lemon zest | 1 tablespoon | Contains the essential oils that provide true lemon aroma |
| Vanilla extract | 1 1/2 teaspoons | Divided: 1 tsp for filling, 1/2 tsp for meringue |
| Egg whites | 4 large | Room temperature helps them reach maximum volume |
| Cream of tartar | 1/4 teaspoon | Stabilizes the meringue structure; prevents collapse |
Step-by-Step Instructions
Phase 1: The Crust and The Curd
- Preheat the oven to 350 degrees F (175 degrees C). Bake the pie crust according to your package or recipe directions until it is golden brown and fully cooked. Remove from the oven but keep the oven on.
- In a medium saucepan, whisk together the 1 1/2 cups sugar, cornstarch, and salt. Gradually whisk in the water until no lumps remain.
- Cook over medium heat, stirring constantly with a whisk or silicone spatula, until the mixture thickens and begins to bubble. Continue to cook for 1 minute once it bubbles to fully hydrate the cornstarch.
- Whisk the egg yolks in a medium bowl. Slowly stream about 1/2 cup of the hot cornstarch mixture into the yolks while whisking constantly. Once combined, pour the egg mixture back into the saucepan.
- Cook for 2 minutes, stirring continuously to prevent scorching. Remove from heat and stir in the butter, lemon juice, lemon zest, and 1 teaspoon of vanilla until smooth and glossy. Pour the hot filling immediately into the baked pie crust.
Phase 2: The Meringue
- In a clean, grease-free bowl, beat the egg whites and cream of tartar on medium speed until soft peaks form.
- Increase speed to high and gradually rain in the remaining 1/2 cup of sugar, one tablespoon at a time. Continue beating until the meringue reaches stiff, glossy peaks. Fold in the remaining 1/2 teaspoon of vanilla.
Phase 3: Assembly and Bake
- Spread the meringue over the hot lemon filling. It is vital to spread the meringue all the way to the crust edge, pressing it gently against the pastry to “seal” it.
- Use the back of a spoon to create decorative peaks and swirls.
- Bake for 12 to 15 minutes, or until the meringue is beautifully toasted and golden brown.
Phase 4: Cooling and Setting
- Remove from the oven and let the pie cool completely on a wire rack—this usually takes 2 to 3 hours. Do not rush this; the curd needs to set at room temperature.
- Transfer to the refrigerator to chill for at least 4 hours before slicing.
Chef Tips for Perfect Results
The “Clean Bowl” Rule. Any residual fat (even a tiny drop of yolk) in your bowl will prevent the egg whites from whipping into stiff peaks. Wipe your bowl and whisk with a little lemon juice or white vinegar before starting to ensure it is 100% grease-free.
Don’t skip the chill time. While it’s tempting to cut into a pie while it’s still warm, a lemon meringue pie needs the full 4 hours of refrigeration to let the starch-thickened curd set completely. If you slice it too early, the filling will slide right out of the crust.
Fresh is best. There is no substitute for fresh-squeezed lemon juice. Bottled juice often contains preservatives that can alter the flavor, and it lacks the essential aromatic oils found in the fresh fruit. Use a microplane to zest the lemon before you juice it.
Preventing “Weeping.” If you notice beads of sugar syrup on your meringue, it’s usually because the meringue wasn’t baked long enough to dissolve the sugar or it wasn’t sealed properly against the filling. Ensure the meringue touches the crust all the way around.
Common Mistakes to Avoid
Using cold eggs. Room temperature whites whip significantly faster and higher than cold ones. Separate your eggs 30 minutes before you begin.
Under-thickening the filling. If the lemon mixture doesn’t bubble for a full minute, the cornstarch won’t fully activate, and your pie will be runny when sliced.
Adding the meringue to a cold filling. The meringue needs the residual heat from the filling to create that airtight seal. If the filling cools too much before you add the meringue, you are much more likely to experience separation between the layers.
Variations and Substitutions
Lemon-Lime Pie: Replace half of the lemon juice with fresh lime juice for a sharper, more complex citrus profile.
Toasted Coconut Meringue: Fold 1/4 cup of toasted unsweetened shredded coconut into the meringue mixture for added texture and a tropical twist.
Graham Cracker Crust: If you prefer a nuttier, less traditional crust, swap the pastry for a graham cracker crust. It provides a nice textural contrast to the silky filling.
Storage and Reheating
Refrigerator: Store covered loosely with a cake dome or plastic wrap (try to avoid touching the meringue directly if possible) for up to 2 days. The meringue will lose some of its crispness over time, but the flavor remains excellent.
Freezer: Not recommended. Meringue tends to become chewy and the lemon curd can separate or turn grainy upon thawing.
Nutritional Information
| Nutrient | Per Serving (approx.) |
|---|---|
| Calories | 320 |
| Protein | 4g |
| Carbohydrates | 55g |
| Fat | 10g |
| Saturated Fat | 3g |
| Sugar | 42g |
Conclusion
Classic Lemon Meringue Pie is a testament to the beauty of simple ingredients handled with care. The process of tempering eggs for a silky curd and whipping whites into a stable, glossy cloud is a quintessential baking skill that rewards you with one of the most satisfying desserts imaginable. Whether it’s the bright pop of lemon or the sweet crunch of the toasted topping, this pie remains a standard-bearer for a reason.