
It was a bright summer afternoon when I first stumbled upon the idea of making a Strawberry Crunch Cake. My kids had just returned from picking strawberries at a local farm, their hands and faces stained with sweet, juicy evidence of their adventure. As I washed and sorted the plump berries, the idea struck me—a cake that encapsulates the essence of summer, with layers of fluffy cake, creamy frosting, and a delightful crunch. This Strawberry Crunch Cake Recipe quickly became a family favorite, bringing smiles to our dinner table and making every gathering feel like a special occasion.
Why You’ll Love This Strawberry Crunch Cake
- Burst of Freshness: This cake is packed with fresh strawberries, offering a natural sweetness and a burst of summer in every bite.
- Perfect Texture: The combination of soft cake layers and a crunchy topping provides a delightful texture contrast that will keep you coming back for more.
- Family-Friendly: It’s a fun project for the whole family—kids will enjoy helping layer the cake and adding the crunch topping.
- Versatile: This cake is perfect for birthdays, picnics, or just because you feel like indulging in something sweet and satisfying.
- Easy to Make: Despite its impressive appearance, this Strawberry Crunch Cake Recipe is straightforward and easy to follow, even for beginners.
The Recipe
Prep Time: 20 minutes
Cook Time: 30 minutes
Servings: 12 slices
Calories: Approximately 320 per slice
Ingredients:
- 1 1/2 cups fresh strawberries, hulled and sliced
- 1 box white cake mix (plus ingredients required on the box)
- 2 cups whipped cream or frosting of your choice
- 1 cup strawberry-flavored cereal, crushed
- 1/2 cup graham cracker crumbs
- 2 tablespoons melted butter
Instructions:
- Prepare the Cake: Follow the instructions on the cake mix box to prepare and bake the cake. Allow it to cool completely.
- Make the Crunch Topping: In a medium bowl, combine the crushed cereal, graham cracker crumbs, and melted butter. Mix until well combined and set aside.
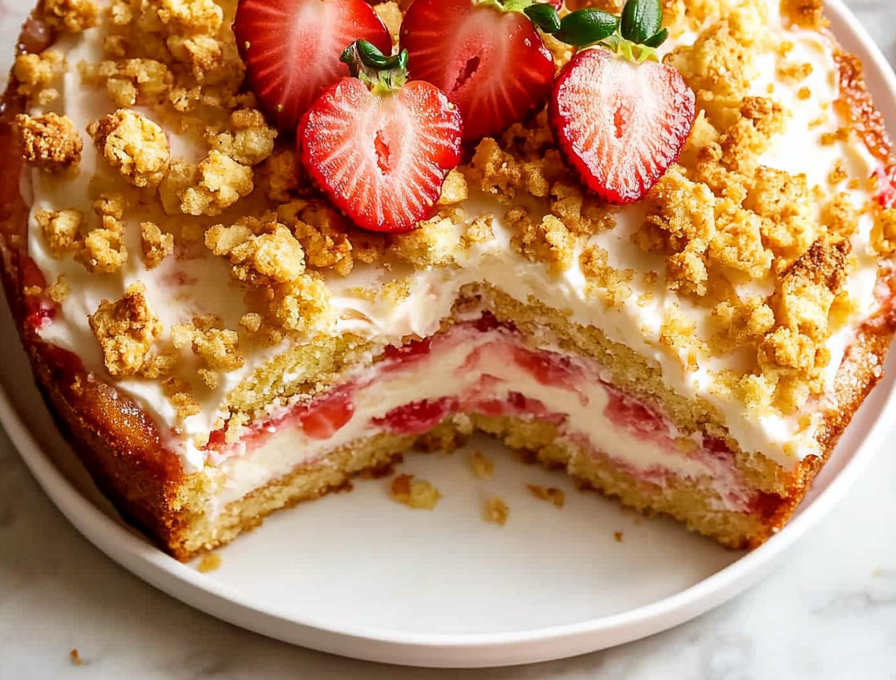
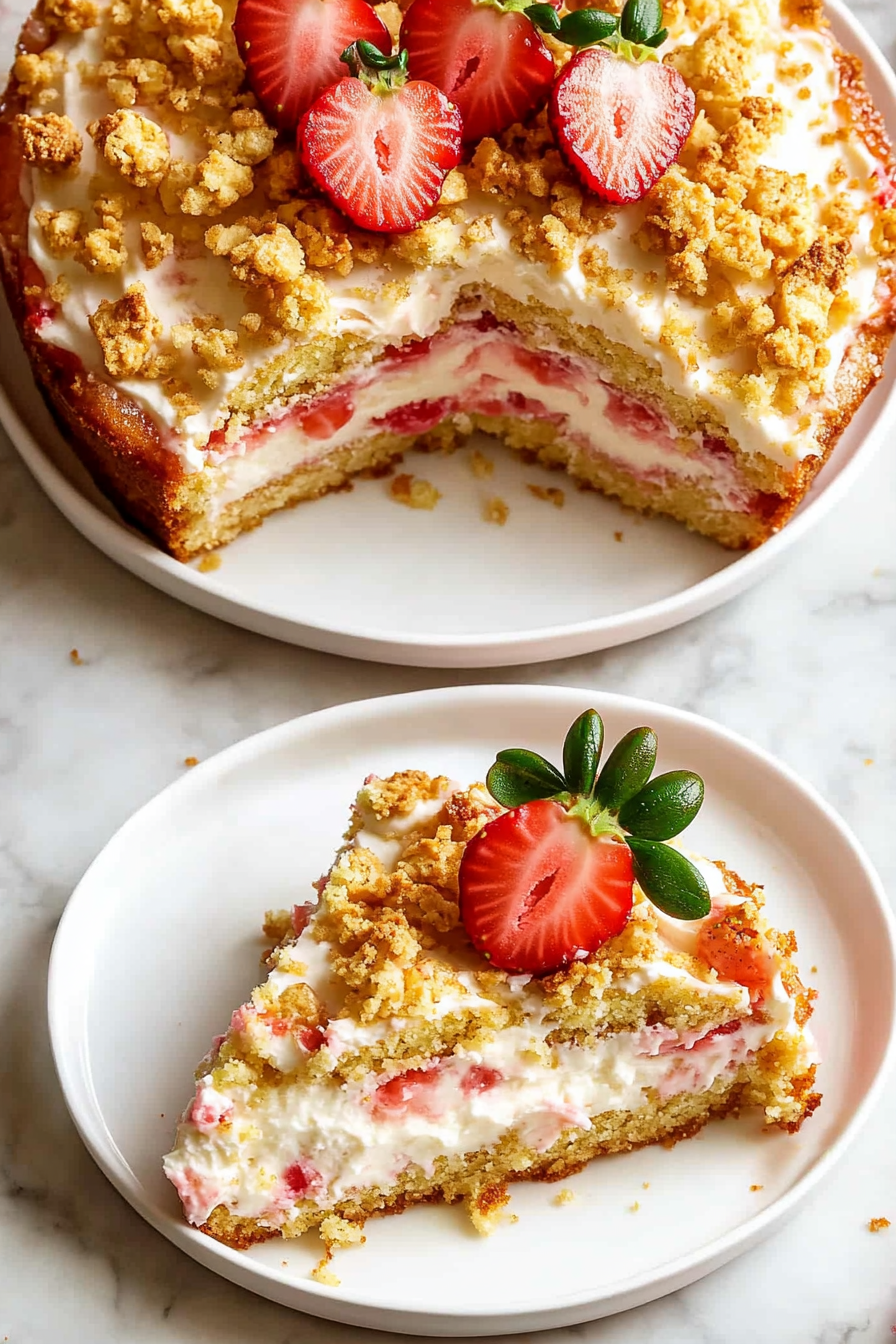
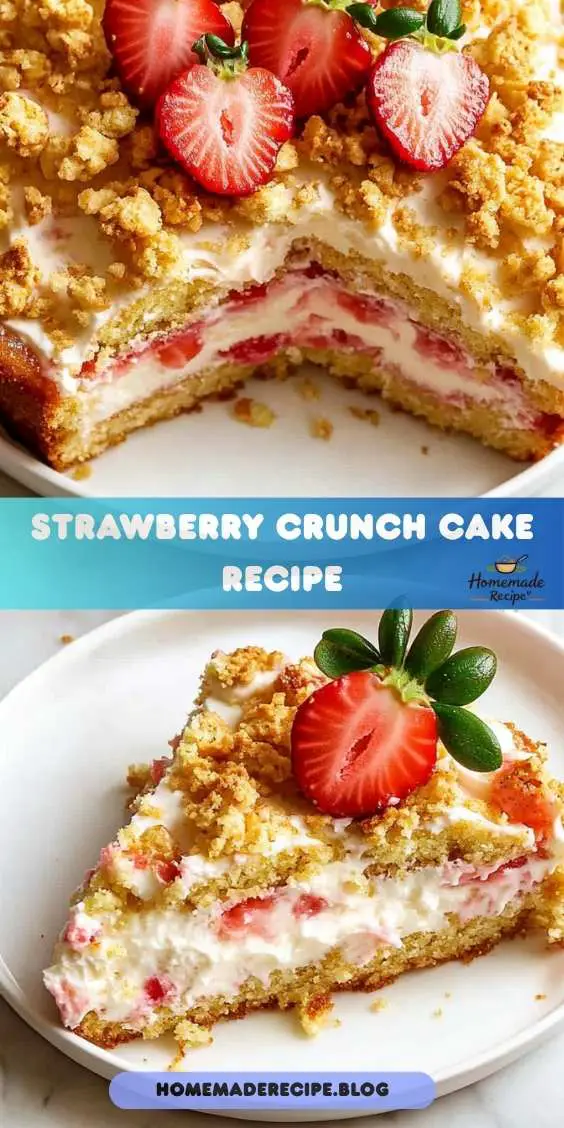
- Layer the Cake: Once the cake is cool, spread a layer of whipped cream or frosting over the top. Arrange sliced strawberries evenly over the frosting.
- Add the Crunch: Sprinkle the crunch topping generously over the strawberries, pressing gently to ensure it sticks.
- Chill and Serve: Let the cake chill in the refrigerator for at least an hour before serving. This allows the flavors to meld together beautifully.
Kitchen Tools You’ll Need
- Mixing Bowls: For combining your crunch topping ingredients.
- Cake Pan: A 9×13 inch pan works perfectly for this recipe.
- Spatula: For spreading the frosting and whipped cream evenly.
- Knife: To slice the fresh strawberries.
- Refrigerator: To chill the cake and enhance its flavors.
The Benefits of Each Ingredient
Fresh Strawberries
Not only do fresh strawberries add a natural sweetness to the cake, but they are also rich in vitamin C and antioxidants. Strawberries are known for their high antioxidant content, which can help reduce inflammation and protect your body from oxidative stress. Their vibrant color and juicy texture make them a perfect addition to desserts, adding both flavor and nutrition.
Strawberry-Flavored Cereal
Using strawberry-flavored cereal in the crunch topping provides a fun, fruity twist and complements the cake’s flavors beautifully. The cereal’s crisp texture adds a playful crunch that contrasts with the soft cake layers. This ingredient also brings an element of nostalgia, reminiscent of breakfast treats from childhood.
Graham Cracker Crumbs
Graham cracker crumbs add a subtle sweetness and a unique texture to the crunch topping. They help bind the ingredients together and provide a delightful contrast to the fresh strawberries and creamy frosting. The mild, honey-like flavor of graham crackers pairs perfectly with the fruity elements of the cake.
Whipped Cream/Frosting
The whipped cream or frosting layer offers a creamy, luscious addition that makes the cake extra indulgent. Whether you choose a classic buttercream, a light whipped topping, or a tangy cream cheese frosting, this layer brings a richness that ties all the components together.
What to Serve With This Strawberry Crunch Cake
Pair this cake with a scoop of vanilla ice cream or a dollop of fresh whipped cream for an extra touch of indulgence. The cool, creamy texture of ice cream or whipped cream enhances the flavors of the cake and adds a luxurious element to each bite. For a refreshing contrast, consider serving alongside a simple green salad or a fresh fruit platter. These side dishes enhance the cake’s flavors and make for a well-rounded dessert experience.
Storage & Leftover Tips
To keep your Strawberry Crunch Cake fresh, store it in an airtight container in the refrigerator for up to three days. The cool temperature helps maintain the cake’s texture and keeps the strawberries fresh. If you have leftovers, individual slices can be wrapped in plastic wrap and stored in the freezer for up to a month. Just thaw in the fridge before serving. Freezing the cake is a great way to preserve its deliciousness and enjoy it later.
Customizing Your Strawberry Crunch Cake
One of the wonderful aspects of this recipe is its versatility. You can easily customize the cake to suit your taste preferences or the ingredients you have on hand. Here are a few ideas to inspire your creativity:
- Add a Layer of Jam: Spread a thin layer of strawberry jam between the cake layers for an extra burst of strawberry flavor.
- Incorporate Other Fruits: Mix in other fresh berries, such as blueberries or raspberries, for a variation in flavor and color.
- Try Different Cereals: Experiment with different types of cereal for the crunch topping, such as granola or cornflakes, to create unique textures.
- Flavor the Frosting: Add a hint of vanilla or almond extract to the frosting for added depth of flavor.
- Decorate with Fresh Mint: Garnish the cake with fresh mint leaves for a pop of color and a refreshing aroma.
The Joy of Baking Together
One of the most rewarding aspects of making a Strawberry Crunch Cake is the opportunity to share the process with loved ones. Baking together can be a delightful bonding experience, creating cherished memories in the kitchen. It’s a chance to involve kids in the joy of cooking, teaching them about ingredients, measurements, and the magic of creating something delicious from scratch.
Encourage your family to participate in each step of the process, from mixing the batter to decorating the cake. Assign tasks based on age and skill level, ensuring that everyone feels involved and valued. As you work together, the kitchen will be filled with laughter, sweet aromas, and the anticipation of tasting the final creation.
Conclusion
In conclusion, this Strawberry Crunch Cake Recipe is a delightful addition to any family gathering or casual dinner. It’s simple enough for a weeknight treat but special enough for a celebration. With its vibrant flavors, contrasting textures, and eye-catching appearance, this cake is sure to impress both family and friends.
I hope you enjoy making and sharing this cake as much as my family does. Be sure to check out more of my easy recipes at www.homemaderecipe.blog, like our Lemon Drizzle Cake or Chocolate Chip Banana Bread for more delicious inspiration. And for more about the benefits of strawberries, check out this guide on Healthline. Happy baking!
Strawberry Crunch Cake
Ingredients
Equipment
Method
- Preheat the oven to 350 degrees.
- Prepare a 9×13 casserole dish by spraying with olive oil or cooking spray. Set aside.
- Cook shells to al dente (to package directions). Drain the cooked shells and set aside to come to room temperature.
- In a medium bowl, combine mozzarella & parmesan cheese. Remove half & set aside.
- With the remaining half of the cheese mixture, add ricotta, egg, chicken, half the salt & pepper. Stir until fully incorporated.
- Pour half the jar of the alfredo sauce into the bottom of the prepared casserole dish.
- Spoon the chicken mixture into each cooked shell, about 1 heaping tablespoon into each.
- Place the stuffed shells on top of the alfredo sauce in the casserole dish in a single layer.
- Pour the remaining alfredo sauce over the prepared shells.
- Top with remaining cheese, remaining salt and parsley (if adding).
- Bake in preheated oven for 15-20 minutes, or until cheese is melted and bubbling.
- Garnish with additional parsley before serving if desired.