
There’s something truly magical about mastering the art of baking macarons, especially when they’re chocolate-flavored. These delicate French confections have captured the hearts and palates of dessert lovers worldwide, and for good reason. They offer a perfect balance of crispness and chewiness, with a rich chocolate flavor that is both indulgent and satisfying.
I remember the first time I decided to take on the challenge of making a Chocolate Macaron Recipe. It was a chilly Sunday afternoon, and my kids were huddled around the kitchen table, eager to see if I could pull off these elegant treats. The process was a dance between precision and creativity, and the reward—a tray of perfectly crisp, chewy, and chocolatey macarons—was worth every minute. If you’ve ever been intimidated by the idea of making macarons, let me assure you, with a little patience and the right tips, you too can create these sophisticated treats right at home.
Why You’ll Love This Chocolate Macaron Recipe
Decadently Delicious
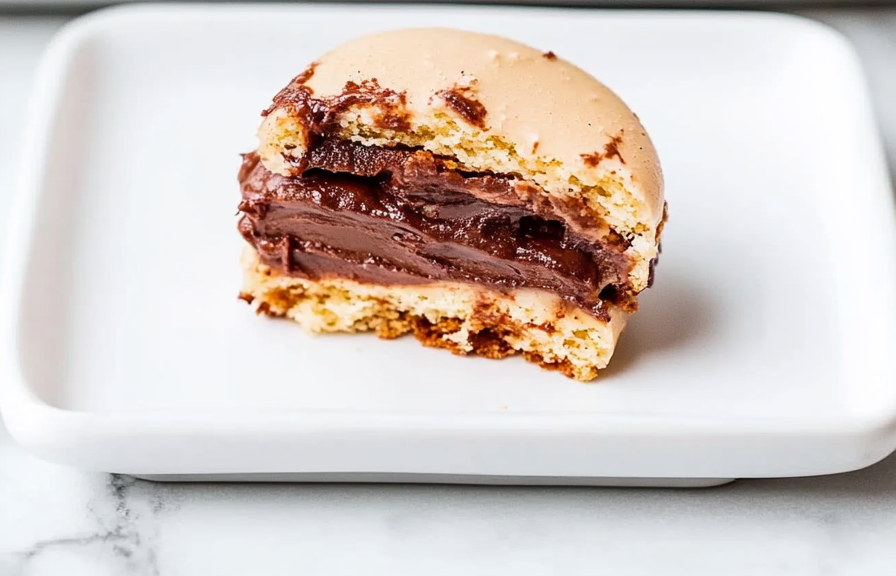
Each bite offers a rich chocolate flavor that is both indulgent and satisfying, perfect for a sweet tooth. The combination of cocoa powder in the shells and a luscious chocolate ganache filling ensures a chocolatey experience that is simply irresistible.
Great for Gifting
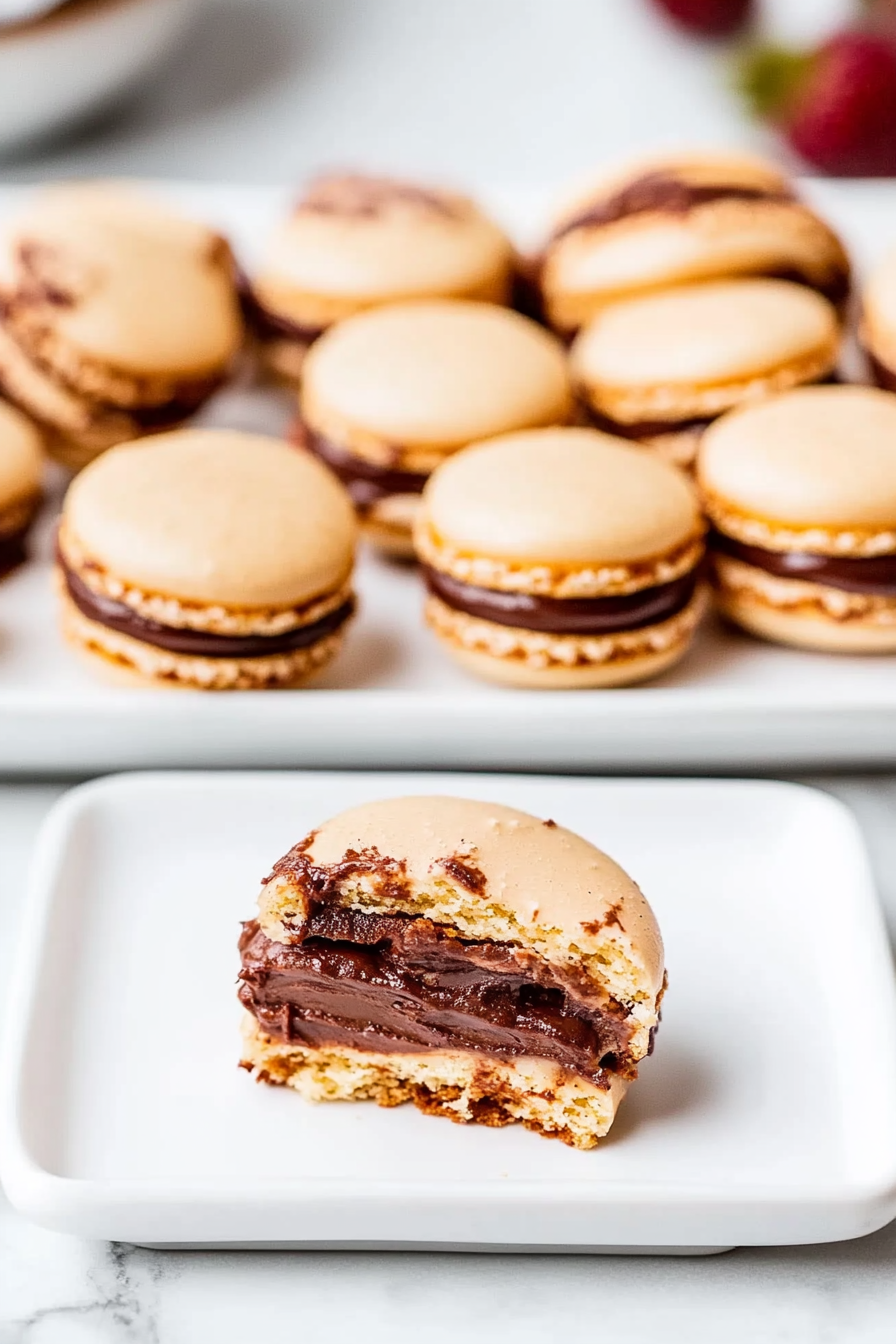
These macarons are not only delightful to eat but also beautiful to look at, making them an impressive homemade gift. Their elegant appearance and delicious taste make them a perfect gift for birthdays, anniversaries, or any special occasion.
Family-Friendly Activity
Get the kids involved in the kitchen! Making macarons is a fun and educational way to spend an afternoon together. It teaches children about precision in baking and the joy of creating something delicious from scratch.
Versatile & Customizable
One of the best things about macarons is their versatility. You can easily change the filling to suit your taste. Whether you prefer chocolate ganache, raspberry jam, or even peanut butter, the possibilities are endless. You can even experiment with the shells by adding different flavors or colors.
Gluten-Free Treat
Naturally free from gluten, they’re an excellent dessert option for those with gluten sensitivities. This makes them a universally appealing treat that can be enjoyed by almost everyone.
The Recipe
Ingredients
Macarons:
– 1 cup confectioners’ sugar
– 1/2 cup almond flour
– 3 tbsp unsweetened cocoa powder
– 2 large egg whites, at room temperature
– 1/4 cup granulated sugar
Chocolate Ganache Filling:
– 1/2 cup heavy cream
– 4 oz bittersweet chocolate, finely chopped
Instructions
Prepare the Macarons
-
Preheat the Oven
- Begin by preheating your oven to 300°F (150°C) and lining two baking sheets with parchment paper. This ensures that the macarons bake evenly and do not stick to the pan.
-
Sift Dry Ingredients
- In a medium bowl, sift together confectioners’ sugar, almond flour, and cocoa powder. This step is crucial as it removes any lumps and ensures a smooth batter.
-
Whip Egg Whites
- In a separate bowl, beat the egg whites until soft peaks form. Gradually add granulated sugar, beating until stiff peaks form. The meringue should be glossy and hold its shape when the beaters are lifted.
-
Combine Ingredients
- Gently fold the dry ingredients into the egg whites using a spatula. The batter should flow like molten lava. Be careful not to overmix, as this can cause the macarons to spread too much during baking.
-
Pipe the Macarons
- Transfer the batter to a piping bag fitted with a round tip and pipe small circles onto the prepared baking sheets. Aim for consistency in size to ensure even baking.
-
Rest the Macarons
- Tap the baking sheets on the counter to release air bubbles and let them sit for 30 minutes until a skin forms on the surface. This helps achieve the signature “feet” of the macarons.
-
Bake
- Bake for 15 minutes, rotating halfway through. Let them cool completely before removing from the parchment paper to prevent sticking.
Make the Ganache
-
Heat the Cream
- Heat the heavy cream in a small saucepan until it just begins to simmer. Avoid boiling, as this can cause the cream to separate.
-
Melt the Chocolate
- Pour the hot cream over the chopped chocolate and let it sit for a minute. Stir until smooth, ensuring the chocolate is fully melted and incorporated.
-
Cool the Ganache
- Let the ganache cool until it thickens slightly before piping onto the macarons. The consistency should be thick enough to hold its shape but still spreadable.
Assemble the Macarons
-
Pair the Shells
- Pair the macaron shells by size to ensure an even and attractive sandwich.
-
Pipe the Filling
- Pipe a small amount of ganache onto the flat side of one shell and sandwich it with another. Be careful not to overfill, as this can cause the filling to spill out.
-
Mature the Macarons
- Let the macarons mature in the fridge for at least 24 hours for optimal flavor. This allows the flavors to meld and the texture to improve.
Kitchen Tools You’ll Need
Mixing Bowls
For combining your ingredients effectively, a set of mixing bowls will be your best friend in the kitchen.
Electric Mixer
To whip the egg whites to stiff peaks, an electric mixer is essential. It saves time and ensures the meringue reaches the right consistency.
Sifter
Ensures the dry ingredients are well combined and free of lumps, contributing to a smooth batter.
Piping Bag and Round Tip
Essential for forming those perfect macaron circles. This tool gives you control over the size and shape of the macarons.
Baking Sheets and Parchment Paper
To bake your macarons evenly and prevent sticking. Parchment paper is crucial for easy removal of the macarons from the baking sheet.
The Benefits of Each Ingredient
Almond Flour
Provides a delicate, nutty flavor while keeping the macarons gluten-free. It’s the key to the macaron’s signature texture.
Cocoa Powder
Adds that rich chocolate flavor we all crave in a Chocolate Macaron Recipe. It’s the star ingredient that makes these macarons stand out.
Egg Whites
Essential for creating the light, airy structure of the macaron shells. They are whipped into a meringue that gives the macarons their lift.
Heavy Cream and Bittersweet Chocolate
Combine to create a luscious ganache filling that complements the crispy shells. The creaminess of the ganache balances the crisp texture of the shells.
What to Serve With This Chocolate Macaron Recipe
These macarons are delightful on their own, but if you’re looking to create a more substantial dessert platter, consider pairing them with a fresh fruit salad. The tartness of the fruit complements the sweetness of the macarons beautifully.
For a more decadent experience, serve them with a scoop of vanilla bean ice cream. The creamy texture of the ice cream pairs wonderfully with the chewy macarons.
For a touch of elegance, enjoy these macarons with a cup of rich, freshly brewed coffee or a glass of sparkling wine. The bitterness of the coffee or the effervescence of the wine enhances the chocolate flavor of the macarons.
Storage & Leftover Tips
Macarons are best enjoyed a day after they’re made, allowing the flavors to meld beautifully. Store them in an airtight container in the refrigerator for up to five days. This ensures they stay fresh and maintain their texture.
If you need to keep them longer, place them in the freezer where they can stay fresh for up to a month. Simply let them come to room temperature before serving to enjoy their full flavor and texture.
Troubleshooting Common Macaron Problems
Hollow Shells
Hollow shells can occur if the macarons are not baked long enough or if the oven temperature is too high. Ensure even baking by rotating the trays and keeping a close eye on the baking time.
Cracked Tops
Cracked tops are often the result of under-rested batter or an oven that is too hot. Make sure to let the macarons rest until a skin forms and check your oven temperature with an oven thermometer for accuracy.
No “Feet”
The absence of “feet” can happen if the batter is overmixed or if the macarons are not rested long enough. Achieving the right batter consistency and allowing adequate resting time are key.
Conclusion
In the end, the joy of making this Chocolate Macaron Recipe is as much about the process as it is about the delicious result. Whether you’re sharing them with family, friends, or simply enjoying them yourself, these macarons are sure to bring a touch of sweetness to your day.
The journey of creating macarons at home is a rewarding one, filled with learning and the satisfaction of mastering a classic French delicacy. So roll up your sleeves, gather your ingredients, and let’s make some magic in the kitchen! Whether you’re a seasoned baker or a beginner, this Chocolate Macaron Recipe is a delightful challenge that promises a delicious payoff. Enjoy every step of the process and savor the sweet success of homemade macarons.
Chocolate Macaron Recipe
Ingredients
Equipment
Method
- Preheat the oven to 350F. Line an 8×8 baking dish with parchment paper and spray it with nonstick baking spray. Set aside.
- In a large bowl, combine the graham cracker crumbs, brown sugar, and melted butter. Stir until the mixture resembles wet sand– about 30 seconds.
- Transfer the crust into the prepared baking dish and pack it firmly into the bottom of the pan. Partially bake the crust for 5 minutes, then remove it from the oven to cool slightly while you make the filling.
- Add the cream cheese and granulated sugar to the bowl of a stand mixer fitted with the paddle attachment. Cream them together on medium speed until they are smooth and light– about 2 minutes.
- Next add the sour cream and pure vanilla extract and mix to combine. Lastly, add the eggs one at a time. Scrape down the sides of the bowl to ensure that everything is fully incorporated.
- Pour the cheesecake layer on top of the par baked crust. Add spoonfuls of strawberry jam to the top of the cheesecake layer and swirl them into the cheesecake.
- Bake for 30-35 minutes, or until the center is fully set and doesn’t jiggle when the pan is lightly shaken.
- Allow the cheesecake to cool to room temperature (about 1 hour) and then transfer it to the fridge to cool completely (about 2 hours).
- Slice and enjoy. Store any leftover bars in an airtight container in the fridge for up to three days.