
Is there anything more comforting than the smell of freshly baked peanut butter cookies wafting through your home? For me, it’s a scent that evokes memories of childhood, when my grandmother would bake these delightful treats on chilly afternoons. I remember sitting at the kitchen table, eagerly awaiting the moment when I could sink my teeth into one of those soft, warm cookies. Now, as a home cook who loves to share the joy of baking, I’m thrilled to pass on this timeless recipe to you. These peanut butter cookies are not just a treat; they’re a piece of my heart, shared from my kitchen to yours.
Table of Contents
- Why You’ll Love This Cookie Recipe
- The Recipe
- Kitchen Tools You’ll Need
- The Benefits of Each Ingredient
- What to Serve With This Cookie Recipe
- Storage & Leftover Tips
Why You’ll Love This Cookie Recipe
If you’re on the fence about making these peanut butter cookies, let me give you a few reasons why they’re bound to become a staple in your home:
- Easy to Make: With just a few simple steps and common pantry ingredients, this recipe is perfect for both novice bakers and seasoned pros. You don’t need any fancy equipment or advanced skills; just a little time and a love for delicious treats.
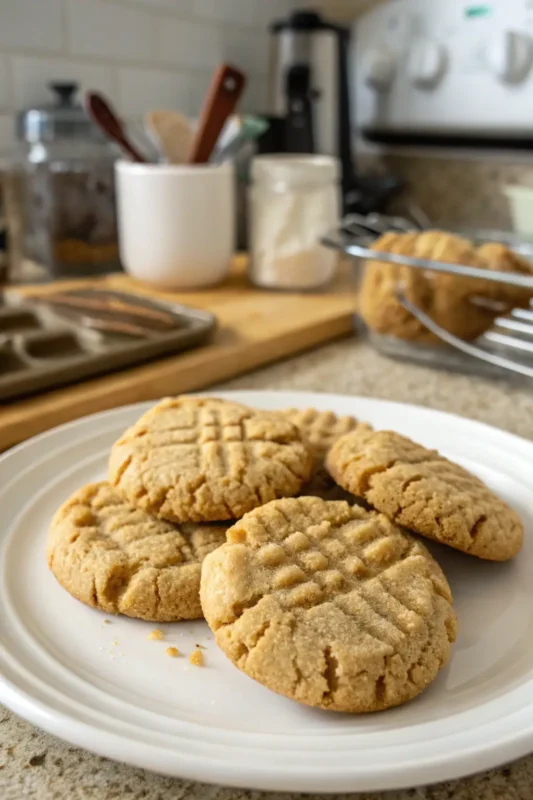
- Perfectly Soft and Chewy: These cookies strike the perfect balance between soft and chewy, with a slightly crisp edge that makes each bite a delight. The secret is in the combination of creamy peanut butter and melted butter, which ensures a tender texture.
- Family-Friendly: This recipe is a great way to get the whole family involved. Kids love rolling the dough in sugar and pressing the classic crosshatch pattern with a fork. It’s a fun activity that can turn a rainy afternoon into a cherished family memory.
- Versatile Treat: Whether it’s for a family gathering, a school bake sale, or a simple weeknight dessert, these cookies fit the bill. They’re also a great choice for gifting during the holidays, packaged in a pretty tin or wrapped in cellophane with a ribbon.
- Rich Peanut Butter Flavor: The creamy peanut butter shines through in every bite, making these cookies irresistible to peanut butter lovers. If you’re a fan of that nutty goodness, you’ll find it hard to stop at just one cookie.
The Recipe
Prep Time: 15 minutes
Cook Time: 9–11 minutes
Servings: 24 cookies
Calories: Approximately 150 per cookie
Ingredients
- ¾ cup creamy peanut butter
- ½ cup unsalted butter, melted
- 1¼ cups brown sugar
- 3 tablespoons milk
- 1 tablespoon vanilla extract
- 1 egg, room temperature
- 1¾ cups all-purpose flour
- ¾ teaspoon salt
- ¾ teaspoon baking soda
- Granulated sugar (for rolling)
Instructions
- Mix the Wet Ingredients
In a large mixing bowl, combine the melted butter, brown sugar, peanut butter, milk, vanilla, and egg. Whisk or beat until smooth and fully combined. Make sure the butter is not too hot when you add it, as this could start cooking the egg prematurely.
- Add the Dry Ingredients
In a separate bowl, whisk together the flour, salt, and baking soda. Add the dry mixture to the wet ingredients and stir until a soft dough forms. If the dough feels sticky, chill it for 10–20 minutes. This step helps make the dough easier to handle and prevents the cookies from spreading too much during baking.
- Preheat the Oven
Preheat your oven to 350°F (175°C) and line a baking sheet with parchment paper. Parchment paper is key to preventing sticking and ensures easy cleanup. If you don’t have parchment paper, a silicone baking mat is a great alternative.
- Shape the Cookies
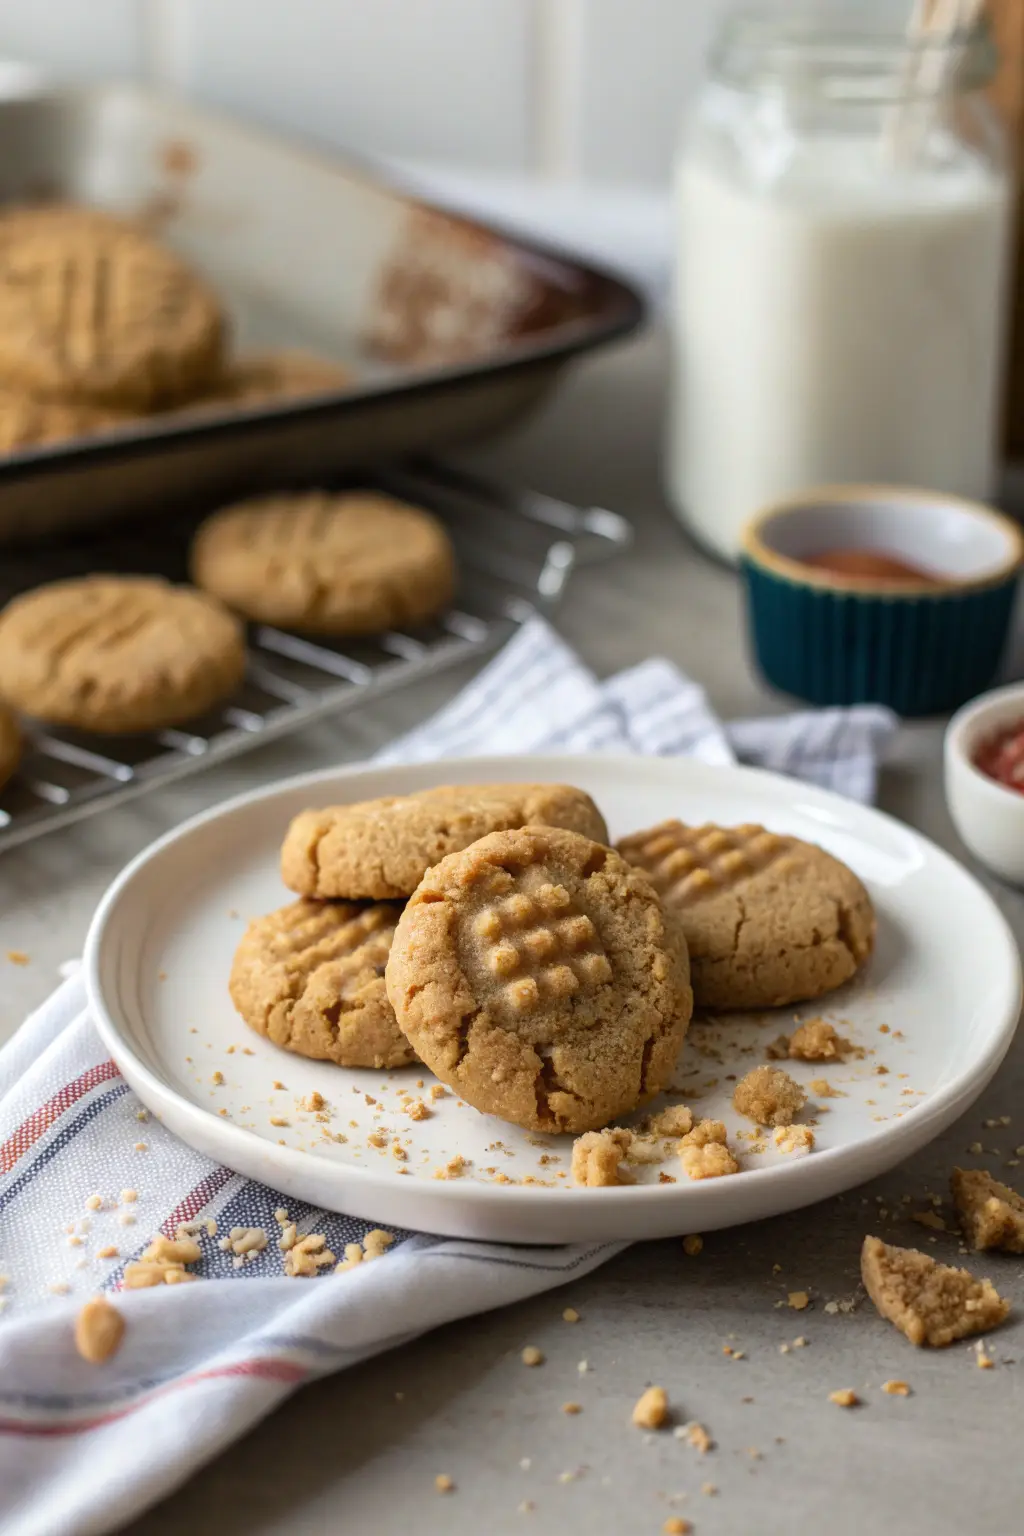
Scoop about 1 tablespoon of dough per cookie. Roll each piece into a ball, then roll the ball in granulated sugar to coat. The granulated sugar adds a delightful crunch to the exterior of the cookies. If you like a thicker sugar coating, feel free to roll the dough balls twice.
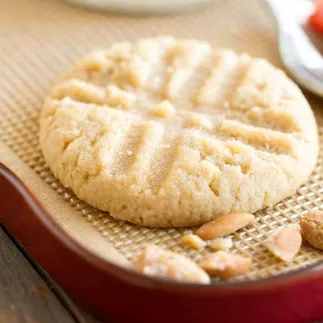
- Make the Classic Crosshatch
Place cookie balls onto the baking sheet. Use a fork to gently press a criss-cross pattern on the top of each ball. The crosshatch not only gives these cookies their iconic look but also helps them bake evenly. For a deeper impression, dip the fork in sugar to prevent sticking.
- Bake
Bake for 9–11 minutes, or until the edges are just set. The centers should look slightly soft — they firm up as they cool. It’s important not to over-bake to maintain the perfect chewy texture. Remember, cookies continue to bake on the sheet even after being removed from the oven.
- Cool & Serve
Allow cookies to cool on the baking sheet for 5 minutes, then transfer to a wire rack. This cooling method helps them retain their shape and texture. If you’re in a hurry, you can transfer them directly to a cooling rack, but be gentle as they’ll be quite soft.
Kitchen Tools You’ll Need
To make these delicious peanut butter cookies, you’ll need a few essential kitchen tools:
- Mixing Bowls: One large for wet ingredients and another for dry. Glass or metal bowls work best for even mixing.
- Whisk or Electric Mixer: To combine ingredients smoothly. A hand mixer makes quick work of combining the butter and sugar into a creamy base.
- Measuring Cups and Spoons: Accurate measurements ensure perfect cookies. Consider using a kitchen scale for the most precise measurements.
- Baking Sheet: For baking the cookies. Choose a heavy-duty sheet to prevent uneven cooking.
- Parchment Paper: Prevents sticking and makes for easy cleanup. It also helps distribute heat evenly.
- Fork: To create the classic crosshatch pattern. A small fork can create a more intricate pattern if desired.
- Wire Rack: For cooling the cookies. This prevents condensation from forming on the bottom of the cookies, which can make them soggy.
The Benefits of Each Ingredient
Understanding why each ingredient is included can help you appreciate the magic of baking:
- Creamy Peanut Butter: The star of the show, it adds rich flavor and moisture to the cookies. Choose a good quality peanut butter for the best results. Avoid using natural peanut butter that separates, as it can alter the texture.
- Unsalted Butter: Provides fat which contributes to the cookies’ tender texture. Melting the butter helps achieve the perfect chewiness, as it allows for more even incorporation with the sugars.
- Brown Sugar: Adds sweetness and a hint of molasses flavor, enhancing the richness of the peanut butter. It also contributes to the cookies’ chewy texture.
- Milk: Aids in softening the dough and contributes to the chewy texture. It also helps spread the flavor evenly throughout the cookie.
- Vanilla Extract: Elevates the flavors and adds a warm, inviting aroma. Pure vanilla extract offers the best flavor, but imitation vanilla can be used in a pinch.
- Egg: Provides structure and acts as a binding agent. A room temperature egg is best for even mixing.
- All-Purpose Flour: The foundation of the cookies, providing structure. For a slightly denser cookie, you can replace a portion with whole wheat flour.
- Salt: Balances the sweetness and enhances the flavors. Kosher salt is preferred for its even distribution.
- Baking Soda: Helps the cookies rise and contributes to their soft texture. Ensure your baking soda is fresh for the best results.
- Granulated Sugar: Used for rolling, it gives the cookies a slight crunch on the outside. You can experiment with raw sugar for a more pronounced texture.
What to Serve With This Cookie Recipe
Peanut butter cookies are a versatile treat that pairs well with a variety of drinks and snacks:
- Milk: Classic and always a hit, a glass of cold milk perfectly complements the rich, nutty flavor of the cookies. For a twist, try almond or oat milk.
- Coffee or Tea: A warm beverage makes for a cozy afternoon snack. Choose a light roast coffee or a mild black tea to complement the cookie’s flavor.
- Ice Cream: Turn your cookies into an indulgent dessert by creating cookie ice cream sandwiches. Vanilla, chocolate, or even coffee ice cream pairs beautifully.
- Fruit: Fresh berries or sliced apples offer a refreshing contrast to the rich cookies. A fruit platter can turn these cookies into a complete dessert spread.
For more delicious dessert options, check out our chocolate chip cookie recipe or our classic oatmeal cookies.
Storage & Leftover Tips
To keep your peanut butter cookies fresh and delicious:
- Storage: Store cookies in an airtight container at room temperature for up to one week. To maintain their softness, place a slice of bread in the container with the cookies. The bread will absorb excess moisture, keeping the cookies fresh.
- Freezing: These cookies freeze beautifully. Place them in a single layer on a baking sheet to freeze, then transfer to a freezer-safe bag. They’ll keep for up to three months. Thaw at room temperature before serving.
- Reheating: To enjoy that fresh-baked taste, warm cookies in the oven at 300°F (150°C) for about 5 minutes. For a quick option, microwave a cookie for 10-15 seconds to soften it.
For more on baking tips and tricks, visit Serious Eats for expert advice on perfecting your baking skills.
As you gather your ingredients and prepare to bake, remember that these cookies are more than just a treat; they’re a way to bring warmth and joy to your home. Whether you’re sharing them with loved ones or indulging in a quiet moment for yourself, these peanut butter cookies are sure to become a cherished part of your baking repertoire. Happy baking!

Peanut Butter Cookies
Ingredients
Equipment
Method
- In a large mixing bowl, combine the melted butter, brown sugar, peanut butter, milk, vanilla, and egg. Whisk or beat until smooth and fully combined.
- In a separate bowl, whisk together the flour, salt, and baking soda. Add the dry mixture to the wet ingredients and stir until a soft dough forms. (If the dough feels sticky, chill it for 10–20 minutes.)
- Preheat oven to 350°F (175°C) and line a baking sheet with parchment paper.
- Scoop about 1 tablespoon of dough per cookie. Roll each piece into a ball, then roll the ball in granulated sugar to coat.
- Place cookie balls onto the baking sheet. Use a fork to gently press a criss-cross pattern on the top of each ball.
- Bake for 9–11 minutes, or until the edges are just set. The centers should look slightly soft — they firm up as they cool.
- Allow cookies to cool on the baking sheet for 5 minutes, then transfer to a wire rack.