
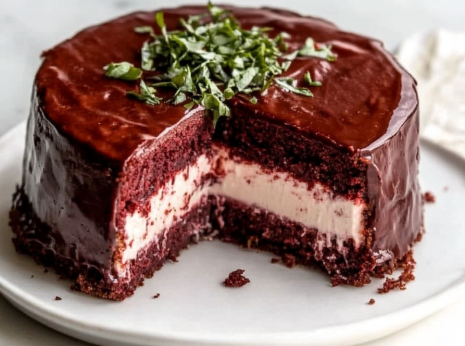
As a child, the smell of my mother’s kitchen was an intoxicating blend of sweet nostalgia and culinary artistry. Every special occasion was marked by the unveiling of her beloved springform pan, signaling the arrival of a dessert that was nothing short of magical. Her Red Velvet Cheesecake was more than just a treat; it was a family tradition steeped in love and memories. Over time, I’ve adopted her cherished recipe, adding my own modern twists to suit today’s dietary preferences while maintaining the nostalgic charm that made it a family favorite.
Why You’ll Love This Red Velvet Cheesecake
Whether you’re an experienced baker or a novice in the kitchen, this Red Velvet Cheesecake is an irresistible dessert that promises to captivate your senses. Here’s why it’s bound to become a staple in your household:
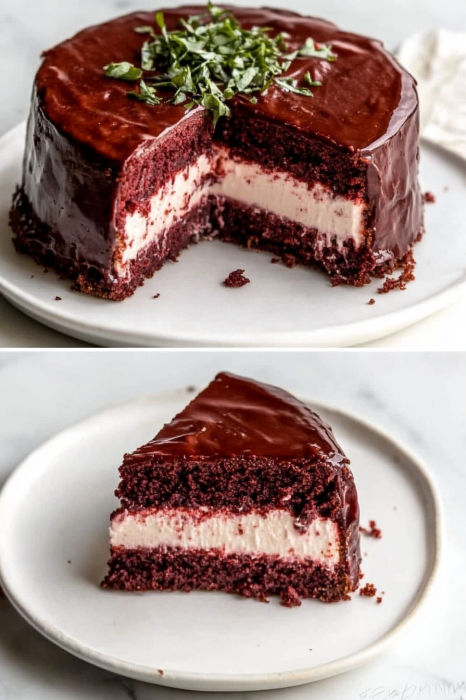
- Rich and Creamy Texture: This recipe harmoniously blends the creamy, luscious nature of cheesecake with the unique flavor profile of red velvet cake. Each bite melts in your mouth, offering a velvety symphony of flavors that is simply unforgettable.
- Low-Carb Indulgence: In today’s health-conscious world, indulging without guilt is a luxury. This cheesecake boasts just 6 grams of net carbs per slice, making it a perfect choice for those following a low-carb or keto lifestyle.
- Easy to Make: Despite its elegant appearance and layered complexity, this cheesecake is surprisingly straightforward to prepare. With minimal steps and ingredients, you can achieve a dessert that looks and tastes like it took hours to craft.
- Versatile Toppings: This cheesecake provides a blank canvas for your creativity. Whether you opt for a simple drizzle of chocolate sauce, a dusting of cocoa powder, or a scattering of fresh berries, it can be dressed up or down to fit any occasion.
- Make-Ahead Friendly: Its need to chill for several hours means you can prepare it in advance, freeing up your time on the day of your gathering. This aspect makes it an ideal dessert for entertaining or busy schedules.
The Recipe
Ingredients
The foundation of this cheesecake’s unique flavor and texture lies in its carefully selected ingredients. Here’s what you’ll need:
- 8 ounces cream cheese, softened
- 2 large eggs, room temperature
- 1 egg yolk
- 1/2 teaspoon vanilla extract
- 2 teaspoons chocolate liquid stevia
- Pinch of salt
- Natural red food coloring
- 1/3 cup unsweetened cocoa powder
- 1/2 cup sour cream
- Optional Chocolate Sauce: 3 ounces sugar-free chocolate chips, melted with 2 Tbsp. unsalted butter
Instructions
- Preheat your oven to 325 degrees F. This initial step is crucial for ensuring your cheesecake bakes evenly.
- In a stand mixer or a large mixing bowl with an electric hand mixer, blend the softened cream cheese, eggs, vanilla, salt, natural food coloring, and chocolate liquid stevia on medium speed until the mixture is smooth and well combined.
- Incorporate the remaining ingredients—cocoa powder and sour cream—into the mixture, blending on high speed until you achieve a smooth and homogenous batter.
- Prepare a 4-inch springform pan by greasing it or lining it with parchment paper. Wrap the pan’s bottom with aluminum foil to prevent water from seeping in, and place it in an 8-by-8-inch baking dish. Pour hot water into the dish until it reaches halfway up the sides of the springform pan, creating a water bath that ensures even baking.
- Pour the cheesecake filling into the prepared springform pan, smoothing the top with a spatula. Bake for 40-45 minutes. If using an electric oven, start checking at 35 minutes to prevent over-baking.
- Once baked, remove the cheesecake from the oven and let it cool for about 10 minutes. Carefully take it out of the water bath and refrigerate for 4-6 hours or overnight. This chilling period allows the flavors to meld and the texture to set.
- Before serving, prepare the optional chocolate sauce by melting the chocolate chips and butter together in a small bowl, stirring until smooth. Drizzle over the cheesecake for an added layer of decadence, if desired.
Kitchen Tools You’ll Need
Creating this cheesecake requires a few essential kitchen tools to ensure a smooth baking process:
- Stand mixer or electric hand mixer
- 4-inch springform pan
- 8-by-8-inch baking dish
- Aluminum foil
- Parchment paper
- Mixing bowls
The Benefits of Each Ingredient
Understanding the role of each ingredient not only enhances your baking skills but also allows for better appreciation of the flavors in your cheesecake:
- Cream Cheese: The cornerstone of any cheesecake, cream cheese provides the rich, creamy base that makes this dessert so indulgent and satisfying.
- Eggs: Essential for binding the ingredients together, eggs also add structure and contribute to the cheesecake’s creamy texture.
- Vanilla Extract: Often underrated, vanilla extract enhances the overall flavor profile with its sweet and aromatic notes, adding depth to the cheesecake.
- Chocolate Liquid Stevia: This low-carb sweetener adds the necessary sweetness without the added sugar, making it suitable for those monitoring their carbohydrate intake.
- Cocoa Powder: Integral to achieving that classic red velvet flavor, cocoa powder also contributes to the deep, alluring color of the cheesecake.
- Sour Cream: An unexpected but vital ingredient, sour cream adds moisture and a slight tang, balancing out the sweetness and enhancing the creaminess.
What to Serve With This Red Velvet Cheesecake
Pairing your Red Velvet Cheesecake with the right accompaniments can elevate the entire dessert experience. Here are some serving suggestions:
- Freshly Brewed Coffee: The robust, slightly bitter notes of coffee complement the rich sweetness of the cheesecake, creating a perfect harmony of flavors.
- Vanilla Ice Cream: A scoop of creamy vanilla ice cream adds a cool contrast to the rich, dense texture of the cheesecake.
- Fruity Accents: For a burst of freshness, serve the cheesecake with a side of our Easy Raspberry Coulis or top it with fresh strawberries or blueberries for a pop of color and flavor.
- Whipped Cream: A dollop of homemade whipped cream can add a light, airy complement to the dense cheesecake. Check out our Whipped Cream Recipe for a quick and easy preparation.
Storage & Leftover Tips
Properly storing your cheesecake ensures it remains fresh and delicious for days to come:
- Refrigerate: Keep any leftovers in an airtight container in the refrigerator for up to 5 days. This will maintain its freshness and creamy texture.
- Freeze: For longer storage, wrap individual slices in plastic wrap and place them in a freezer-safe bag. This cheesecake can be frozen for up to 1 month. To serve, thaw slices overnight in the fridge.
- Reheat: If you prefer your cheesecake warm, gently reheat slices in the microwave for 10-15 seconds, being careful not to overheat and alter the texture.
A Celebration of Tradition and Innovation
In crafting this Red Velvet Cheesecake, I’ve sought to honor my mother’s culinary legacy while embracing modern dietary trends. This recipe is more than just a dessert; it’s a testament to the timeless joy of baking and the enduring power of family traditions. Whether you’re making it for a special occasion or simply to indulge in something sweet, I hope this cheesecake brings a touch of joy and nostalgia to your home.
Cooking, after all, is a labor of love. It’s about savoring every step of the process, from the careful selection of ingredients to the anticipation of the first bite. So gather your ingredients, preheat your oven, and embark on a culinary journey that promises to delight both old friends and new. Here’s to creating memories, one slice at a time!
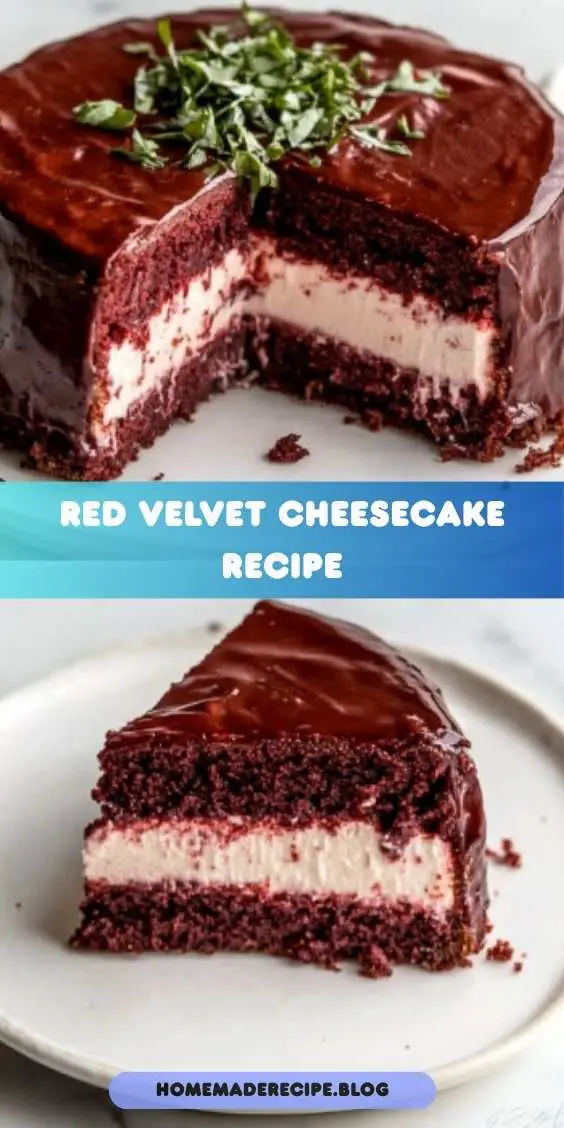
Red Velvet Cheesecake
Ingredients
Equipment
Method
- Preheat oven to 325 degrees F.
- In a stand mixer, combine the cream cheese, eggs, vanilla, salt, food coloring, and sweetener. Blend on medium speed until smooth. Add cocoa powder and sour cream, blend on high speed until smooth.
- Grease or line a 4-inch springform pan with parchment paper. Wrap the bottom of the pan with aluminum foil, place it into an 8-by-8-inch baking dish. Pour hot water into the dish until halfway up the sides of the pan.
- Pour the cheesecake filling into the springform pan and bake for 40-45 minutes. Check at 35 minutes and continue until center is set.
- Remove from oven, let cool for 10 minutes. Remove from water bath, refrigerate for 4-6 hours or overnight.
- When ready to serve, melt chocolate chips and butter together, mix until smooth. Drizzle over cheesecake if desired.