
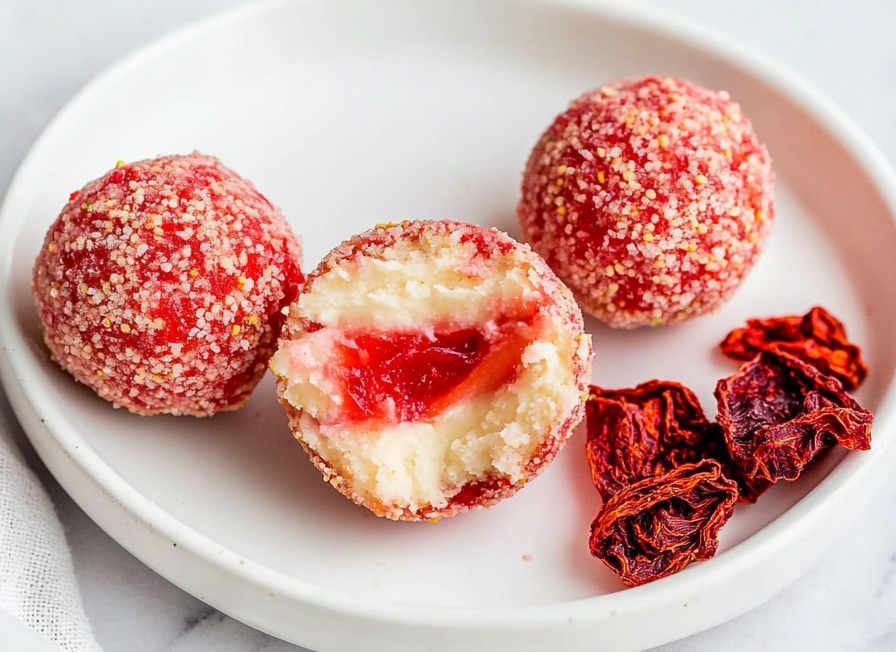
There’s something undeniably nostalgic about the delightful combination of strawberries and a hint of creamy sweetness, isn’t there? Every time I whip up a batch of Strawberry Truffles, I’m transported back to those sun-drenched afternoons spent in my grandmother’s kitchen, where the air was always rich with the scent of fresh strawberries and the comforting warmth of home. These truffles have become a cherished tradition in my family—a little bite of happiness that seems to bring everyone together. Whether you’re a seasoned chef or a kitchen newbie, I promise this recipe is as approachable as it is delicious. Let’s dive into a world of sweet indulgence!
Why You’ll Love These Strawberry Truffles
Easy and Quick: With minimal prep time, these truffles are perfect for those spontaneous sweet cravings. They provide an opportunity for instant gratification, delivering maximum flavor with minimal effort. In today’s fast-paced world, finding time to create a homemade treat can be challenging, but this recipe fits seamlessly into even the busiest of days.
No Baking Required: Skip the oven chaos! These truffles are a straightforward, no-bake treat. This not only saves time but also makes them an excellent option for those hot summer months when turning on the oven is the last thing you want to do. The simplicity of a no-bake dessert adds to its charm, making it accessible for cooks of all skill levels.
Versatile Flavors: While strawberry is the star, you can easily swap flavors to suit your mood. Imagine substituting freeze-dried raspberries or blueberries for a slight twist, or incorporating a touch of citrus zest for a refreshing tang. The base recipe serves as a canvas, inviting creativity and personalization.
Perfect for Gifting: Wrapped in a pretty box, these truffles make a thoughtful homemade gift. There’s something deeply personal and heartfelt about giving a gift that you’ve made yourself. It shows effort and consideration, making these truffles an ideal choice for birthdays, holidays, or just because.
Kid-Friendly: Involve the little ones in rolling and dipping—it’s fun for the whole family! Cooking together fosters bonding and creates lasting memories. Plus, it’s an excellent way to teach children basic kitchen skills in a fun and engaging manner.
The Recipe
Prep Time: 20 minutes
Chill Time: 2 hours
Servings: 24 truffles
Calories: 321 kcal per truffle
Ingredients
- 15.25-ounce vanilla cake mix (Betty Crocker)
- 8-ounce cream cheese (softened to room temperature)
- ½ cup freeze-dried strawberries (roughly chopped)
- 20 ounces vanilla melting wafers (2-10 oz bags, Ghirardelli)
- ½ cup red candy melts (Wilton)
- Crushed freeze-dried strawberries (for topping)
Step-by-Step Instructions
-
Heat Treating the Cake Mix:
- Preheat your oven to 350°F. Spread the cake mix on a parchment-lined baking sheet and bake for 5 minutes. This step not only ensures the safety of the raw flour but also enhances the flavor by giving the mix a slight toasty aroma. Cool completely on a wire rack.
-
Making the Truffles:
- In a medium mixing bowl, beat the softened cream cheese until smooth. This creates a creamy base that binds the ingredients together.
- Fold in the cooled cake mix, then mix on medium-high speed until a dough forms. The texture should be pliable yet firm enough to hold its shape.
- Gently fold in the freeze-dried strawberries. These add bursts of concentrated strawberry flavor and a delightful crunch.
- Cover the dough with plastic wrap and chill in the refrigerator for 2 hours. Chilling firms up the mixture, making it easier to roll into balls.
-
Shaping and Coating:
- Roll chilled dough into balls using a 1½ tablespoon cookie scoop, then place them on parchment-lined baking sheets. This ensures uniformity in size, which is crucial for even coating.
- Let the truffles sit for 15 minutes to expand slightly. This step helps them settle, maintaining their round shape.
- Melt the vanilla wafers using a double boiler or microwave. For a smoother finish, ensure the wafers are thoroughly melted and warm.
- Dip each dough ball into the melted wafers, allowing excess to drip off. Work quickly to ensure even coating.
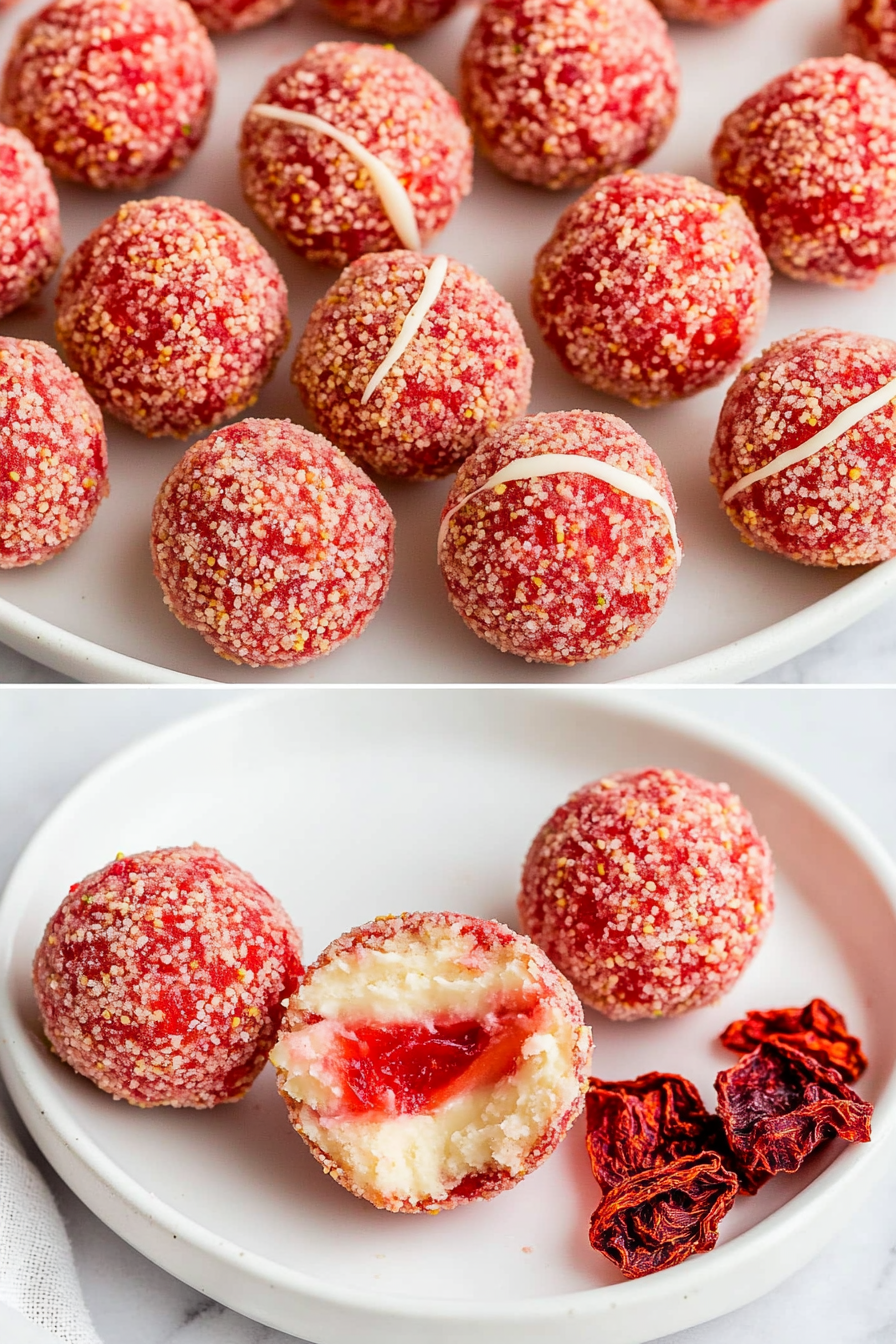
- Before the coating sets, sprinkle some with crushed freeze-dried strawberries. This adds a visually appealing touch and enhances the strawberry flavor.
- Melt red candy melts in piping bags and drizzle over the remaining truffles. This decorative step adds a pop of color and a hint of additional sweetness.
- Allow to set completely before serving. Enjoy!
Kitchen Tools You’ll Need
- Medium mixing bowl: Essential for combining ingredients efficiently.
- Hand mixer or stand mixer: Makes mixing the dough quick and easy, ensuring a smooth consistency.
- Baking tray: Used for both heat-treating the cake mix and setting the truffles.
- Double boiler (or microwave-safe bowl): Ideal for melting the coating wafers evenly without scorching.
The Benefits of Each Ingredient
- Vanilla Cake Mix: Provides a sweet and fluffy base, perfect for absorbing flavors. Its pre-mixed nature simplifies the process, saving time and effort.
- Cream Cheese: Adds creaminess and tang, balancing the sweetness. Its smooth texture ensures the truffles are rich and decadent.
- Freeze-Dried Strawberries: Intensify the strawberry flavor while adding a bit of crunch. They are a powerhouse of concentrated natural flavor.
- Vanilla Melting Wafers: Offer a smooth and creamy coating, enhancing the truffle’s richness. Their quick-melting properties make them ideal for coating.
- Red Candy Melts: Add a festive touch and extra sweetness, making the truffles visually striking and appealing.
What to Serve With These Strawberry Truffles
These truffles are delightful on their own, but they pair wonderfully with a refreshing cup of herbal tea or a flute of sparkling rosé. The lightness of these beverages complements the richness of the truffles, creating a balanced tasting experience. They also make a stunning addition to any dessert platter, especially when accompanied by our Decadent Chocolate Brownies or Classic Lemon Bars. The contrasting flavors of chocolate and lemon provide variety and enhance the overall presentation.
Storage & Leftover Tips
Keep your Strawberry Truffles fresh by storing them in an airtight container in the refrigerator for up to a week. This ensures they maintain their delightful texture and flavor. If you’re planning to make them ahead, you can freeze the uncoated truffle balls in a single layer on a baking sheet. Once frozen, transfer them to a freezer-safe bag for up to one month. Just thaw them in the fridge before coating and decorating. This method allows you to enjoy fresh truffles at a moment’s notice.
Creating Memories in the Kitchen
As you embark on this sweet adventure, remember that the best recipes are those shared with loved ones. The act of creating and sharing food is a universal language of love and connection. I hope these Strawberry Truffles bring as much joy to your home as they do to mine. Whether you’re making them for a special occasion or simply to brighten a regular day, these truffles are sure to create cherished memories. Happy cooking!
Strawberry Truffles
Ingredients
Equipment
Method
- Preheat the oven to 350°F and line a baking sheet with parchment paper.
- Spread the cake mix powder onto the prepared baking sheet and bake for 5 minutes. Then remove from the oven and allow it to cool completely on a wire rack.
- Beat the softened cream cheese in a medium mixing bowl until smooth and creamy.
- Add the cake mix and fold it into the cream cheese with a rubber spatula. Then mix with the mixer on medium-high speed until fully combined and you get a dough consistency.
- Fold in the freeze-dried strawberries until fully combined.
- Cover the dough with plastic wrap and allow it to chill in the refrigerator for 2 hours.
- Line two baking sheets with parchment paper and use a 1 ½ tablespoon cookie scoop to scoop the dough and place it onto the prepared baking sheets.
- Roll each of them until smooth and even with your hands.
- Allow them to expand for about 15 minutes.
- Prepare a double boiler to melt the vanilla melting wafers on the stovetop over low heat or use a microwave safe bowl to microwave on a low setting for 30 seconds increments, stirring between each time, until fully melted.
- Dip the dough balls into the melted vanilla wafers and place the coated balls onto the lined baking sheet.
- Sprinkle the crushed freeze-dried strawberries on top of half of the prepared truffles.
- Melt the red candy melts in small microwave safe piping bags and drizzle onto the remaining truffles.
- Allow to set completely before serving. Enjoy!