
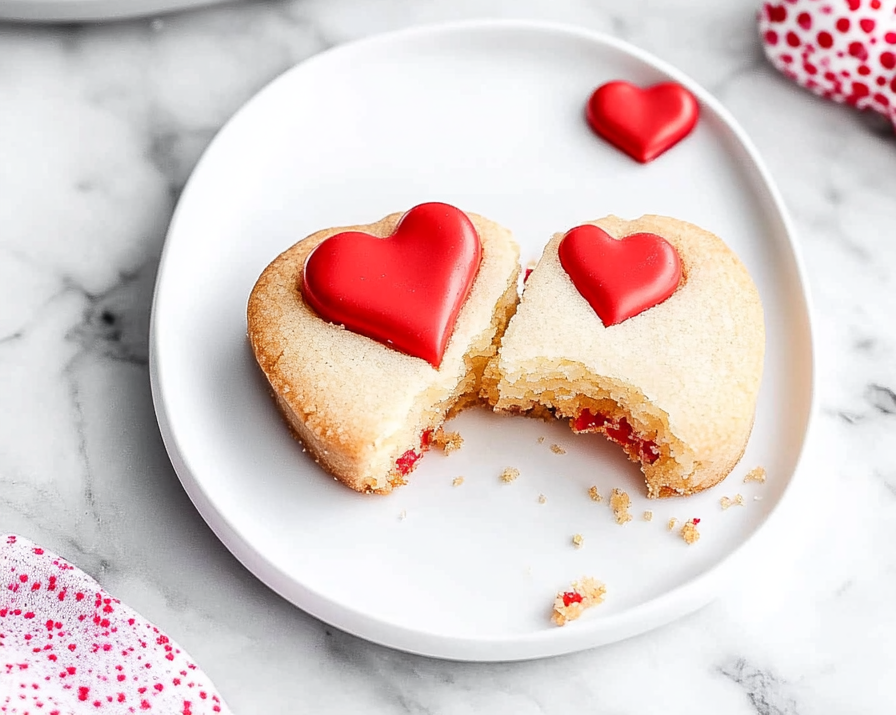
When I think of Valentine’s Day, I’m whisked away to memories of baking in the kitchen with my kids, their little hands eagerly cutting out heart-shaped cookies from a soft dough. It’s one of those family traditions that fills my home with warmth and the sweet scent of love. These Valentine Shortbread Cookies aren’t just a treat; they’re a delightful way to share affection with those you care about. Every year, we decorate them with colorful icing, creating edible masterpieces that are almost too pretty to eat—almost! Whether you’re crafting these with your family or as a sweet surprise for someone special, these cookies are sure to bring smiles and delicious memories.
Why You’ll Love These Cookies
Simple Ingredients
One of the beautiful things about these cookies is the simplicity of the ingredients. You likely have everything you need in your pantry already, making it easy to whip them up without a trip to the store. The basic ingredients—flour, butter, sugar, and vanilla—are staples in most kitchens. This simplicity makes the cookies not only accessible but also budget-friendly. Despite using common ingredients, the result is an extraordinary treat that doesn’t compromise on flavor.
Kid-Friendly
Baking these cookies can be a fun and educational activity for kids. It’s a perfect opportunity to teach them about measuring ingredients, following instructions, and even the science of baking. Kids love being involved, especially when it comes to cutting out shapes and decorating with icing and sprinkles. This hands-on experience can spark a lifelong interest in baking and create lasting memories of family time spent together in the kitchen.
Customizable
The customization options for these cookies are endless. You can add a few drops of food coloring to the dough to create a vibrant display or use different shapes beyond hearts—like stars or flowers—to suit any occasion. Sprinkles, edible glitter, and a variety of icing colors allow each cookie to be a unique work of art. You can even flavor your icing with a hint of almond or lemon extract for a subtle twist.
Quick to Make
With a prep time of just 20 minutes, these cookies are a quick go-to for last-minute baking. The dough comes together in a flash, and after a brief chill in the freezer, they’re ready to roll and bake. If you find yourself short on time, you can prepare the dough in advance and keep it refrigerated until you’re ready to bake.
Delicious and Buttery
The perfect blend of sweet and buttery goodness that melts in your mouth is what makes these shortbread cookies irresistible. The butter gives them a rich, tender crumb that practically dissolves on your tongue, while the sugar adds just the right amount of sweetness. The subtle hint of vanilla ties everything together, creating a cookie that’s both simple and sophisticated.
The Recipe
Ingredients
Cookies:
- ½ cup butter, softened
- ¼ cup granulated sugar
- 1 tsp vanilla extract
- ¼ tsp red gel food coloring (optional)
- 1 cup all-purpose flour
Royal Icing (optional):
- 2 cups confectioner’s sugar
- 1½ tbsp meringue powder
- 4-5 tbsp room-temperature water
- Food coloring (optional)
Instructions
-
Preheat and Prepare: Preheat your oven to 375°F. Line a large baking sheet with parchment paper. This step ensures that your cookies bake evenly and don’t stick to the pan.
-
Mix Cookie Dough: In a stand mixer, beat the softened butter and granulated sugar on medium-high speed until light and fluffy, about 2 minutes. Reduce speed to low, add vanilla extract and food coloring, and mix until combined. Gradually add flour, mixing until the dough forms a ball. The dough should be smooth and slightly sticky but not overly wet.
-
Chill the Dough: Wrap the dough in plastic wrap and place it in the freezer for 15-20 minutes until slightly firm. Chilling the dough helps the cookies maintain their shape during baking and enhances the flavor.
-
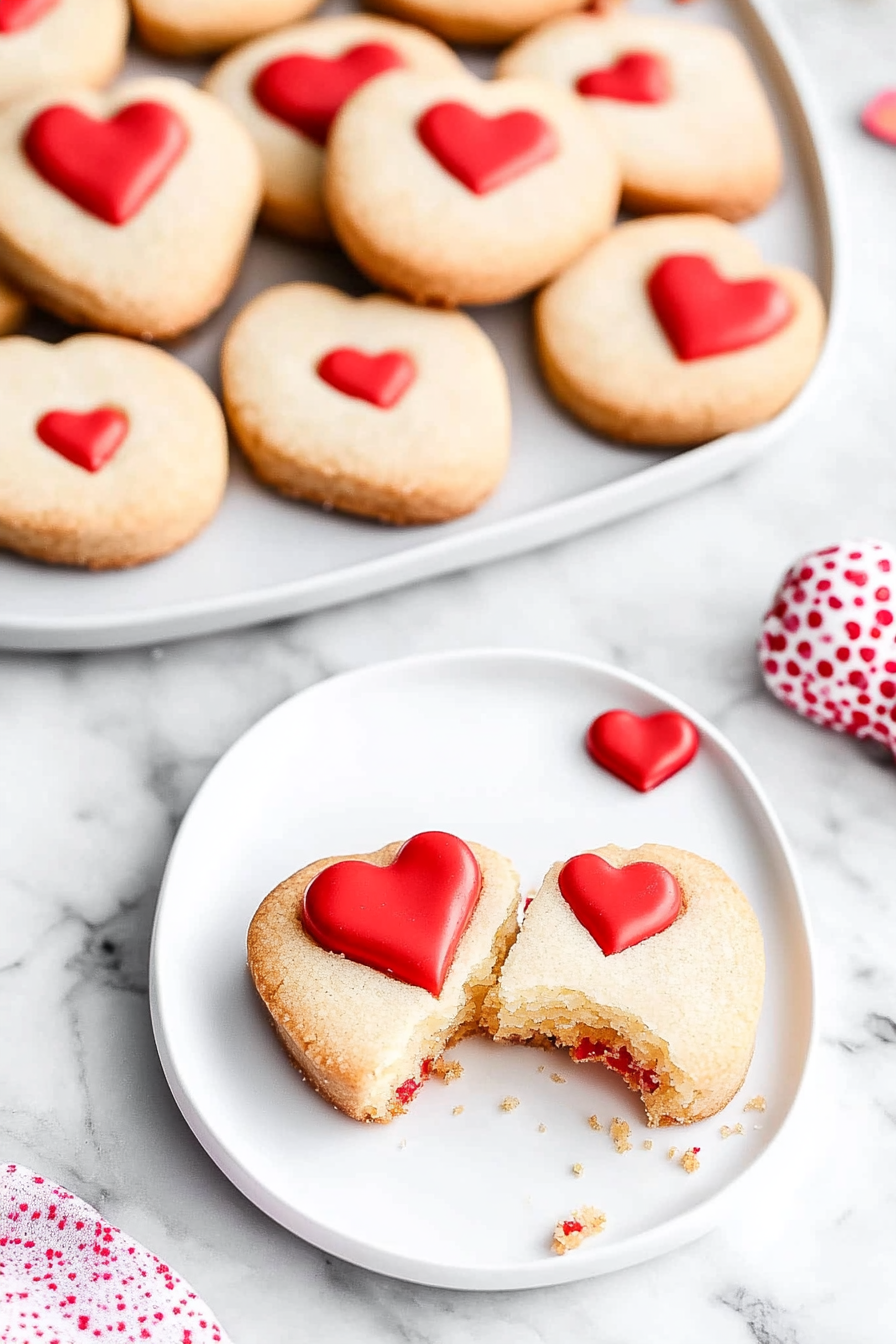
Roll and Cut: Lightly flour your work surface and roll out the dough to ¼-inch thickness. Use a 2-inch heart-shaped cookie cutter to cut out cookies. Transfer to a parchment-lined baking sheet. If the dough becomes too soft, return it to the freezer for a few minutes.
-
Bake: Bake for 10-15 minutes, until the edges begin to turn golden brown. Cool completely before icing. The cooling process is crucial as it allows the cookies to firm up and prevents the icing from melting.
-
Prepare Royal Icing: Combine confectioner’s sugar, meringue powder, and water. Whip until smooth. Use thicker icing for outlining and slightly thinner icing for flooding. Decorate as desired. The icing acts as both a delicious finishing touch and a way to personalize each cookie.
Prep Time: 20 minutes
Cook Time: 15 minutes
Servings: 20 cookies
Calories: 90 per cookie
Kitchen Tools You’ll Need
To make these cookies, you’ll need a few kitchen tools that help streamline the process and enhance the baking experience.
- Stand Mixer or Hand Mixer: Essential for creaming the butter and sugar to achieve the right texture.
- Baking Sheet: A large baking sheet allows you to bake multiple cookies at once.
- Parchment Paper: Prevents sticking and ensures even baking.
- Plastic Wrap: Useful for chilling the dough and preventing it from drying out.
- Heart-Shaped Cookie Cutter: Adds a festive touch to your cookies.
- Rolling Pin: Helps achieve an even thickness in the dough.
- Squeeze Bottles for Icing: Make it easier to outline and flood the cookies with icing.
The Benefits of Each Ingredient
Understanding the role of each ingredient can enhance your baking skills and appreciation for the cookies’ flavors and textures.
- Butter: Provides the rich, buttery flavor that makes shortbread so irresistible. The fat content in butter also contributes to the cookies’ tender texture.
- Granulated Sugar: Sweetens the dough and helps achieve a tender crumb. Sugar also aids in browning and adds a slight crunch to the outer layer of the cookies.
- Vanilla Extract: Adds a subtle, aromatic sweetness that enhances the overall flavor. It complements the butter and sugar, creating a balanced taste.
- Red Gel Food Coloring: Perfect for adding a festive touch to your cookies. Gel food coloring is ideal because it doesn’t alter the consistency of the dough.
- All-Purpose Flour: Gives the cookies their structure and classic shortbread texture. Flour provides the body that holds the cookies together.
What to Serve With These Cookies
Pair these Valentine Shortbread Cookies with a warm cup of tea or a frothy hot chocolate for a cozy afternoon treat. The buttery richness of the cookies complements the warmth and sweetness of a hot beverage. They also make a delightful finish to a romantic dinner, perhaps alongside a bowl of fresh strawberries or a scoop of vanilla ice cream. For a fun twist, serve them with a glass of sparkling wine for a sophisticated touch.
Storage & Leftover Tips
To keep your cookies fresh and delicious, store them in an airtight container at room temperature for up to two days. If you want to enjoy them longer, freeze the undecorated cookies for up to a month and decorate them fresh when ready to serve. When freezing, place parchment paper between layers of cookies to prevent sticking. If you’ve already decorated the cookies, you can still freeze them, but be sure to separate them with parchment paper to preserve the icing design.
The Joy of Baking and Sharing
Baking these Valentine Shortbread Cookies is more than just making a treat; it’s a way to express love and creativity. Involving family members in the process can turn baking into a cherished tradition. The act of measuring, mixing, rolling, and decorating offers a sense of accomplishment and joy. Sharing these cookies with loved ones not only brings smiles but also strengthens bonds through the simple act of giving.
I hope these Valentine Shortbread Cookies bring as much joy to your home as they do to mine. Baking can be a wonderful way to express love, and sharing these sweet treats is like giving a little piece of your heart. Enjoy every delicious bite, and remember, the best ingredient in any recipe is the love you put into it. If you’re looking for more delightful treats, check out my Chocolate Chip Banana Bread or indulge in a Classic Apple Pie. For more tips on perfecting your royal icing, visit King Arthur Baking’s Guide to Royal Icing. Happy baking!
Valentine Shortbread Cookies
Ingredients
Equipment
Method
- Preheat the oven to 375F.
- Line a large baking sheet with parchment paper.
- In the bowl of a stand mixer, beat together the softened butter and granulated sugar until light and fluffy– about 2 minutes on medium-high speed.
- Reduce the mixer to low speed, add the vanilla extract and food coloring, if using, and mix until incorporated. Scrape down the sides of the bowl.
- With the mixer still on low speed, slowly add the flour. Mix just until the dough has come together in a ball.
- Wrap the dough in plastic wrap and place it in the freezer to chill for 15-20 minutes, or until it has hardened slightly.
- Lightly flour your work surface and roll the dough out until it is ¼” thick.
- Cut the cookies using a heart-shaped cookie cutter that is about 2” across.
- Transfer the cut cookies to the parchment-lined baking sheet.
- Re-roll any leftover dough and repeat the cutout process.
- Bake the cookies for 10-15 minutes (depending on the size of your hearts), or until the edges are starting to turn golden brown.
- Allow the cookies to cool completely before adding icing or decorating.
- Store in an airtight container at room temperature for up to 2 days.
- Combine the sugar, meringue powder and water in the bowl of a stand mixer fitted with the whip attachment or in a medium mixing bowl – you’ll need a hand mixer.
- Whip the ingredients together on high for 1-2 minutes or until the mixture has the consistency to drizzle down back into the bowl and smooth out within a couple of seconds.
- Depending on the climate you may need to add more water or confectioner’s sugar (very small amounts at a time).
- Transfer a portion of the icing to a squeeze bottle and outline the cookies. You’ll want a thicker consistency for this step.
- Once the cookies are outlined the icing should harden within 2-3 minutes.
- Thin out the icing slightly with a little bit more water and then transfer to another squeeze bottle.
- Fill in the outlined cookies – this is called flooding.
- The icing should be nice and smooth and sort of pour into and fill the area you have outlined.
- The thicker icing you added earlier should hold it all in.
- Immediately add any desired sprinkles to the icing – before moving on to the next cookie as the icing will harden before you are done with all of the cookies and the sprinkles won’t stick.
- You can refrigerate the cookies to speed the process of setting the icing if desired.