
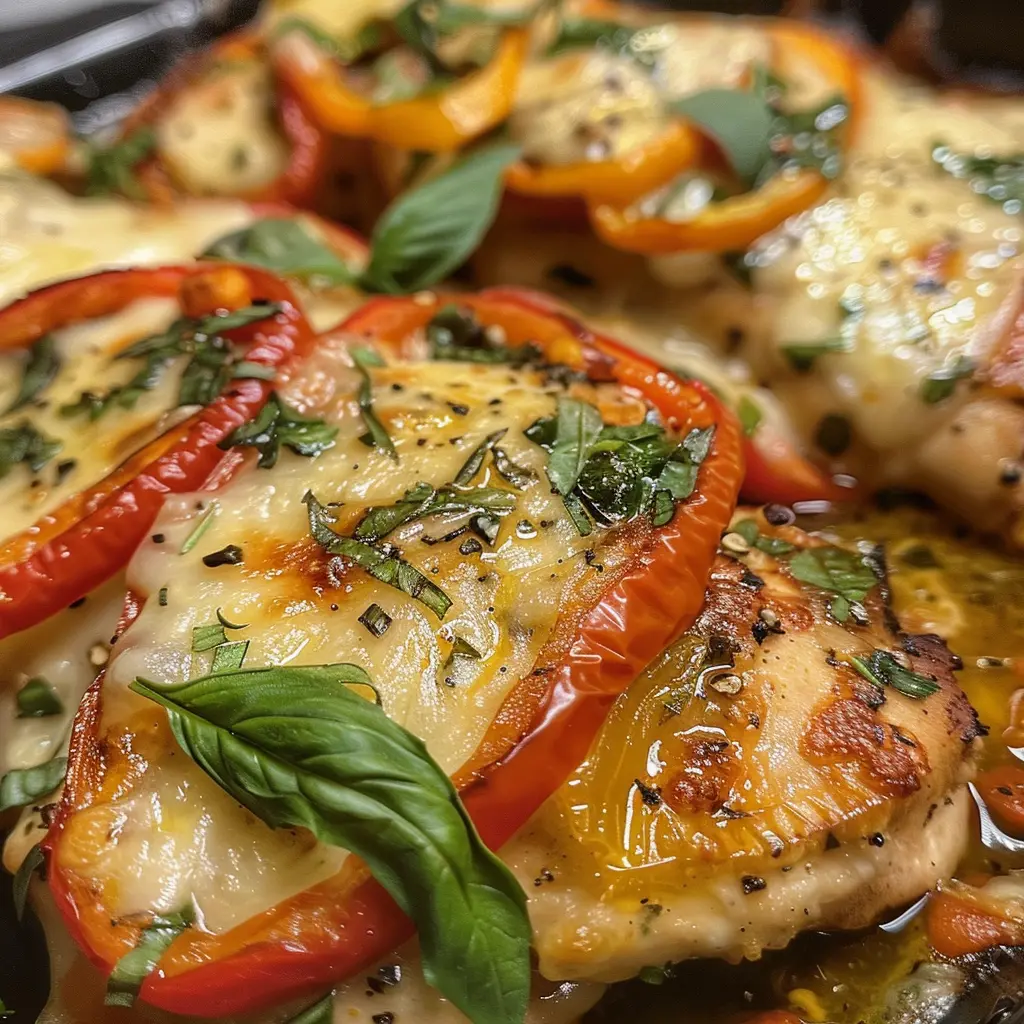
Cheesy garlic herb chicken with roasted peppers starts with a generous seasoning rub, a hard sear in a hot skillet, and finishes in the oven under a blanket of melted mozzarella and sweet roasted red peppers. The whole dinner comes together in 45 minutes from a single pan, and the result — juicy, herb-crusted chicken topped with bubbling cheese and caramelized pepper strips — looks and tastes like something that required considerably more effort than it actually did.
| Detail | Info |
|---|---|
| Prep Time | 15 minutes |
| Cook Time | 30 minutes |
| Total Time | 45 minutes |
| Servings | 6 |
| Difficulty | Easy to Medium |
| Cuisine | American / Italian-Inspired |
Why This Recipe Works
The sear-then-bake method is what makes this chicken genuinely excellent rather than just adequate. Searing the seasoned chicken breasts in a hot skillet for 3 to 4 minutes per side before they go into the oven accomplishes two things that the oven alone cannot: it creates a golden-brown crust on the exterior through the Maillard reaction, developing flavor compounds that make the chicken taste complex and savory rather than just cooked, and it seals the outer layer, which helps retain moisture during the oven finish. Chicken breasts baked without a prior sear tend to have a pale, soft exterior that doesn’t hold seasoning as well and loses more moisture during baking.
Roasting the red bell peppers separately before they go on the chicken is a step that transforms them from raw, slightly bitter vegetables into something sweet, slightly caramelized, and deeply flavored. Fifteen minutes at 400 degrees F with a drizzle of olive oil collapses the pepper strips, concentrates their natural sugars, and produces the slightly charred edges that give roasted peppers their characteristic sweetness. Raw bell pepper placed directly on the chicken before baking would still be partially firm and grassy-tasting when the chicken is done — roasted peppers are fully tender and flavor-forward from the moment they hit the top of the chicken.
The seasoning blend — paprika, garlic powder, onion powder, Italian seasoning, salt, and pepper — is layered for a reason. Paprika provides color and a subtle earthiness. Garlic powder and onion powder add savory depth that distributes evenly across the surface of the chicken in a way that fresh garlic alone cannot achieve at the seasoning stage. The Italian seasoning brings herbal notes that bridge the chicken to the mozzarella and pepper topping. Applied before searing, this blend forms a seasoned crust rather than simply flavoring the surface — heat bonds the spices to the exterior of the chicken and they become part of the texture rather than just a coating.
Fresh minced garlic added to the skillet after the sear and before the oven finish blooms in the residual heat and oil, releasing its aromatic compounds directly into the pan environment where they infuse the chicken and the drippings below. This is the point in the recipe where the kitchen starts to smell exactly like something you want to eat immediately — garlic, herb-crusted chicken, and olive oil combining in a hot skillet is one of the most compelling kitchen aromas there is.
Mozzarella is the right cheese for this dish rather than cheddar or Parmesan. Its high moisture content and low-acid profile produce a gentle, stretchy melt that doesn’t overpower the herb-seasoned chicken or compete with the sweetness of the roasted peppers. It melts into a smooth, creamy layer that connects the peppers to the chicken without dominating either. A sharp cheese would fight the other flavors; mozzarella supports them.
Ingredients
| Ingredient | Quantity | Notes |
|---|---|---|
| Chicken breasts | 6 | Even thickness is important for uniform cooking; pound thicker ends if needed |
| Mozzarella cheese, shredded | 2 cups | Low-moisture mozzarella melts more evenly than fresh; freshly shredded is best |
| Red bell peppers, sliced | 2 | Sliced into half-inch strips; roasted separately before adding to chicken |
| Garlic cloves, minced | 3 | Added to the skillet after searing; blooms in residual heat |
| Olive oil | 2 tablespoons | 1 tablespoon for the peppers, 1 for searing the chicken |
| Italian seasoning | 1 teaspoon | Applied before searing; creates an herb crust on the chicken surface |
| Paprika | 1 teaspoon | Adds color and mild earthiness; sweet or smoked both work |
| Garlic powder | 1 teaspoon | Provides even garlic flavor across the entire surface of the chicken |
| Onion powder | 1 teaspoon | Adds savory depth alongside the garlic powder |
| Salt | 1 teaspoon | Seasons the chicken directly; don’t skip it |
| Black pepper | 1/2 teaspoon | Freshly cracked for best flavor and aroma |
| Fresh parsley, chopped | 2 tablespoons | Added after baking; brightens the finished dish visually and in flavor |
Step-by-Step Instructions
Phase 1: Roast the Peppers
- Preheat the oven to 400 degrees F. Line a rimmed baking sheet with parchment paper or foil for easy cleanup.
- Slice the red bell peppers into strips about half an inch wide. Toss them in a bowl with 1 tablespoon of olive oil and a pinch of salt and spread them in a single layer on the prepared baking sheet. A single layer is important — overlapping pepper strips steam each other rather than roasting and don’t develop the caramelized edges that give roasted peppers their sweetness.
- Roast for 15 minutes, until the peppers are tender, slightly collapsed, and have some lightly charred edges. Remove from the oven and set aside. Leave the oven on at 400 degrees F.
Phase 2: Season and Sear the Chicken
- While the peppers roast, prepare the chicken. If any chicken breasts are significantly thicker at one end than the other, place them between two sheets of plastic wrap and pound the thick end lightly with a meat mallet or the bottom of a heavy pan until the breast is an even thickness throughout. Even thickness means the chicken cooks at the same rate from edge to edge — thick spots are still raw when thin spots are overdone.
- In a small bowl, combine the salt, black pepper, paprika, garlic powder, onion powder, and Italian seasoning. Mix well. Pat the chicken breasts dry with paper towels — dry surfaces sear rather than steam — then season both sides of each breast generously and evenly with the spice mixture. Press the seasoning lightly into the surface with your fingers so it adheres.
- Heat the remaining tablespoon of olive oil in a large oven-safe skillet over medium-high heat until the oil shimmers and a drop of water flicked in sizzles immediately. The pan needs to be genuinely hot for the sear to work — a cold or warm pan steams the chicken rather than searing it.
- Add the chicken breasts to the hot skillet in a single layer. Don’t move them once they’re down. Sear for 3 to 4 minutes on the first side without touching or peeking — the chicken will release naturally from the pan when the crust has properly formed. If it sticks when you try to lift it, it needs more time. Flip and sear the other side for another 3 to 4 minutes. The chicken will not be cooked through at this stage — the centers will still be raw. That’s correct.
- Reduce the heat to medium. Add the minced garlic to the skillet around the chicken pieces. Cook for 30 seconds, stirring the garlic in the oil rather than on the chicken, until fragrant. Watch the garlic carefully — it can go from golden to burnt in under 30 seconds and burnt garlic is bitter and unpleasant.
Phase 3: Top and Bake
- Arrange the roasted pepper strips evenly over each chicken breast, distributing them so every piece is well covered. The peppers should lie flat on the chicken rather than piled in the center.
- Sprinkle the shredded mozzarella evenly over all six chicken breasts, covering the peppers and the exposed chicken around them. Use the full two cups — a generous layer of cheese is what produces the bubbly, golden-topped result that makes this dish visually impressive.
- Carefully transfer the skillet to the preheated oven. Bake for 15 to 20 minutes, until the cheese is fully melted and bubbling with some golden spots, and an instant-read thermometer inserted into the thickest part of the largest chicken breast reads 165 degrees F. Start checking temperature at the 15-minute mark — ovens vary and chicken breasts of different sizes cook at different rates.
- Remove the skillet from the oven. Let the chicken rest in the pan for 3 to 5 minutes before serving — resting allows the juices to redistribute through the meat rather than pouring out when cut. Garnish with freshly chopped parsley and serve directly from the skillet.
Chef Tips for Perfect Results
Pound the chicken to even thickness. This is the single most impactful technique improvement for anyone who struggles with dry or unevenly cooked chicken breasts. The thin end of an unmodified chicken breast cooks through in 12 minutes while the thick end needs 20 — by the time the thick end is done, the thin end is overcooked and dry. Two minutes with a meat mallet or rolling pin produces a breast of consistent thickness that cooks perfectly from end to end.
Use smoked paprika for deeper flavor. Sweet paprika adds mild earthiness and color. Smoked paprika does all of that and adds a subtle smoky depth that makes the seasoning crust taste more complex and developed. The smokiness also complements the roasted peppers and mozzarella in a way that sweet paprika doesn’t. Use the same quantity — it’s a one-for-one swap.
Add sun-dried tomatoes with the roasted peppers. A quarter cup of oil-packed sun-dried tomatoes, drained and roughly chopped, scattered over the chicken alongside the roasted peppers adds a concentrated, slightly tangy tomato flavor that pairs exceptionally well with the mozzarella and herb seasoning. They don’t need any additional cooking — they go directly on the chicken with the roasted peppers.
Use a cast-iron skillet for the best sear. Cast iron holds heat more consistently than stainless or non-stick and produces a more even, deeply colored sear across the entire surface of each chicken breast. It also transitions seamlessly from stovetop to oven, which is exactly what this recipe requires. If you don’t have cast iron, any oven-safe skillet works — just make sure the handle is oven-safe to 400 degrees F.
Let the skillet preheat fully before adding the chicken. A skillet that isn’t fully up to temperature produces chicken that sticks and steams rather than searing. Heat the oil over medium-high for at least 90 seconds before the chicken goes in. You should see the oil shimmer and move easily when you tilt the pan — that shimmer indicates it’s hot enough for a proper sear.
Common Mistakes to Avoid
Moving the chicken during the sear. The temptation to check the bottom or shift the chicken around the pan is strong, but movement is the enemy of a good sear. The crust forms through sustained contact between the seasoned chicken surface and the hot pan. Every time you move it, you break that contact and interrupt the browning process. Set it down, leave it alone for 3 to 4 minutes, and trust that it will release when the crust has properly formed.
Skipping the temperature check. Chicken breast size varies enormously — a small breast might reach 165 degrees F in 12 minutes while a large breast needs the full 20. Cooking by time alone without checking the internal temperature risks serving undercooked chicken or, more commonly, overcooking the smaller pieces while waiting for the larger ones to finish. An instant-read thermometer takes two seconds and removes all guesswork.
Not patting the chicken dry before seasoning. Moisture on the surface of the chicken creates steam in the pan and prevents the Maillard reaction from occurring. A dry surface sears into a golden crust; a wet surface turns gray and steams. Paper towels and 30 seconds of patting make a visible difference in the quality of the sear.
Burning the garlic. Minced garlic added to a very hot pan over high heat burns in seconds. After the sear, reduce the heat to medium before adding the garlic and keep it moving in the oil around the chicken — not sitting stationary on the hot pan surface where it browns and turns bitter fastest.
Using fresh mozzarella instead of low-moisture shredded. Fresh mozzarella contains significantly more water than low-moisture block or pre-shredded mozzarella. It releases that water during baking, which makes the topping wet rather than melted and bubbly, and can make the chicken surface soggy. Low-moisture mozzarella — the kind sold in blocks or pre-shredded bags — melts cleanly into the stretchy, golden-topped layer this dish is known for.
Variations and Substitutions
Provolone or fontina cheese: Both are excellent alternatives to mozzarella with better melt characteristics and more complex flavor profiles. Provolone adds a slightly sharp, tangy note that contrasts nicely with the sweet roasted peppers. Fontina is buttery and nutty and produces a particularly rich, indulgent topping. Either can replace the mozzarella in the same quantity.
Add mushrooms: Slice 8 ounces of cremini mushrooms and saute them in the same skillet after removing the seared chicken — 4 to 5 minutes over medium-high heat until golden. Return the chicken to the pan on top of the mushrooms before adding the peppers and cheese. The mushrooms add earthiness and absorb the garlic-infused pan drippings, making the finished dish even more flavorful.
Chicken thighs: Boneless, skinless chicken thighs are an excellent substitute for chicken breasts in this recipe. They have more fat, more flavor, and are significantly more forgiving of slight overcooking. Sear and bake as directed, checking for doneness at 165 degrees F — thighs typically take slightly longer than breasts of the same thickness but stay moist even a few degrees above the target temperature.
Add spinach: Wilt two large handfuls of fresh baby spinach in the skillet with the garlic after the sear, before adding the peppers. The spinach collapses into a thin layer in about 60 seconds and adds color, nutrition, and a mild, earthy note that works well under the cheese and peppers.
Pesto version: Spread a thin layer of basil pesto over each seared chicken breast before adding the roasted peppers and cheese. The pesto adds a concentrated basil and Parmesan flavor that makes the dish taste more Italian and pairs particularly well with fresh mozzarella if you want to use it here instead of the low-moisture version.
Serving Suggestions
Serve directly from the skillet with a large spoon to capture the pan juices and any melted cheese and pepper drippings alongside each portion. Garlic mashed potatoes are the natural first choice — they absorb the herbed pan drippings and provide a rich, starchy base that balances the bright pepper and cheese topping. Buttered pasta or steamed rice work equally well for a more complete plate.
For a lighter meal, serve alongside a crisp Caesar salad and a piece of crusty bread for the pan juices. Steamed or roasted broccoli alongside provides a green vegetable that doesn’t compete with the flavors of the main dish and completes the nutritional profile of the plate.
Storage and Reheating
Refrigerator: Store cooled chicken in an airtight container for up to 4 days. The chicken stays moist because the cheese layer on top acts as a moisture barrier during storage. Store with any pan juices poured over the chicken to keep it from drying out.
Freezer: Freeze individual portions wrapped tightly in plastic wrap and then foil for up to 2 months. Thaw overnight in the refrigerator before reheating. The cheese texture changes slightly after freezing — it becomes slightly grainy — but the flavor is unaffected.
Reheating: The oven produces the best reheating result. Place the chicken in a baking dish, add a splash of chicken broth to prevent drying, cover with foil, and warm at 325 degrees F for 15 to 20 minutes until heated through. Remove the foil for the last 5 minutes to re-melt the cheese. The microwave works for quick reheating — cover and heat in 60-second intervals until uniformly hot, though the cheese won’t re-melt as cleanly as in the oven.
Nutritional Information
| Nutrient | Per Serving (1 chicken breast) |
|---|---|
| Calories | 390 |
| Protein | 48g |
| Carbohydrates | 6g |
| Fat | 18g |
| Saturated Fat | 8g |
| Fiber | 1g |
| Sodium | 680mg |
Nutritional values are estimates based on standard 6-ounce chicken breasts and low-moisture mozzarella. Values will vary based on chicken breast size and specific brands used.
FAQ
Can I make this without an oven-safe skillet?
Yes. Sear the chicken in any skillet, then transfer the seared chicken breasts to a greased 9×13-inch baking dish. Pour any pan drippings and the bloomed garlic over the chicken, top with the roasted peppers and cheese, and bake as directed. The result is identical — you just have an extra dish to wash. If you do this often, a 12-inch cast-iron skillet is a worthwhile investment since it’s the most versatile pan for this style of sear-and-bake cooking.
How do I know when the chicken is done without a thermometer?
An instant-read thermometer is the only reliable method for confirming doneness, and for food safety reasons it’s strongly recommended. If you don’t have one, the visual and tactile cues are: the chicken feels firm rather than yielding when pressed in the center, the juices run clear rather than pink when the thickest part is pierced with a knife, and the flesh looks opaque all the way through with no pink remaining when cut. These cues are less precise than a thermometer but are the best alternatives available without one.
Can I prep this dish ahead of time?
Yes. Season the chicken and refrigerate it uncovered on a plate for up to 24 hours before cooking — the seasoning penetrates the surface and produces more deeply flavored chicken than seasoning right before cooking. Roast the peppers up to 2 days ahead and store in the refrigerator. When ready to cook, bring the chicken to room temperature for 15 minutes, then proceed with the sear and bake as directed. The active cooking time is the same; everything is just more organized.
Why did my cheese not melt evenly?
Uneven melting almost always comes from cheese that was too cold when it went into the oven — cold cheese takes longer to melt and can be fully melted in some spots while still clumpy in others when the chicken reaches temperature. Let the shredded mozzarella sit at room temperature for 10 to 15 minutes before adding it to the chicken. Also make sure you’re using freshly shredded low-moisture mozzarella — the anti-caking agents in pre-shredded bagged cheese interfere with smooth, even melting.
Can I use chicken thighs instead of chicken breasts?
Chicken thighs are an excellent substitute and many cooks prefer them for this recipe. Boneless, skinless thighs have more fat and collagen than breasts, which means they stay moist and tender even if they spend a few extra minutes in the oven. They also have a richer, more savory flavor that stands up well to the herb seasoning and mozzarella topping. Sear for 3 to 4 minutes per side and bake until they reach 165 degrees F — this typically takes 18 to 22 minutes depending on size.
Conclusion
Cheesy garlic herb chicken with roasted peppers is a weeknight dinner that consistently overdelivers on the effort-to-result ratio. The sear builds flavor that baking alone can’t produce, the roasted peppers add sweetness that raw peppers never achieve, and the mozzarella ties everything together into a finished dish that looks and tastes intentional and considered. Forty-five minutes, one skillet, and six people are genuinely happy at the table. That’s a recipe worth keeping close.