
No bake pineapple cream dessert layers a buttery graham cracker crust beneath a light, fluffy filling of cream cheese, powdered sugar, crushed pineapple, and whipped topping that sets in the refrigerator into something cool, creamy, and deeply satisfying. Twenty minutes of prep, four hours of chilling, and you have a make-ahead dessert that travels beautifully, feeds a crowd, and tastes like summer regardless of what the calendar says.
| Detail | Info |
|---|---|
| Prep Time | 20 minutes |
| Chill Time | 4 hours minimum |
| Total Time | 4 hours 20 minutes |
| Servings | 12 |
| Difficulty | Easy |
| Cuisine | American |
Why This Recipe Works
The combination of cream cheese and whipped topping in the filling is a pairing that produces a result neither ingredient could achieve alone. Cream cheese provides structure, richness, and a subtle tang that prevents the filling from tasting cloyingly sweet. Whipped topping provides the airy, mousse-like lightness that makes the filling feel refreshing rather than dense. Folded together, they create a filling that’s simultaneously creamy and light — a balance that’s very difficult to achieve with a single dairy product.
Draining the crushed pineapple thoroughly before folding it into the filling is the single most important step in this recipe and the one most likely to be rushed or underestimated. Canned crushed pineapple is packed in juice that, if not fully removed, dilutes the cream cheese mixture and prevents the filling from setting to a sliceable consistency. A filling with excess pineapple juice stays soft and watery no matter how long it chills. Press the drained pineapple firmly in a fine-mesh strainer or squeeze it by the handful in a clean kitchen towel to remove as much liquid as possible — the goal is pineapple that feels almost dry when you press it between your fingers.
Refrigerating the graham cracker crust for 15 to 20 minutes before adding the filling allows the butter to re-solidify and the crumbs to bond into a firm, cohesive base. A crust spread with filling immediately after pressing is too soft to provide the clean, defined layer that makes this dessert look and eat properly. The brief chill gives the crust the structural integrity to support the filling without collapsing or mixing into it at the interface.
Beating the cream cheese until fully smooth before adding anything else is the step that determines whether the finished filling is silky or lumpy. Even small lumps of incompletely beaten cream cheese show up in the finished dessert as visible white chunks that don’t integrate no matter how long the dessert chills. The cream cheese must be at full room temperature and beaten for at least 2 minutes before powdered sugar goes in.
Overnight chilling rather than the 4-hour minimum produces a noticeably better dessert. The filling firms up more completely, the flavors meld, and the graham cracker crust softens just slightly at the base where it’s in contact with the filling — moving from dry and crumbly to a texture closer to a cheesecake crust that’s easier to cut cleanly and more pleasant to eat. The extra time costs nothing and pays off in texture and flavor every time.
Ingredients
| Ingredient | Quantity | Notes |
|---|---|---|
| Crust | ||
| Crushed graham crackers | 2 cups | About 14 to 16 full sheets; crush finely for the most compact crust |
| Unsalted butter, melted | 1/2 cup | Fully melted; binds the crumbs and sets firm when chilled |
| Filling | ||
| Cream cheese, softened | 8 ounces | Full-fat block cream cheese; must be fully room temperature before beating |
| Powdered sugar | 1 cup | Sift before adding to avoid lumps in the filling |
| Vanilla extract | 1 teaspoon | Pure vanilla; rounds out the sweetness and cream cheese flavor |
| Crushed pineapple, well drained | 1 can (20 oz) | Drain and press thoroughly — excess juice prevents the filling from setting |
| Whipped topping, thawed | 8 ounces | Cool Whip or store brand; fold in gently to preserve the airy texture |
| Topping | ||
| Extra whipped topping | To taste | Dolloped or piped over the surface before serving |
| Crushed graham crackers | For garnish | A light sprinkle adds crunch and visual connection to the crust |
| Maraschino cherries (optional) | For garnish | One per serving square for color and a classic retro touch |
Step-by-Step Instructions
Phase 1: Make and Chill the Crust
- Crush the graham crackers into fine crumbs. The most reliable method is to place the crackers in a zip-top bag and roll a rolling pin over them until no large pieces remain. A food processor produces even finer crumbs in seconds. Coarse crumbs with large pieces produce a crumbly crust that doesn’t hold together when sliced — the finer the crumb, the more compact and cohesive the finished crust.
- In a medium bowl, combine the graham cracker crumbs and melted butter. Stir until every crumb is evenly coated with butter and the mixture holds together when you press a small amount between your fingers. If it still seems dry and crumbles apart, add another tablespoon of melted butter.
- Pour the crumb mixture into a 9×9-inch baking dish. Using the bottom of a flat measuring cup or a straight-sided glass, press the crumbs firmly and evenly into the bottom of the dish. Apply firm, even pressure across the entire surface and push the crumbs into the corners so the crust is the same thickness throughout. A well-compacted crust holds together when sliced; a loosely pressed one crumbles and separates from the filling.
- Refrigerate the crust for 15 to 20 minutes until the butter has re-solidified and the crust feels firm to the touch.
Phase 2: Make the Filling
- While the crust chills, drain the crushed pineapple. Pour it into a fine-mesh strainer and press firmly with the back of a spoon to extract the juice. Then transfer the pressed pineapple to a clean kitchen towel or several layers of paper towels and squeeze out any remaining liquid. The pineapple is ready when pressing it produces no visible juice. This step is non-negotiable for a filling that sets properly.
- In a large mixing bowl, beat the room-temperature cream cheese with an electric hand mixer on medium-high speed for 2 full minutes until it is completely smooth, pale, and fluffy. Stop once and scrape down the sides and bottom of the bowl to make sure no unmixed cream cheese remains. Any lumps at this stage will remain in the finished filling.
- Sift the powdered sugar directly into the beaten cream cheese. Beat on medium speed until fully incorporated and smooth. Add the vanilla extract and beat for another 30 seconds.
- Add the well-drained crushed pineapple and fold it into the cream cheese mixture using a rubber spatula. Fold until the pineapple is evenly distributed throughout the filling — about 8 to 10 broad strokes from the bottom of the bowl.
- Add the thawed whipped topping to the bowl. Fold it in gently using the same broad, sweeping motion. The goal is to fully incorporate the whipped topping without deflating it — stop folding the moment no white streaks remain. Overworking the mixture at this stage collapses the air in the whipped topping and produces a dense, flat filling rather than a light, mousse-like one.
Phase 3: Assemble and Chill
- Remove the chilled crust from the refrigerator. Spoon the pineapple cream filling onto the crust and spread it into a smooth, even layer using an offset spatula or the back of a large spoon. Work from the center outward and push the filling into the corners so the layer is uniform in thickness throughout.
- Cover the dish tightly with plastic wrap pressed directly against the surface of the filling to prevent a skin from forming. Refrigerate for at least 4 hours — overnight is strongly preferred for the best texture and flavor.
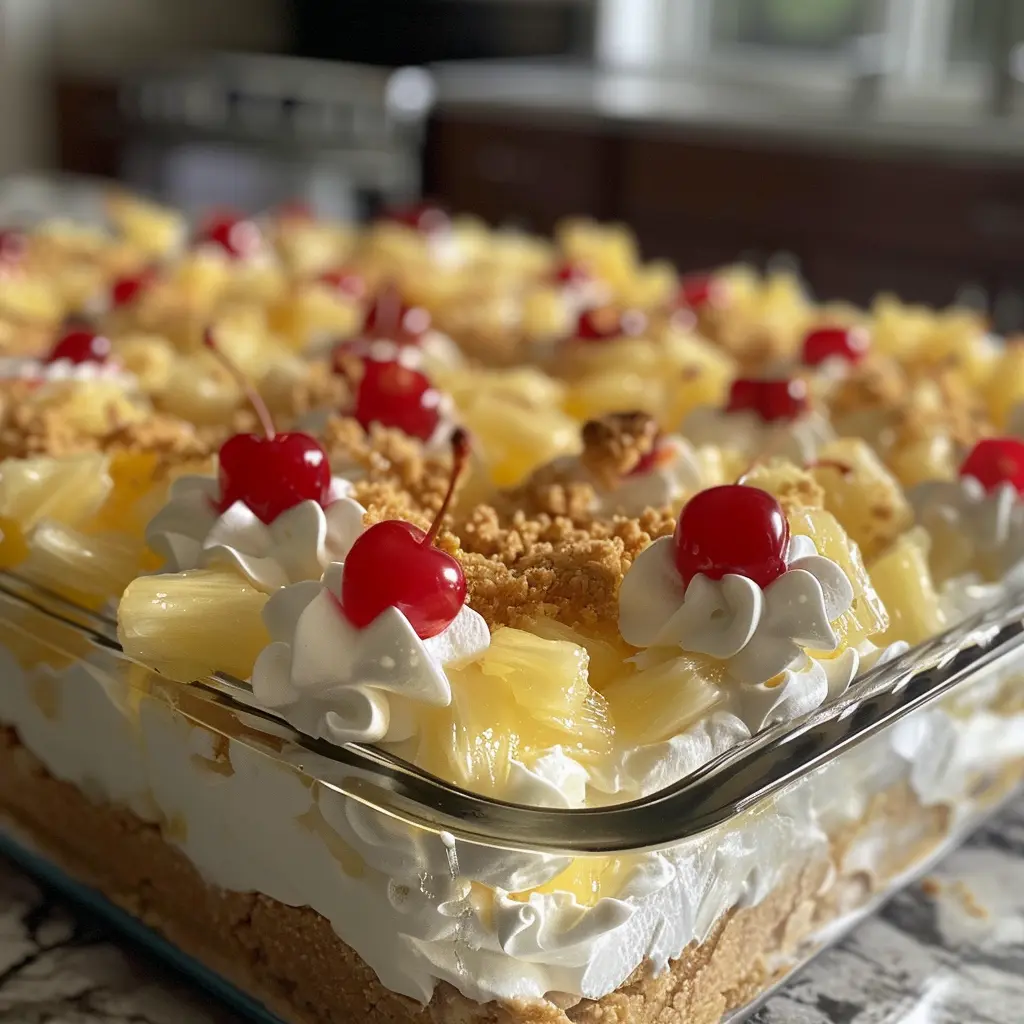
- Just before serving, add the garnishes: dollops or piped swirls of extra whipped topping, a sprinkle of crushed graham crackers, and maraschino cherries if using. Add the garnishes at serving time rather than before chilling — whipped topping added hours before serving can weep and the graham cracker crumbs absorb moisture and lose their texture.
- Slice into 12 squares using a sharp knife wiped clean between each cut. Serve chilled.
Chef Tips for Perfect Results
Drain the pineapple twice. Once through a strainer with the back of a spoon, and then a second time by squeezing in a clean kitchen towel or paper towels. Most recipes drain once, but a second round of pressing removes significantly more juice. The difference in the firmness of the finished filling is substantial — properly double-drained pineapple produces a filling that slices cleanly into defined squares; inadequately drained pineapple produces a soft, soupy filling that pools on the plate.
Bring the cream cheese to full room temperature. Pull it from the refrigerator at least an hour before you plan to make the filling. Press it with your finger — it should give completely without resistance. If the cream cheese is at all firm or cool, it won’t beat smooth and the filling will have lumps. If you forgot to take it out ahead of time, unwrap the block, cut it into cubes, and microwave for 10-second intervals until just soft enough to press.
Add toasted coconut to the filling. A quarter cup of sweetened shredded coconut toasted in a dry skillet for 3 minutes until golden, cooled, and folded into the filling alongside the pineapple, adds a tropical depth and a subtle crunch that connects the dessert to a more complete tropical flavor profile. It also makes a beautiful garnish scattered over the whipped topping before serving.
Use a 9×13-inch pan for thinner slices that serve more people. The recipe works in a 9×13-inch dish and produces thinner but still satisfying slices that can serve 16 to 18 people — ideal for large gatherings and potlucks. The chill time stays the same; the filling-to-crust ratio is slightly lower but still well-balanced.
Chill the mixing bowl before whipping or folding. A cold bowl keeps the whipped topping at its firmest and most stable during the folding process. If your kitchen is warm, place the mixing bowl in the refrigerator for 10 minutes before you start the filling. Warm whipped topping deflates more readily under folding and can make the filling looser than intended.
Common Mistakes to Avoid
Insufficient pineapple draining. This is the most common reason a no-bake pineapple dessert doesn’t set properly. The juice from canned crushed pineapple is almost as much liquid as the pineapple itself. Inadequately drained pineapple introduces enough extra liquid into the filling to prevent it from firming up regardless of chilling time. Press, squeeze, and press again until the pineapple is nearly dry.
Using cold cream cheese. Cold cream cheese beaten with a mixer doesn’t become smooth — it stays lumpy and those lumps persist in the finished filling. The cream cheese absolutely must be at full room temperature before the mixer touches it. This is not a step that can be rushed or skipped.
Beating the whipped topping in rather than folding it. The whipped topping is full of air that makes the filling light and mousse-like. Running the mixer after the whipped topping is added deflates that air in seconds. Switch to a rubber spatula the moment the whipped topping goes into the bowl and use gentle, broad folding strokes only.
Not pressing the crust firmly enough. A loosely pressed graham cracker crust crumbles and falls apart when the dessert is sliced, mixing into the filling rather than staying as a defined layer at the bottom. Press with firm, consistent pressure using a flat-bottomed object — a measuring cup works well — until the crust feels compact and doesn’t shift when the dish is tilted.
Serving before fully chilled. Four hours is the minimum and overnight is genuinely better. A filling that hasn’t chilled long enough is too soft to cut cleanly, and the graham cracker crust hasn’t had time to bond properly with the filling above it. Patience here produces a completely different — and significantly better — dessert.
Variations and Substitutions
Coconut cream version: Add a half cup of toasted sweetened coconut to the filling alongside the pineapple and use coconut extract in place of the vanilla extract. Top the finished dessert with additional toasted coconut. The pineapple and coconut combination is a tropical classic — a no-bake version of a pina colada in dessert form.
Mango pineapple: Replace half the crushed pineapple with an equal amount of well-drained canned mango chunks, finely diced. The mango adds a different tropical sweetness that complements the pineapple without competing with it. Garnish with fresh mango slices just before serving for a visually striking presentation.
Vanilla wafer crust: Replace the graham crackers with crushed Nilla wafers and reduce the butter slightly to 6 tablespoons since vanilla wafers are slightly less absorbent than graham crackers. The vanilla wafer crust has a more delicate, slightly sweeter flavor that pairs particularly well with the pineapple filling.
Add cream of coconut: Stir two tablespoons of cream of coconut (not coconut milk — cream of coconut is thick and sweet) into the cream cheese mixture with the powdered sugar for a richer, more coconut-forward flavor throughout the filling. Reduce the powdered sugar by two tablespoons to account for the sweetness the cream of coconut adds.
Make it with fresh pineapple: Fresh pineapple can replace canned but requires important handling. Raw fresh pineapple contains bromelain, an enzyme that breaks down proteins — including the proteins in cream cheese and whipped topping — and can prevent the filling from setting. To use fresh pineapple, cook it briefly (5 minutes in a saucepan with a tablespoon of sugar) to deactivate the bromelain before draining and cooling completely. Canned pineapple has already been heat-processed, so the enzyme is inactive.
Serving Suggestions
Serve in squares directly from the baking dish with a thin spatula to lift clean portions. The dessert is self-contained and needs no sauce or additional accompaniment, though a spoonful of fresh pineapple chunks alongside each serving adds a fresh fruit note that emphasizes the tropical theme. Toasted coconut scattered over the top at the table adds texture and visual appeal without requiring any additional prep.
For a more formal presentation, use a 9-inch springform pan rather than a square baking dish. After chilling, release the spring and lift away the ring, leaving the dessert standing free on the base. The defined, vertical sides look considerably more polished than a dessert scooped from a dish and make for an impressive table presentation at a dinner party or holiday gathering.
Storage
Refrigerator: Store covered tightly with plastic wrap in the refrigerator for up to 4 days. The filling stays firm and the flavors continue to develop over the first 24 hours. Add the garnishes — whipped topping, graham cracker crumbles, cherries — fresh each day rather than in advance, since the whipped topping weeps and the graham cracker crumbles absorb moisture and soften during storage.
Freezer: This dessert freezes surprisingly well. Cover tightly with plastic wrap and then foil and freeze for up to 1 month. Thaw in the refrigerator for 4 to 6 hours before serving. The texture is slightly denser after freezing but still delicious, and the frozen version actually has a texture reminiscent of a semifreddo that some people prefer. Add garnishes after thawing.
Nutritional Information
| Nutrient | Per Serving (based on 12 squares) |
|---|---|
| Calories | 310 |
| Protein | 3g |
| Carbohydrates | 38g |
| Fat | 17g |
| Saturated Fat | 10g |
| Fiber | 1g |
| Sugar | 26g |
| Sodium | 190mg |
Nutritional values are estimates based on standard ingredients. Values will vary based on specific brands and exact portion sizes.
FAQ
Why didn’t my filling set firmly?
The most common cause is insufficiently drained pineapple. Even a small amount of excess juice can keep the cream cheese mixture too loose to firm up during chilling. The second most common cause is cream cheese that was too cold when beaten — cold cream cheese doesn’t fully incorporate and leaves pockets of dense, undissolved cheese that affect how the filling sets. If you’ve already assembled the dessert and it’s not setting after 4 hours, give it more time — sometimes it needs 6 to 8 hours. If it’s still soft after 8 hours, the pineapple was the likely cause.
Can I use fresh whipped cream instead of Cool Whip?
Yes, with an important adjustment. Fresh whipped cream is less stable than Cool Whip and can weep and deflate over the 4 to 8 hours of chilling required. Stabilize it by dissolving half a teaspoon of unflavored gelatin in a teaspoon of warm water and folding it into the cream as it approaches stiff peaks. Stabilized whipped cream holds its structure for up to 24 hours in the refrigerator and produces a filling with a lighter, cleaner flavor than the store-bought alternative.
Can I make this in individual cups?
Yes. Press a tablespoon of the graham cracker crust mixture into the bottom of each cup or small mason jar, chill for 10 minutes, then spoon or pipe the filling on top. Individual portions are easy to serve at parties, look polished, and can be made up to 2 days ahead and stored in the refrigerator. Add the garnishes individually right before serving.
Can I use a different fruit?
Mandarin oranges, well-drained, work beautifully in place of pineapple for a creamsicle-adjacent flavor. Canned peaches, drained and finely diced, produce a warmer, stone-fruit version that’s excellent in fall and winter. Strawberry preserves or crushed fresh strawberries (squeezed very dry) create a strawberry cream cheese square that’s a natural variation. Any fruit can work as long as it’s as dry as possible before folding into the filling.
How do I get clean slices?
Three things produce clean slices: full overnight chilling so the filling is completely firm, a sharp knife wiped clean with a damp cloth between each cut, and cutting without sawing — press straight down with the knife rather than dragging it back and forth. For the cleanest edges, run the knife blade under hot water, dry it, make the cut, then wipe and repeat. The warmth helps the knife pass through the firm filling cleanly without dragging.
Conclusion
No bake pineapple cream dessert is exactly the kind of recipe a busy cook keeps in permanent rotation. The prep is effortless, the ingredients are accessible, and the result is a dessert that looks impressive and tastes genuinely special. Make it the night before, add the garnishes before it hits the table, and watch it disappear faster than anything else at the gathering. For a make-ahead, crowd-feeding, tropically flavored dessert that requires no oven and no special equipment, this one is hard to beat.