
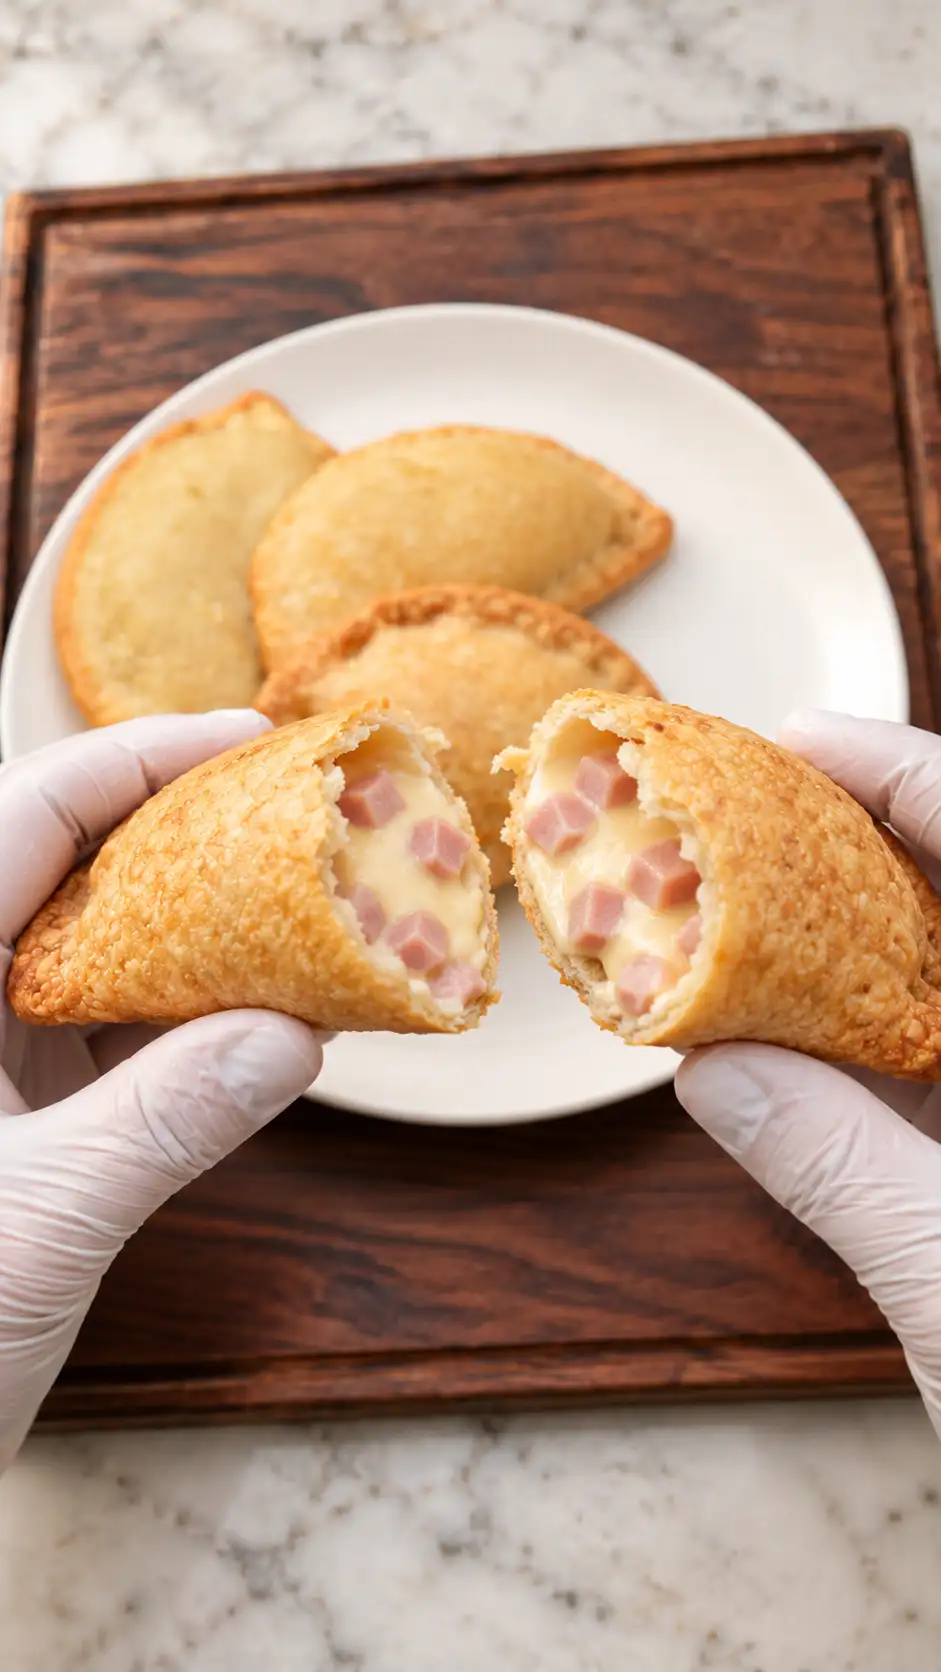
EMPANADILLAS DE JAMÓN Y QUESO are one of my all-time favorite comfort foods. These savory pastries, filled with melted cheese and tender ham, are perfect for family gatherings or a cozy dinner at home. With a crisp golden crust and a warm, gooey center, they’re sure to become a staple in your kitchen. Today, I’ll guide you through making these delightful empanadillas, ensuring that even novice cooks can achieve delicious results.
For those interested in exploring different pastry recipes, Serious Eats offers a wealth of resources on creating perfect doughs. Additionally, if you’re curious about some of the best cheese options for melting, BBC Good Food provides a handy guide that can help you select the perfect cheese to use in your empanadillas.
Table of Contents
Why You’ll Love This Dish
Empanadillas de jamón y queso are a wonderful blend of flavors and textures that appeal to both adults and children. The dough is simple to make and requires just a few pantry staples. Meanwhile, the filling is a comforting combination of cheese and ham, seasoned with a hint of pepper. These empanadillas are not just tasty, but they’re also versatile. Perfect as an appetizer, a main dish, or even a snack, they can be enjoyed hot from the oven or at room temperature. Additionally, making them at home allows you to customize the filling to your liking, experimenting with different cheeses or adding herbs for extra flavor.
One of the reasons you’ll love this dish is its adaptability. If you’re hosting a party or a casual get-together, these empanadillas make an excellent finger food that guests can easily pick up and enjoy. Their portability also makes them a great option for picnics or lunchboxes. Moreover, the combination of ham and cheese is a classic that never fails to satisfy, and the slight peppery kick adds just the right amount of spice to make them interesting without overpowering the other flavors.
The beauty of empanadillas lies in their simplicity and the comfort they bring. There’s something inherently soothing about biting into a warm, flaky pastry that oozes with cheesy goodness, complemented by the savory richness of ham. For those who appreciate a good pastry, the contrast between the crisp outer shell and the soft, melty interior is a delight to the senses. Plus, the process of making these empanadillas can be a fun and rewarding experience, especially if you involve family or friends in the preparation.
The Recipe
Let’s dive into the heart of the recipe. Gather your ingredients and follow these easy steps to make your very own empanadillas de jamón y queso.
For the Dough:
| Amount | Ingredient | Notes |
|---|---|---|
| 270 g | harina de trigo | Use all-purpose flour for best results |
| 90 g | aceite de oliva | Extra virgin olive oil preferred |
| 90 ml | vino blanco | A dry white wine works well |
| 0.5 tsp | sal | Adjust to taste |
The dough is a crucial component of the empanadillas, providing the structure and texture that encases the filling. The combination of flour, olive oil, wine, and salt creates a dough that is both flavorful and easy to work with. The olive oil adds a subtle richness, while the wine contributes to the dough’s elasticity and flavor.
For the Filling:
| Amount | Ingredient | Notes |
|---|---|---|
| 12 slices | queso fundido tipo tranchete | Substitute with any mild melting cheese |
| 100 g | jamón cocido en daditos | Can replace with turkey or chicken |
| 1 g | pimienta | Add more for a spicier kick |
The filling is where the magic happens. The cheese should be a good melting variety, like tranchete, which ensures a creamy, gooey interior. The ham provides a savory depth that pairs perfectly with the cheese. If you’re feeling adventurous, consider adding a bit of chopped fresh herbs like parsley or chives for an extra burst of flavor.
For Finishing:
| Amount | Ingredient | Notes |
|---|---|---|
| 1 | egg huevo batido | Optional; gives a golden finish |
The egg wash is optional, but it does give the empanadillas a beautiful golden sheen that makes them look as good as they taste. It also adds a slight crispness to the crust, enhancing the overall texture.
Instructions:
- Start by mixing the flour, olive oil, white wine, and salt in a bowl until a dough forms. Wrap the dough in plastic wrap and refrigerate for an hour to rest.
Allowing the dough to rest in the refrigerator is a crucial step. This resting period helps to relax the gluten in the flour, making the dough easier to roll out and preventing it from shrinking during baking.
- Preheat your oven to 180°C (356°F), ensuring the heat is set to both top and bottom. Roll out the dough thinly on a floured surface and cut it into discs.
Rolling the dough thinly ensures that it cooks evenly and crisps up nicely in the oven. Using a cookie cutter or the rim of a glass can help achieve consistently sized discs.
- Place a slice of cheese, a portion of the diced ham, and a sprinkle of pepper on each disc. Lightly moisten the edges with water, fold the dough over the filling, and seal the edges using a fork.
This step is where you can let your creativity shine. Feel free to experiment with other fillings or add ingredients like caramelized onions or sautéed mushrooms for a twist.
- Arrange the empanadillas on a baking sheet lined with parchment paper. If desired, brush the tops with beaten egg for a glossy, golden finish. Bake for approximately 15 minutes or until the empanadillas are golden and the dough is cooked through. Let them cool slightly on a wire rack before serving.
Baking the empanadillas on parchment paper prevents them from sticking to the tray and makes cleanup a breeze. The wire rack ensures even cooling, preventing sogginess.
For extra flavor, consider adding a sprinkle of herbs such as oregano or thyme to the filling or the dough itself. These empanadillas are best enjoyed warm with your favorite dipping sauce.
Kitchen Tools You’ll Need
| Tool | Why you need it |
|---|---|
| Mixing bowl | To combine the dough ingredients |
| Rolling pin | For rolling out the dough to the desired thinness |
| Baking sheet | To place the empanadillas for baking |
| Fork | To seal the edges of the empanadillas |
| Wire rack | To cool the empanadillas evenly after baking |
Having the right tools can make the process of making empanadillas much smoother. A rolling pin is essential for achieving a uniform dough thickness, while a fork is perfect for crimping the edges and ensuring a good seal. The wire rack is a must for cooling, as it prevents the empanadillas from becoming soggy by allowing air to circulate around them.
The Benefits of Each Ingredient
| Ingredient | What it does here |
|---|---|
| Harina de trigo | Provides the structure and base for the empanadilla dough |
| Aceite de oliva | Adds flavor and helps create a tender crust |
| Vino blanco | Contributes to the dough’s flavor and texture |
| Sal | Enhances the overall flavor of the dough |
| Queso fundido | Melts beautifully, creating a creamy filling |
| Jamón cocido | Adds a savory, meaty element to the filling |
| Pimienta | Adds a slight kick and enhances the flavor profile |
| Huevo batido | Gives the empanadillas a beautiful golden finish when baked |
Each ingredient in this recipe plays an important role, from providing structure to enhancing flavor. The balance between the dough and filling ingredients is what makes these empanadillas so satisfying.
What to Serve With This Dish
| Idea | Why it pairs well |
|---|---|
| Tomato sauce | Complements the cheesy filling with a tangy contrast |
| Green salad | Offers a refreshing, crunchy counterpoint |
| Roasted vegetables | Adds a warm, savory side dish |
| Spanish rice | Enhances the meal with a flavorful, hearty side |
Pairing your empanadillas with the right side dishes can elevate the meal to new heights. A simple tomato sauce can be a delightful dipping option, while a fresh green salad provides a crisp, refreshing contrast to the rich pastries. Roasted vegetables or Spanish rice can round out the meal, offering additional textures and flavors.
Storage & Leftover Tips
| Method | How long | Tip |
|---|---|---|
| Refrigeration | Up to 3 days | Store in an airtight container to maintain freshness |
| Freezing | Up to 2 months | Freeze before baking for best results |
| Reheating | Until warm | Heat in an oven or toaster oven for a crisp finish |
These empanadillas are a joy to make and share, bringing a little piece of culinary tradition to your home. Whether you’re serving them for a special occasion or simply as a comforting meal, they’re sure to impress.
Storing leftovers properly ensures you can enjoy your empanadillas even days after they’ve been made. Refrigerating them in an airtight container helps to retain their freshness, while freezing them before baking allows you to have a quick, homemade snack ready whenever you desire. When reheating, using an oven or toaster oven helps to restore the original crispness of the pastry, making them almost as good as fresh out of the oven.
In conclusion, empanadillas de jamón y queso are not just a dish, but an experience—a combination of flavors, textures, and traditions that bring warmth and joy to any table. Whether you’re a seasoned cook or a kitchen novice, this recipe offers a delightful way to explore the world of pastry-making, with results that are sure to impress.
FAQs About EMPANADILLAS DE JAMÓN Y QUESO
Can I substitute another type of cheese?
Absolutely! While queso fundido is traditional, you can use mozzarella, cheddar, or any mild melting cheese you prefer.
How should I store leftover empanadillas?
Keep any leftovers in an airtight container in the refrigerator for up to 3 days. Reheat them in the oven to retain their crispiness.
Can I prepare the dough in advance?
Yes, you can prepare the dough a day in advance and refrigerate it. This can save time when you’re ready to assemble and bake the empanadillas.
Empanadillas de Jamón y Queso
Ingredients
Equipment
Method
- Mezcla harina, aceite, vino y sal hasta formar una masa. Envuelve y refrigera 1 hora.
- Precalienta a 180 °C, calor arriba y abajo. Estira la masa fina y corta discos.
- Reparte queso, jamón y pimienta. Humedece los bordes con agua, dobla y sella con un tenedor.
- Coloca sobre papel de horno; pincela con huevo si quieres. Hornea unos 15 minutos, hasta dorar y cocer la masa. Deja templar sobre una rejilla.