
Hello, friends! Today, I’m thrilled to share one of my all-time favorite comfort foods: Classic Chicken Pot Pie with Flaky Pastry. This dish brings back memories of cozy family dinners around the table, where the chatter and laughter were as warm as the pie itself. There’s something so special about the way this hearty meal brings everyone together. Whether it’s a chilly evening or you’re just in the mood for something heartwarming, this chicken pot pie is sure to hit the spot.
Why You’ll Love This Comfort Food
- Hearty and Satisfying: This chicken pot pie is packed with tender chicken, vibrant vegetables, and a creamy sauce, all encased in a golden, flaky crust. It’s a complete meal that fills you up and warms your heart. The combination of rich sauces and juicy chicken creates a symphony of flavors that dances on your palate. The crust, with its buttery layers, perfectly complements the savory filling, providing a textural contrast that makes each bite delightful.
- Family-Friendly: Kids and adults alike will adore this dish. The familiar flavors and comforting textures make it a hit with even the pickiest eaters. It’s a great way to sneak in some vegetables for those who might otherwise turn up their noses. The colorful peas and carrots add visual appeal, often tempting even the most reluctant vegetable eaters to give them a try.
- Make-Ahead Friendly: You can prepare the filling ahead of time, making it a convenient option for busy weeknights. Simply assemble and bake when you’re ready. This allows you to enjoy more time with your family during dinner, knowing that most of the hard work is already done. Preparing the filling in advance also allows the flavors to meld and deepen, resulting in an even tastier pie.
- Customizable: Feel free to swap in your favorite vegetables or use leftover turkey after the holidays. The recipe is wonderfully adaptable to whatever you have on hand. Consider adding mushrooms for an earthy flavor or corn for a touch of sweetness. You might also experiment with herbs, such as rosemary or sage, to give the pot pie a unique twist.
- Impressive Yet Easy: It looks and tastes like it took hours, but with my step-by-step instructions, you’ll have it ready with ease. Even if you’re a beginner in the kitchen, this recipe will guide you to a successful and satisfying result. The process is straightforward, and with a little patience, you’ll achieve that perfect balance of creamy filling and flaky crust.
The Recipe
Prep Time: 30 minutes
Cook Time: 40 minutes
Servings: 6
Calories: 450 per serving
Ingredients
- 2 cups cooked chicken, diced
- 1 cup peas
- 1 cup carrots, diced
- 1/2 cup celery, diced
- 1/3 cup butter
- 1/3 cup all-purpose flour
- 1/2 teaspoon salt
- 1/4 teaspoon black pepper
- 1/4 teaspoon thyme
- 1 3/4 cups chicken broth
- 2/3 cup milk
- 1 package refrigerated pie crusts
Instructions
-
Preheat your oven to 425°F (220°C). This ensures your pie will bake to golden perfection. A well-preheated oven is crucial for achieving that perfect flaky crust. If your oven isn’t hot enough, the crust won’t crisp up properly, leaving it doughy rather than deliciously flaky.
-
Prepare the filling: In a saucepan, melt butter over medium heat. Stir in flour, salt, pepper, and thyme until well blended. Gradually stir in chicken broth and milk. Cook, stirring constantly, until the mixture thickens and begins to bubble. This step is essential for creating a creamy base that envelops your chicken and vegetables in rich flavor. Pay attention to the consistency; it should be thick enough to coat the back of your spoon.
-
Assemble the pie: Stir in the chicken, peas, carrots, and celery. Remove from heat. Place one pie crust in a pie pan, ensuring it fits snugly. Pour the chicken mixture into the crust. Make sure the filling is evenly distributed for a uniform bake. If the edges of the crust extend beyond the rim of the pan, fold them under to create a neat edge that won’t burn during baking.
-
Top it off: Cover with the second crust, sealing the edges. Cut several slits in the top to allow steam to escape. This is crucial to prevent the pie from becoming soggy inside. You can also use a fork to press the edges together, creating a decorative pattern that seals the pie.
-
Bake: Place the pie on a baking sheet to catch any drips, and bake for 30 to 40 minutes, or until the crust is golden brown. Let it cool for a few minutes before serving. Cooling allows the filling to set slightly, making it easier to slice and serve. If the edges brown too quickly, cover them with foil to prevent burning.
Kitchen Tools You’ll Need
- Pie Pan: An 8 or 9-inch pie pan works perfectly. The size ensures the crust fits well and the filling cooks evenly. Glass or ceramic pans are preferable as they conduct heat evenly, helping the crust bake uniformly.
- Saucepan: For preparing the creamy filling. A heavy-bottomed saucepan helps prevent the sauce from burning or sticking. Ensure the pan is large enough to allow for easy stirring and incorporation of ingredients.
- Rolling Pin: To roll out the pie crust if needed. This tool is useful if you decide to make your own crust or need to adjust the thickness of a store-bought one. A well-rolled crust ensures even baking and a professional finish.
- Baking Sheet: To catch any overflow while baking. This prevents messes in your oven and makes cleanup easier. A rimmed baking sheet is ideal to contain any spills.
The Benefits of Each Ingredient
- Chicken: Provides lean protein, making the dish hearty and filling. Choose chicken breast for a leaner option or thighs for more flavor. Chicken adds a substantial, satisfying element to the pie, ensuring that even a small slice is filling.
- Peas and Carrots: Add natural sweetness and a pop of color, along with essential vitamins. These vegetables are packed with nutrients like fiber and vitamin A. They also enhance the visual appeal of the pie with their vibrant hues.
- Celery: Offers a subtle crunch and aromatic flavor. It’s a low-calorie addition that brings a fresh dimension to the dish. Celery also adds a slight peppery note that complements the other flavors.
- Butter and Flour: Create a roux that thickens the sauce to a perfect consistency. This classic technique is key to achieving a smooth, velvety sauce. Butter adds richness, while flour provides the structure needed for the sauce to hold together.
- Thyme: Brings a warm, earthy note that complements the chicken beautifully. Thyme’s aromatic qualities enhance the overall depth of flavor in the pie. Its subtle herbal notes elevate the dish from simple to sophisticated.
What to Serve With This Comfort Food
This chicken pot pie pairs wonderfully with a simple side salad or steamed green beans for a complete meal. A crisp salad with a tangy vinaigrette can balance the richness of the pie. For a truly comforting dinner, serve it with a bowl of warm, homemade soup like the ones you’ll find in my Simple Vegetable Soup Recipe or Creamy Tomato Basil Soup right here on {BLOG_DOMAIN}. A slice of crusty bread could also be a delightful accompaniment, perfect for sopping up any leftover filling. For a refreshing contrast, consider serving a light fruit salad with citrus segments and fresh mint.
Storage & Leftover Tips
- Refrigerate: Store any leftovers in an airtight container in the fridge for up to 3 days. Reheat in the oven at 350°F (175°C) until warmed through. This method helps maintain the crust’s flakiness compared to microwaving. If reheating individual slices, consider wrapping them in foil to prevent the edges from drying out.
- Freeze: You can also freeze the pie before baking. Wrap it tightly in foil and plastic wrap, and it will keep for up to 3 months. Bake from frozen at 425°F (220°C) for about an hour. This is a great way to have a homemade meal ready to go on those busy nights when you don’t feel like cooking from scratch. If you prefer, you can also freeze slices individually for easy single-serving reheating.
In conclusion, this Classic Chicken Pot Pie with Flaky Pastry is more than just a meal. It’s a little piece of home, a dish that brings us together and reminds us of the simple joys of sharing food with loved ones. I hope it becomes a favorite in your home as it is in mine. Happy cooking!
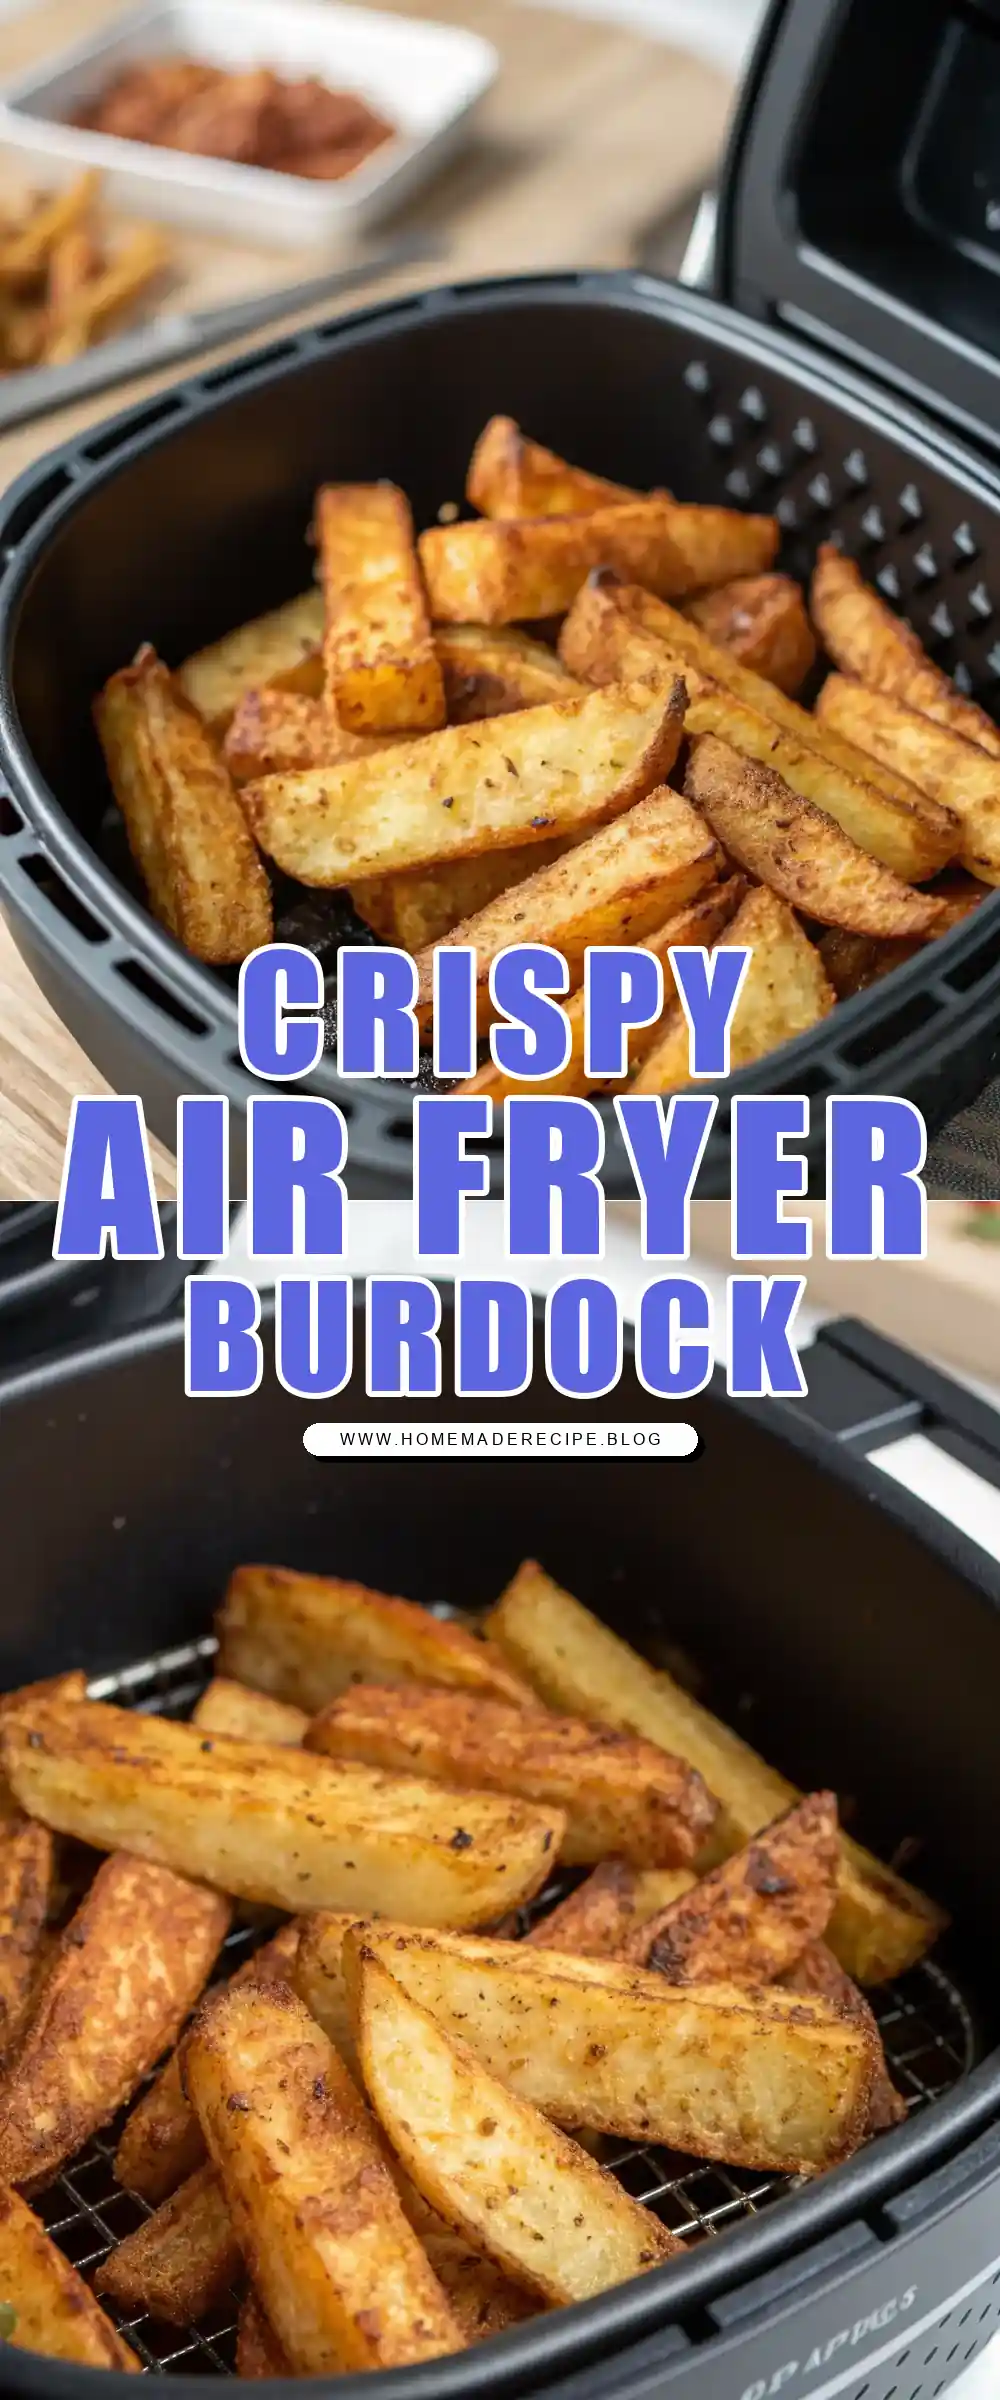

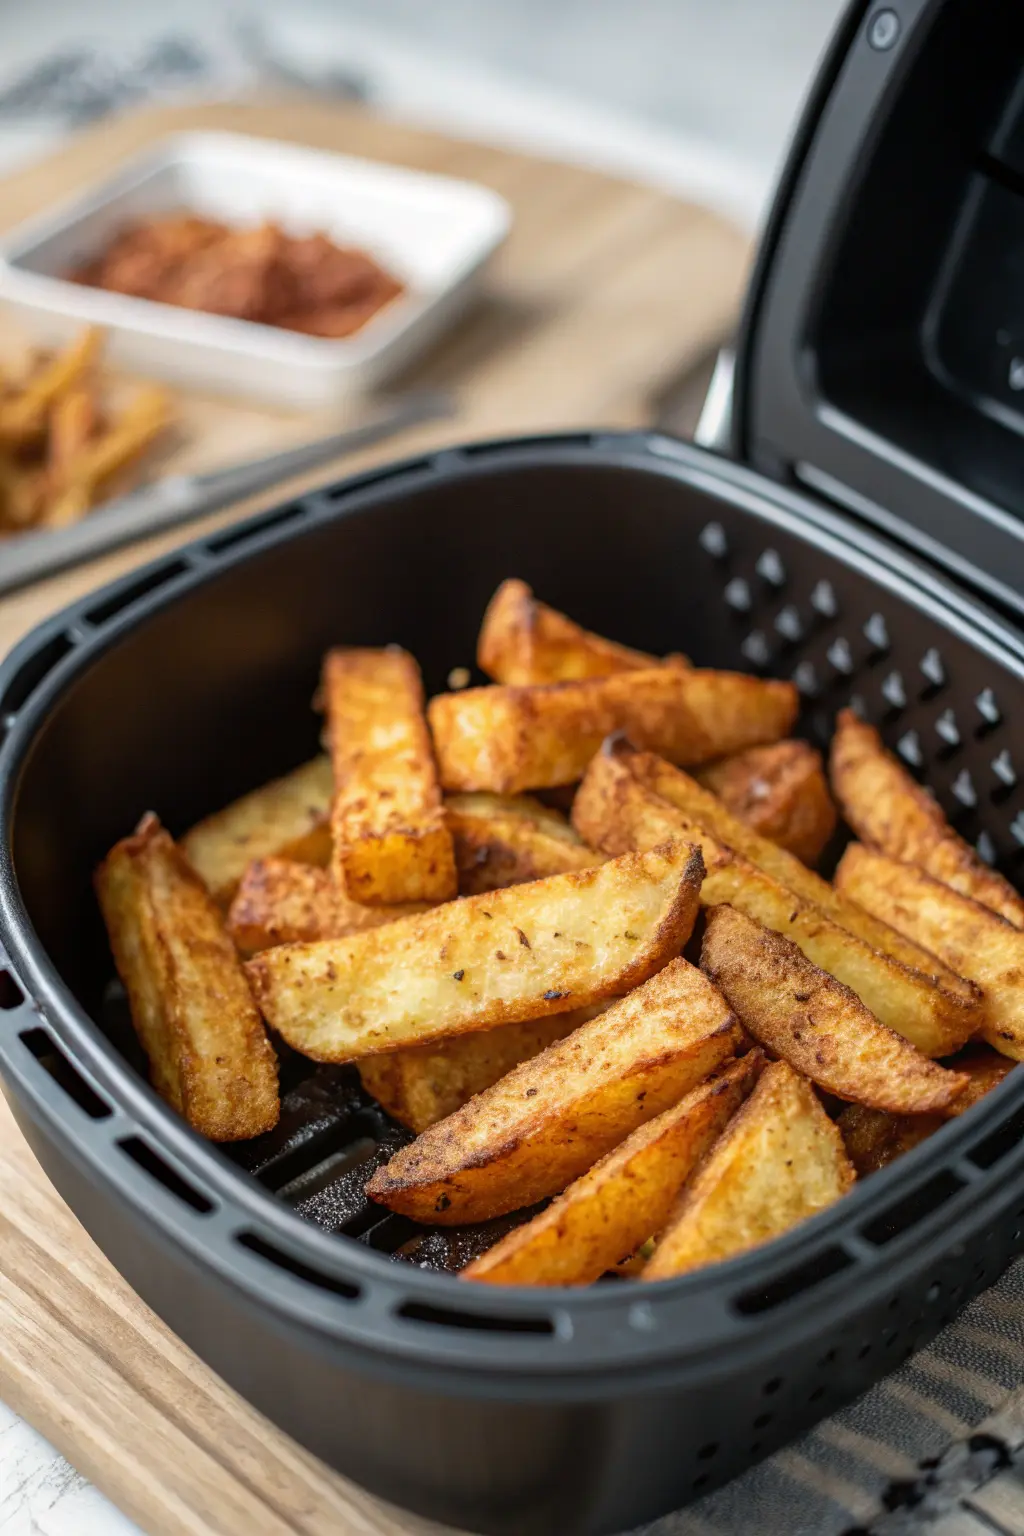
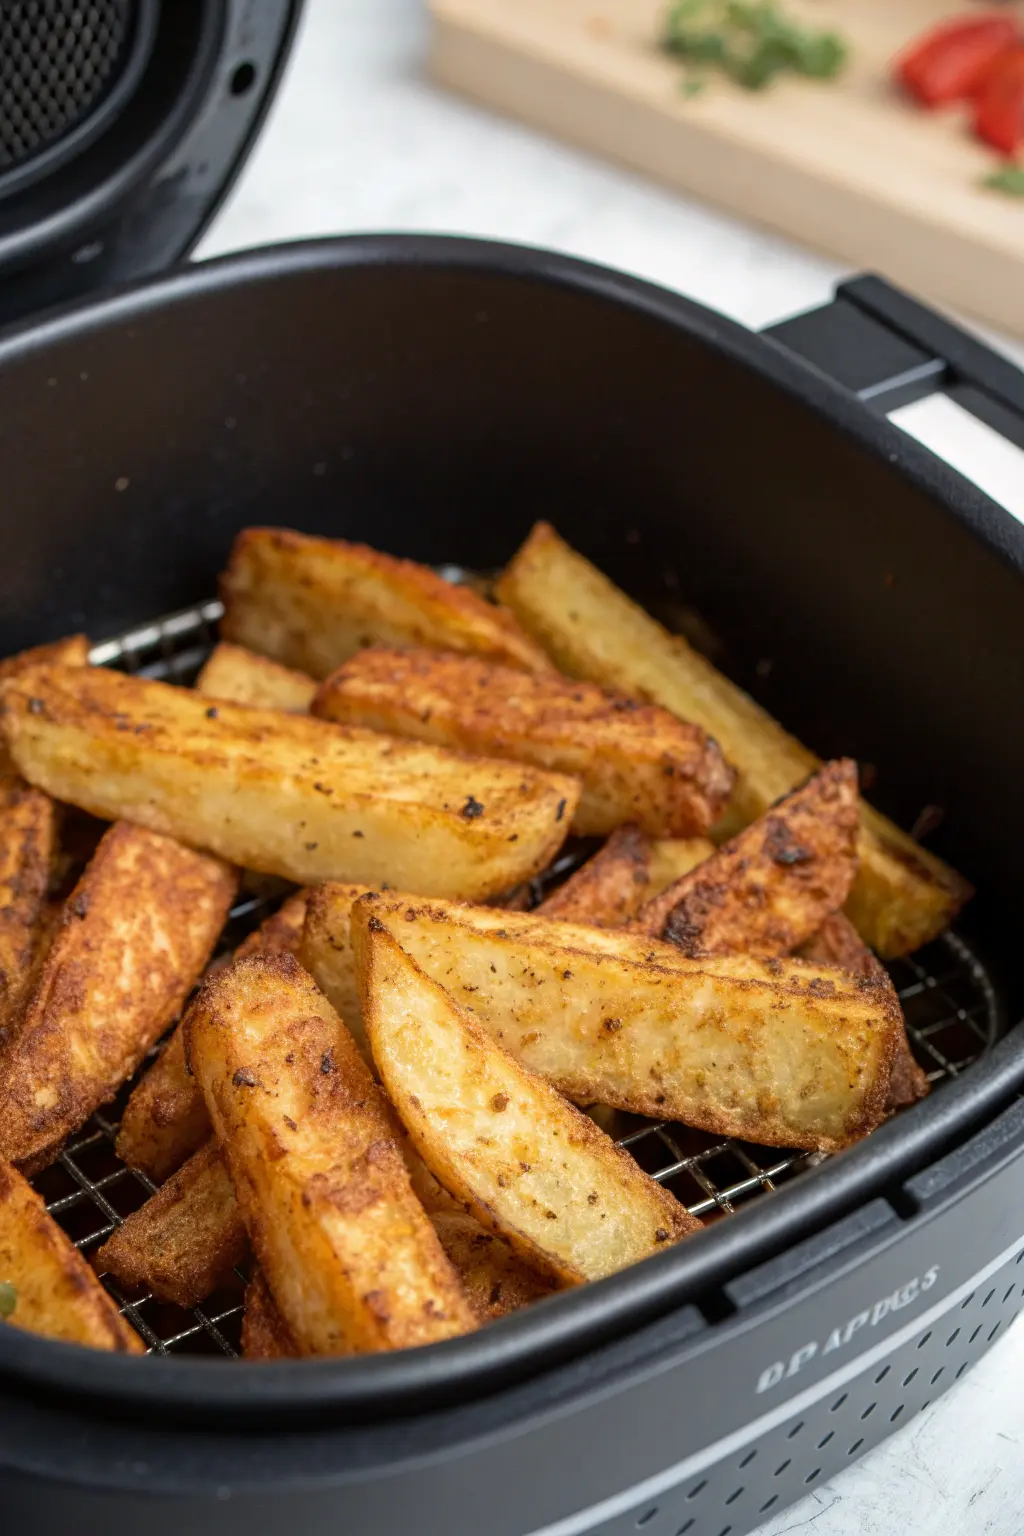
Air Fryer Burdock
Ingredients
Equipment
Method
- Preheat the air fryer to 375°F (190°C) for 3-5 minutes.
- In a mixing bowl, combine the burdock root strips, olive oil, soy sauce, garlic powder, salt, and black pepper. Toss until evenly coated.
- Place the burdock mixture in the air fryer basket in a single layer.
- Cook for 12-15 minutes, shaking the basket halfway through for even cooking, until crispy and golden brown.
- If using, sprinkle with sesame seeds before serving.