

There’s something truly magical about the smell of freshly baked chocolate chip cookies wafting through the house. It reminds me of cozy afternoons spent in the kitchen with my grandmother, eagerly waiting by the oven door. These classic chocolate chip cookies hold a special place in my heart, and I’m thrilled to share this cherished recipe with you. Whether you’re a seasoned baker or a beginner, these cookies are a delightful treat that bring warmth and happiness to any home.
Why You’ll Love This Cookie Recipe
- Easy to Make: This recipe is straightforward and perfect for bakers of all skill levels. With a few simple steps, you’ll have a batch of delicious cookies ready in no time. Even if you’ve never baked before, the instructions are foolproof, guiding you step-by-step through the process. The simplicity of this recipe ensures that you won’t need any fancy equipment or hard-to-find ingredients, making it a go-to choice whenever the craving strikes.
- Family Favorite: These cookies are a hit with kids and adults alike, making them a great choice for family gatherings or a sweet after-school snack. Imagine the joy on your children’s faces when they come home from school to the smell of cookies baking in the oven—a memory that will last a lifetime. Consider hosting a cookie-baking day with your family, turning the kitchen into a place of laughter and sweet aromas.
- Perfect Texture: Achieve the ideal balance of chewy and crispy with every bite, thanks to the combination of real butter and brown sugar. The edges have a delightful crunch, while the centers remain soft and chewy, making them truly irresistible. The secret is in the precise baking time and the quality of ingredients, which together create a cookie that is perfectly balanced in texture.
- Customizable: Feel free to add your favorite mix-ins like nuts or dried fruit to make these cookies your own. Consider adding walnuts for a nutty crunch or dried cranberries for a tart contrast, turning a classic into something uniquely yours. You can even experiment with different types of chocolate chips, such as dark chocolate, milk chocolate, or even white chocolate to suit your taste preferences.
- Comforting and Nostalgic: Few things evoke a sense of comfort like a warm chocolate chip cookie, taking you back to simpler times. Sharing these cookies with friends and family brings a sense of togetherness and joy, reminiscent of childhood memories. They are perfect for any occasion, whether it’s a lazy Sunday afternoon or a festive holiday gathering.
The Recipe
Prep Time: 15 minutes
Cook Time: 10-12 minutes
Servings: 24 cookies
Calories: Approximately 150 per cookie
Ingredients:
- 1 cup unsalted butter, softened
- 3/4 cup brown sugar
- 3/4 cup granulated sugar
- 2 large eggs
- 1 teaspoon vanilla extract
- 2 1/4 cups all-purpose flour
- 1 teaspoon baking soda
- 1/2 teaspoon salt
- 2 cups semi-sweet chocolate chips
Instructions:
- Preheat your oven to 350°F (175°C). Line a baking sheet with parchment paper. This step is crucial to ensure your cookies bake evenly and don’t stick to the pan. It also makes cleaning up a breeze, as you can simply discard the parchment paper after baking.
- In a large bowl, cream together the butter, brown sugar, and granulated sugar until smooth and fluffy. This can take about 2-3 minutes. The creaming process is important as it incorporates air into the mixture, which helps the cookies rise. Make sure your butter is at room temperature for optimal creaming.
- Add the eggs one at a time, beating well after each addition. Stir in the vanilla extract. This ensures that the eggs are fully incorporated and the batter remains smooth. The vanilla extract not only enhances the flavor but also adds a subtle, sweet aroma that complements the chocolate chips.
- In another bowl, whisk together the flour, baking soda, and salt. Gradually add this to the creamed mixture, mixing until just combined. Over-mixing can lead to tough cookies, so be gentle. Be sure to scrape down the sides of the bowl to ensure all ingredients are well mixed.
- Fold in the chocolate chips with a spatula, ensuring they’re evenly distributed. You want each cookie to have a generous amount of chocolate in every bite. This step is where you can get creative with additional mix-ins if desired.
- Drop rounded tablespoons of dough onto the prepared baking sheet, leaving about 2 inches between each cookie. This spacing allows the cookies to spread without merging together. If you prefer larger cookies, you can use a cookie scoop or ice cream scoop for uniform size.
- Bake for 10-12 minutes, or until the edges are golden brown. Remove from oven and let cool on the baking sheet for a few minutes before transferring to a wire rack to cool completely. This brief cooling period on the baking sheet helps set the cookies so they don’t fall apart when you transfer them. For those who prefer a softer center, err on the side of shorter baking time.
Kitchen Tools You’ll Need
- Mixing bowls: At least two; one for wet ingredients and one for dry. Opt for bowls with non-slip bases to make mixing easier.
- Electric mixer: A hand mixer or stand mixer makes creaming the butter and sugars a breeze. If you don’t have an electric mixer, a sturdy wooden spoon and some elbow grease will work, though it might take a bit longer.
- Measuring cups and spoons: Accurate measurements ensure consistent results. Invest in a good set that includes measurements in both cups and milliliters for precision.
- Baking sheet: A sturdy, non-warping sheet is essential for even baking. Having multiple sheets can speed up the process if you’re baking large batches.
- Parchment paper: Prevents sticking and makes cleanup easy. It also promotes even baking by preventing the bottoms of the cookies from over-browning.
- Wire cooling rack: Allows cookies to cool evenly and prevents them from becoming soggy. Look for a rack with a tight grid to prevent smaller cookies from falling through.
The Benefits of Each Ingredient
- Butter: Provides richness and helps create that irresistible chewy texture. Using unsalted butter allows you to control the amount of salt in your cookies. The fat from the butter also contributes to the overall flavor and aids in the right spread of the cookie.
- Brown Sugar: Adds moisture and depth of flavor, giving the cookies their soft and chewy quality. The molasses in brown sugar is the secret to that rich flavor. It also adds a slight caramel undertone that pairs beautifully with chocolate.
- Granulated Sugar: Helps with spreading and crisping the edges. It balances the moisture provided by the brown sugar. The combination of sugars is what gives these cookies their signature chewy-crisp texture.
- Eggs: Act as a binder and add richness, contributing to the structure and moisture of the cookies. The eggs also help emulsify the butter, sugar, and flour into a smooth dough.
- Vanilla Extract: Enhances the flavor of the chocolate and gives a warm aroma, turning simple cookies into a gourmet treat. Consider using pure vanilla extract for the best flavor.
- All-Purpose Flour: Forms the structure of the cookies. Too much flour can make cookies dry, so measure carefully. For a slightly denser cookie, you can substitute a portion of the flour with whole wheat flour.
- Baking Soda: Ensures the cookies rise properly, giving them a light texture. It reacts with the acids in the brown sugar to help the dough rise and spread properly.
- Salt: Balances the sweetness and enhances all the flavors. A small amount makes a big difference in taste. Kosher salt can be used for a less-intense saltiness.
- Chocolate Chips: The star ingredient, providing bursts of chocolatey goodness in every bite. Choose high-quality chips for the best flavor. For a more sophisticated taste, try using chocolate chunks or chopped chocolate bars.
What to Serve With This Cookie Recipe
These cookies pair perfectly with a glass of cold milk, a hot cup of coffee, or a scoop of vanilla ice cream. For a fun twist, try making ice cream sandwiches by placing a scoop of ice cream between two cookies. Warm cookies with a drizzle of caramel or chocolate sauce can elevate your dessert game for a special occasion. These cookies also make for a delightful addition to a cookie platter at parties or as a sweet gift wrapped in cellophane and tied with a ribbon.
Storage & Leftover Tips
Store any leftover cookies in an airtight container at room temperature for up to a week. If you want to enjoy them later, the dough can be frozen. Simply scoop the dough into balls and freeze on a baking sheet. Once frozen, transfer the dough balls to a freezer bag. This way, you can bake fresh cookies anytime you crave them. When baking from frozen, add a couple of extra minutes to the bake time, and enjoy freshly baked cookies whenever you like. If you prefer softer cookies after storing, briefly microwave them for a few seconds before serving.
I hope you enjoy making and sharing these classic chocolate chip cookies as much as I do. They bring a little bit of joy and nostalgia with every bite. Don’t forget to check out other delightful recipes on {BLOG_DOMAIN}, like my Chewy Oatmeal Raisin Cookies or Homemade Brownies for more baking inspiration. Happy baking!
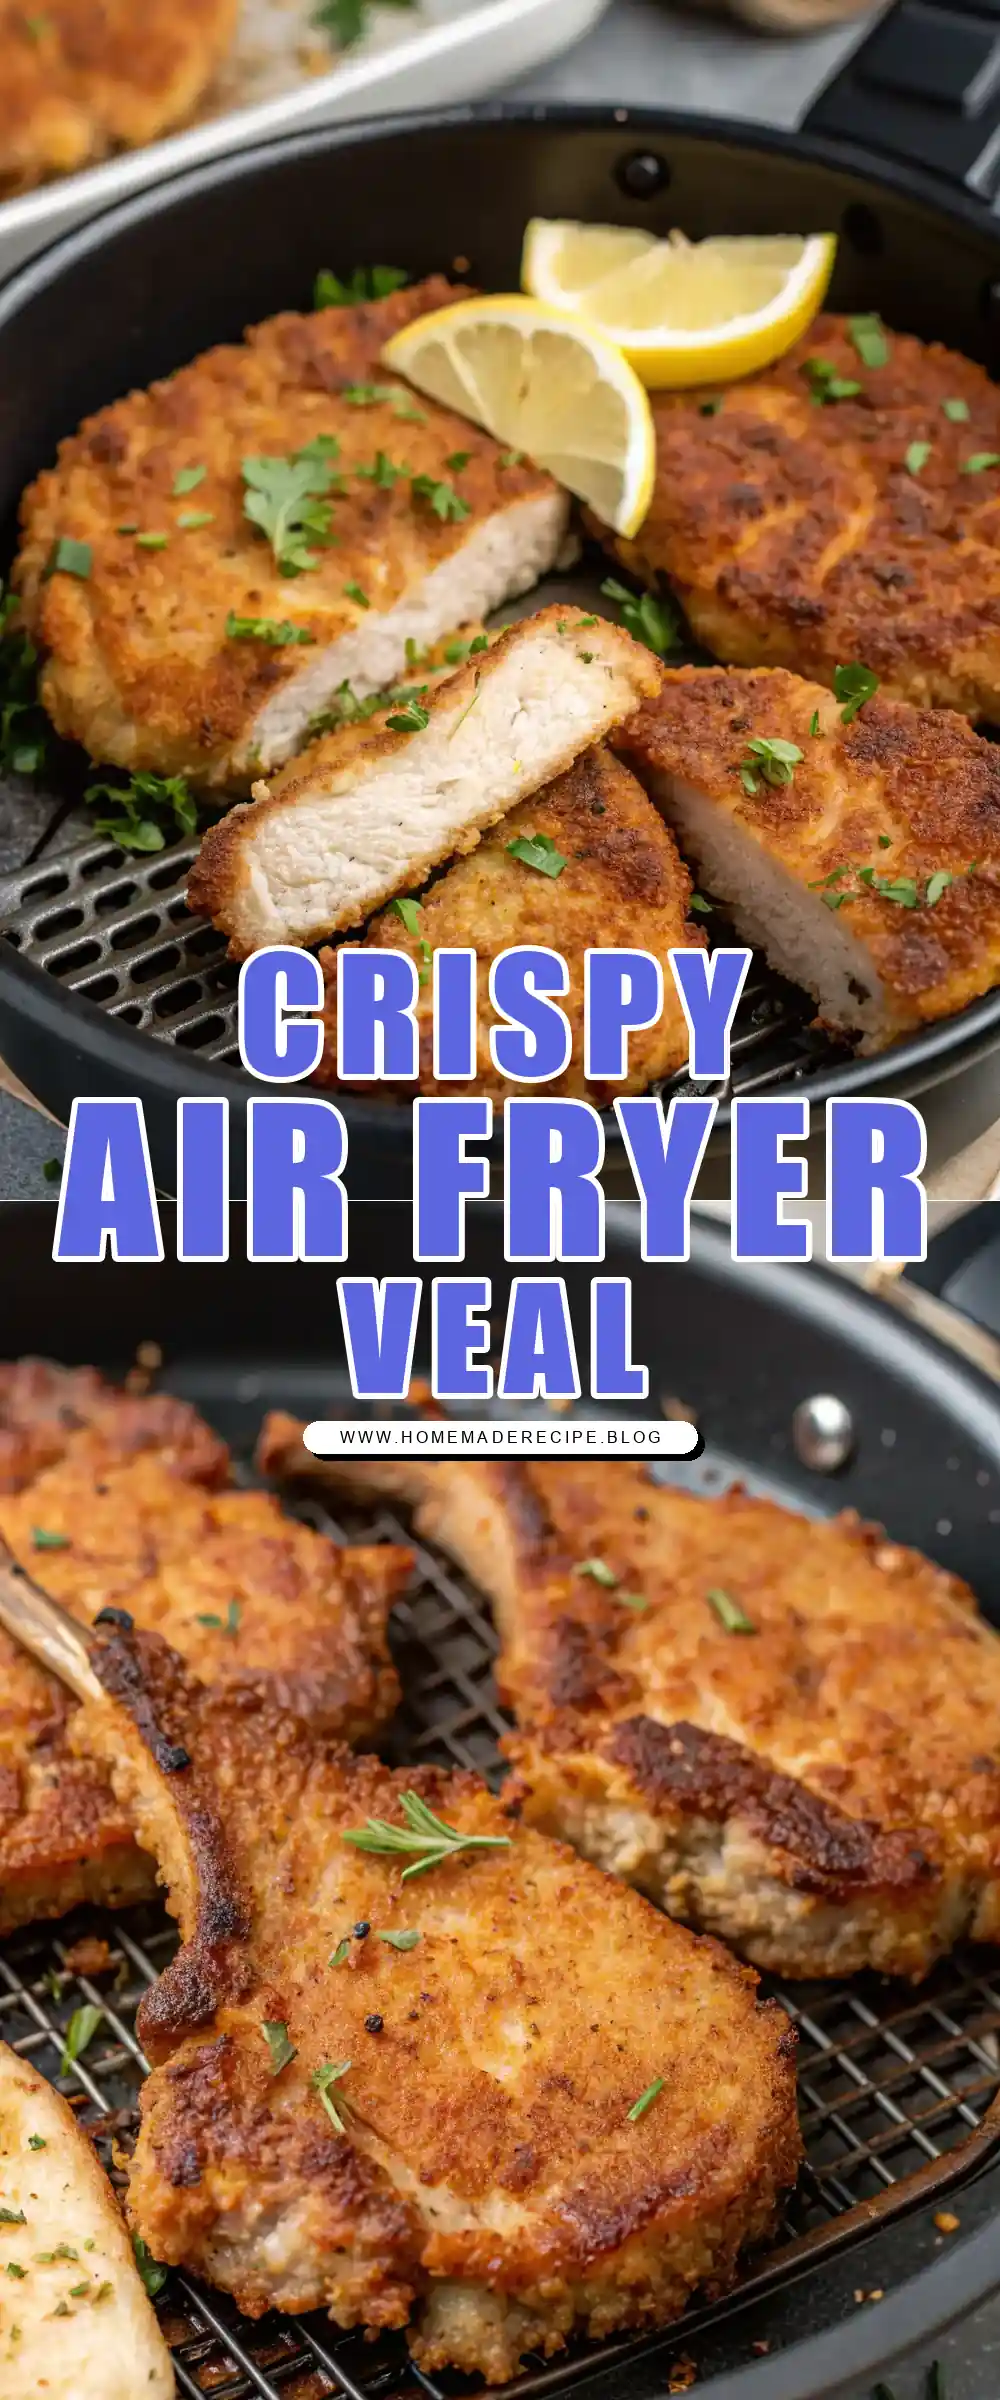

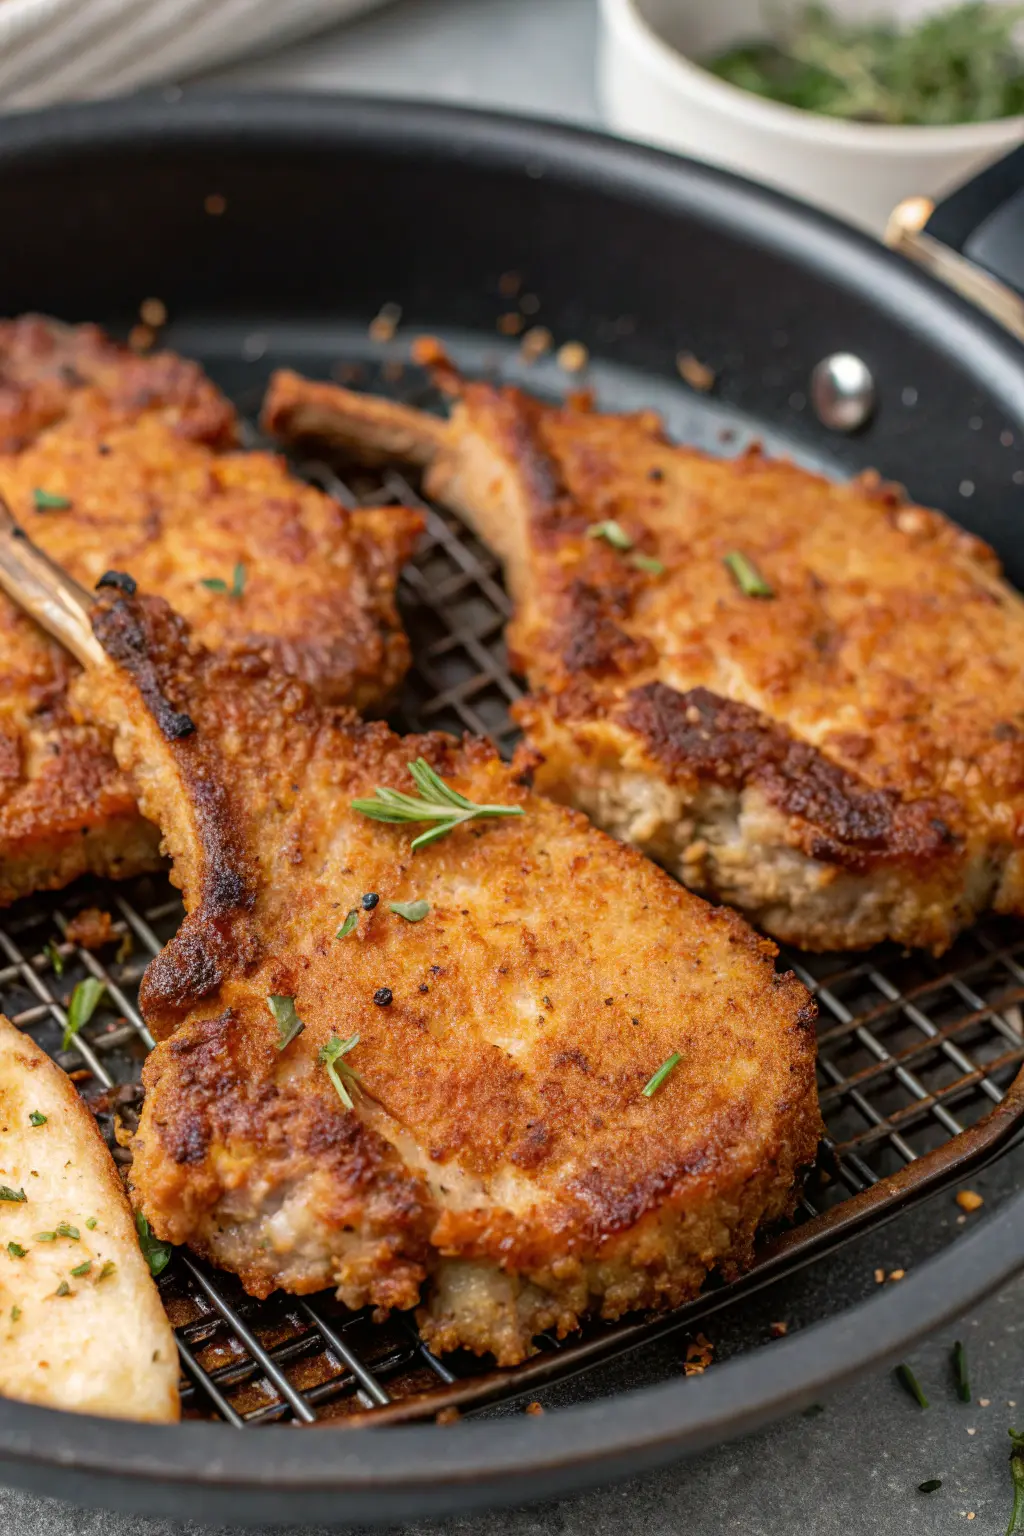
Air Fryer Veal Cutlets
Ingredients
Equipment
Method
- Preheat the air fryer to 400°F (200°C) for about 5 minutes.
- Set up a breading station: Place flour in one shallow dish, beat the eggs in a second dish, and combine breadcrumbs, salt, pepper, garlic powder, and oregano in a third dish.
- Dredge each veal cutlet in flour, shaking off excess, then dip in beaten eggs, and finally coat with the breadcrumb mixture, pressing gently to adhere.
- Lightly spray both sides of the breaded cutlets with cooking spray.
- Place the cutlets in the air fryer basket in a single layer, making sure they do not overlap. You may need to cook in batches.
- Air fry for 5 minutes, then flip the cutlets, and air fry for an additional 5 minutes until golden brown and cooked through.
- Remove the cutlets from the air fryer and let them rest for a couple of minutes before serving.