
There’s something truly special about a homemade chicken pot pie. For me, it evokes memories of cozy family dinners around the kitchen table, with everyone eagerly waiting for that first slice to be served. The golden, flaky crust and the creamy, savory filling are a comforting reminder of home. I remember my grandmother making her famous chicken pot pie every Sunday, and the delightful aroma that filled the house made it impossible not to come running to the table. I’m delighted to share with you my version of this timeless classic—one that’s simple enough for a weeknight dinner yet satisfying enough to impress your family.
Why You’ll Love This Comforting Dish
Chicken pot pie is more than just a meal; it’s a hug in a dish. Here’s why this recipe will become a staple in your home:
- Simple Ingredients: This recipe uses everyday ingredients you probably already have in your pantry and fridge. No need for fancy or hard-to-find items, making it as accessible as it is delicious. The beauty of this dish lies in its simplicity, where each ingredient shines through with its natural flavors.
- One-Pot Wonder: With everything cooked in one dish, there’s minimal cleanup, leaving you more time to enjoy your meal. This convenience does not compromise on flavor or comfort. The pot pie’s all-in-one nature means it’s perfect for those nights when you want a delicious meal without a pile of dishes.
- Family-Friendly: Kids and adults alike love the creamy chicken filling and crispy crust. It’s a meal that brings everyone to the table with smiles and satisfaction. The nostalgia and warmth that this dish brings can create new family traditions.
- Make-Ahead Option: You can prepare the filling in advance, making it an easy go-to for busy weeknights. Just assemble and bake when you’re ready for a comforting dinner. This flexibility makes it perfect for meal prep enthusiasts or those unexpected dinner guests.
- Versatile: Swap out vegetables based on what’s in season or what you have on hand. This adaptability ensures that your pot pie can change with the seasons or your tastes. You can even experiment with different herbs and spices to give it a unique twist every time.
The Recipe
Prep Time: 20 minutes
Cook Time: 45 minutes
Servings: 6
Calories: Approximately 450 per serving
Ingredients:
- 2 cups cooked chicken, diced
- 1 cup frozen peas and carrots
- 1/2 cup chopped onions
- 1/2 cup chopped celery
- 1/3 cup unsalted butter
- 1/3 cup all-purpose flour
- 1 3/4 cups chicken broth
- 2/3 cup milk
- Salt and pepper to taste
- 1 package of refrigerated pie crusts
Instructions:
-
Prepare the Filling: In a large skillet, melt the butter over medium heat. Add onions and celery, sautéing until soft and translucent, about 5 minutes. Stir in flour, cooking for 1 minute to create a roux, which will thicken your sauce. Gradually whisk in chicken broth and milk, cooking until the mixture thickens to a gravy-like consistency. Season with salt and pepper, adjusting to your taste preference. This step is crucial as it builds the foundation for the pie’s flavor, ensuring every bite is rich and satisfying.
-
Add the Chicken and Vegetables: Stir in the cooked chicken, peas, and carrots until everything is well combined. Allow the mixture to heat through, then remove from heat and set aside. This step ensures that your filling is homogeneously flavored and richly textured. You may want to taste and adjust the seasoning here, as the flavors meld together beautifully.
-
Assemble the Pie: Preheat your oven to 425°F (220°C). Roll out one pie crust and fit it into a 9-inch pie plate, ensuring it covers the bottom and sides. Pour the filling into the prepared crust, spreading it evenly to the edges. This assembly step is where the magic happens, turning a simple filling into a comforting pie.
-
Top It Off: Place the second pie crust over the filling, sealing the edges by crimping them with your fingers or a fork. Cut slits in the top to allow steam to escape, which helps to keep the crust flaky and prevents it from becoming soggy. You can also brush the top crust with a beaten egg for an extra golden finish.
-
Bake: Bake in the preheated oven for about 30-35 minutes, or until the crust is golden brown and the filling is bubbling. Let it cool for a few minutes before serving to allow the filling to set slightly, making it easier to slice and serve. The cooling period also enhances the flavors, letting them settle and become more pronounced.
Kitchen Tools You’ll Need
Having the right tools can make your cooking experience smoother and more enjoyable:
- Large Skillet: Essential for preparing the filling. A non-stick skillet can make cleanup even easier. Opt for a skillet with high sides to contain all the ingredients comfortably.
- Whisk: Useful for blending the flour into the butter and incorporating the liquids smoothly. A flat whisk can be particularly effective in preventing lumps.
- 9-inch Pie Plate: Ensures your pie has enough depth for the filling without overflowing. A glass or ceramic pie plate bakes evenly and allows you to check the bottom crust for doneness. Consider using a deep-dish pie plate if you prefer a thicker filling.
- Rolling Pin: Optional, if the pie crust needs rolling. Ready-to-use crusts are usually pre-rolled, but a rolling pin can help achieve the perfect thickness. A French rolling pin offers better control if you’re rolling out your crust from scratch.
- Oven: Preheating the oven is crucial for achieving a perfectly flaky, golden crust. Consistent oven temperature ensures even baking and prevents soggy bottoms.
The Benefits of Each Ingredient
Understanding the role of each ingredient can enhance your appreciation for this dish:
- Chicken: A great source of lean protein, helping to keep you full and satisfied. It’s also a versatile meat that absorbs flavors well, making it ideal for this savory pie. You can use leftover roasted chicken or rotisserie chicken for added convenience and flavor.
- Peas and Carrots: These vegetables provide essential vitamins and antioxidants. They also add a pop of color and a subtle sweetness, balancing the savory notes of the filling. Fresh or canned vegetables can also be used if you prefer.
- Onions and Celery: The aromatic base of the filling, these vegetables enhance the flavor profile and add a satisfying crunch that complements the creamy sauce. You might try adding garlic or leeks for additional depth of flavor.
- Butter and Flour: Create a rich roux, forming the base of the creamy sauce. This classic cooking technique is key to achieving the ideal texture and flavor. The roux ensures the filling isn’t too runny and holds together well.
- Chicken Broth: Adds depth to the filling, making it savory and flavorful. Opt for low-sodium broth to control the saltiness of the dish. You can also make your own broth for an even richer taste.
- Pie Crust: The flaky pastry is the perfect contrast to the creamy filling. Using refrigerated pie crusts saves time and effort, while still delivering a delicious result. Homemade crusts can be used for a personal touch or dietary preferences.
What to Serve With This Hearty Dish
Pairing your chicken pot pie with the right sides can elevate your meal experience:
- Green Salad: A simple green salad with a light vinaigrette pairs beautifully with chicken pot pie, balancing the richness of the dish with fresh, crisp flavors. You might include seasonal greens or a sprinkling of nuts for added texture.
- Mashed Potatoes: For something a little more indulgent, serve it with creamy mashed potatoes that complement the textures and tastes of the pie. You can infuse your mashed potatoes with garlic or herbs for extra flavor.
- Roasted Vegetables: Seasonal roasted vegetables add another layer of flavor and are a great way to include more nutrients in your meal. Try roasting root vegetables like parsnips and sweet potatoes for a sweet, caramelized contrast.
- Homemade Bread: A slice of homemade bread can soak up any delicious remnants on your plate, ensuring nothing goes to waste. Consider serving with a flavored butter or a light spread.
Storage & Leftover Tips
Chicken pot pie is just as delightful the next day. Here’s how to store and reheat it:
- Refrigeration: Store leftovers in an airtight container in the refrigerator for up to three days. This keeps the filling fresh and the crust from becoming stale. Be sure to cover the pie well to prevent the crust from absorbing other odors.
- Reheating: To reheat, place the pot pie in a preheated oven at 350°F (175°C) until warmed through. Avoid microwaving, as it can make the crust soggy and unevenly heated. Reheating in the oven helps maintain the pie’s original texture and flavor.
- Freezing: You can also freeze individual slices for up to two months. Wrap them tightly in plastic wrap and place them in a freezer-safe bag. When ready to eat, thaw in the refrigerator overnight and reheat in the oven. This method is perfect for portion control and quick meals.
In the mood for more comforting recipes? Check out my Creamy Tomato Soup or Easy Meatloaf for more family-friendly dinner ideas. For additional tips on perfecting your pie crust, visit King Arthur Baking.
I hope this chicken pot pie becomes a cherished favorite in your home, just as it is in mine. Enjoy every bite, and remember that the best meals are the ones made with love.
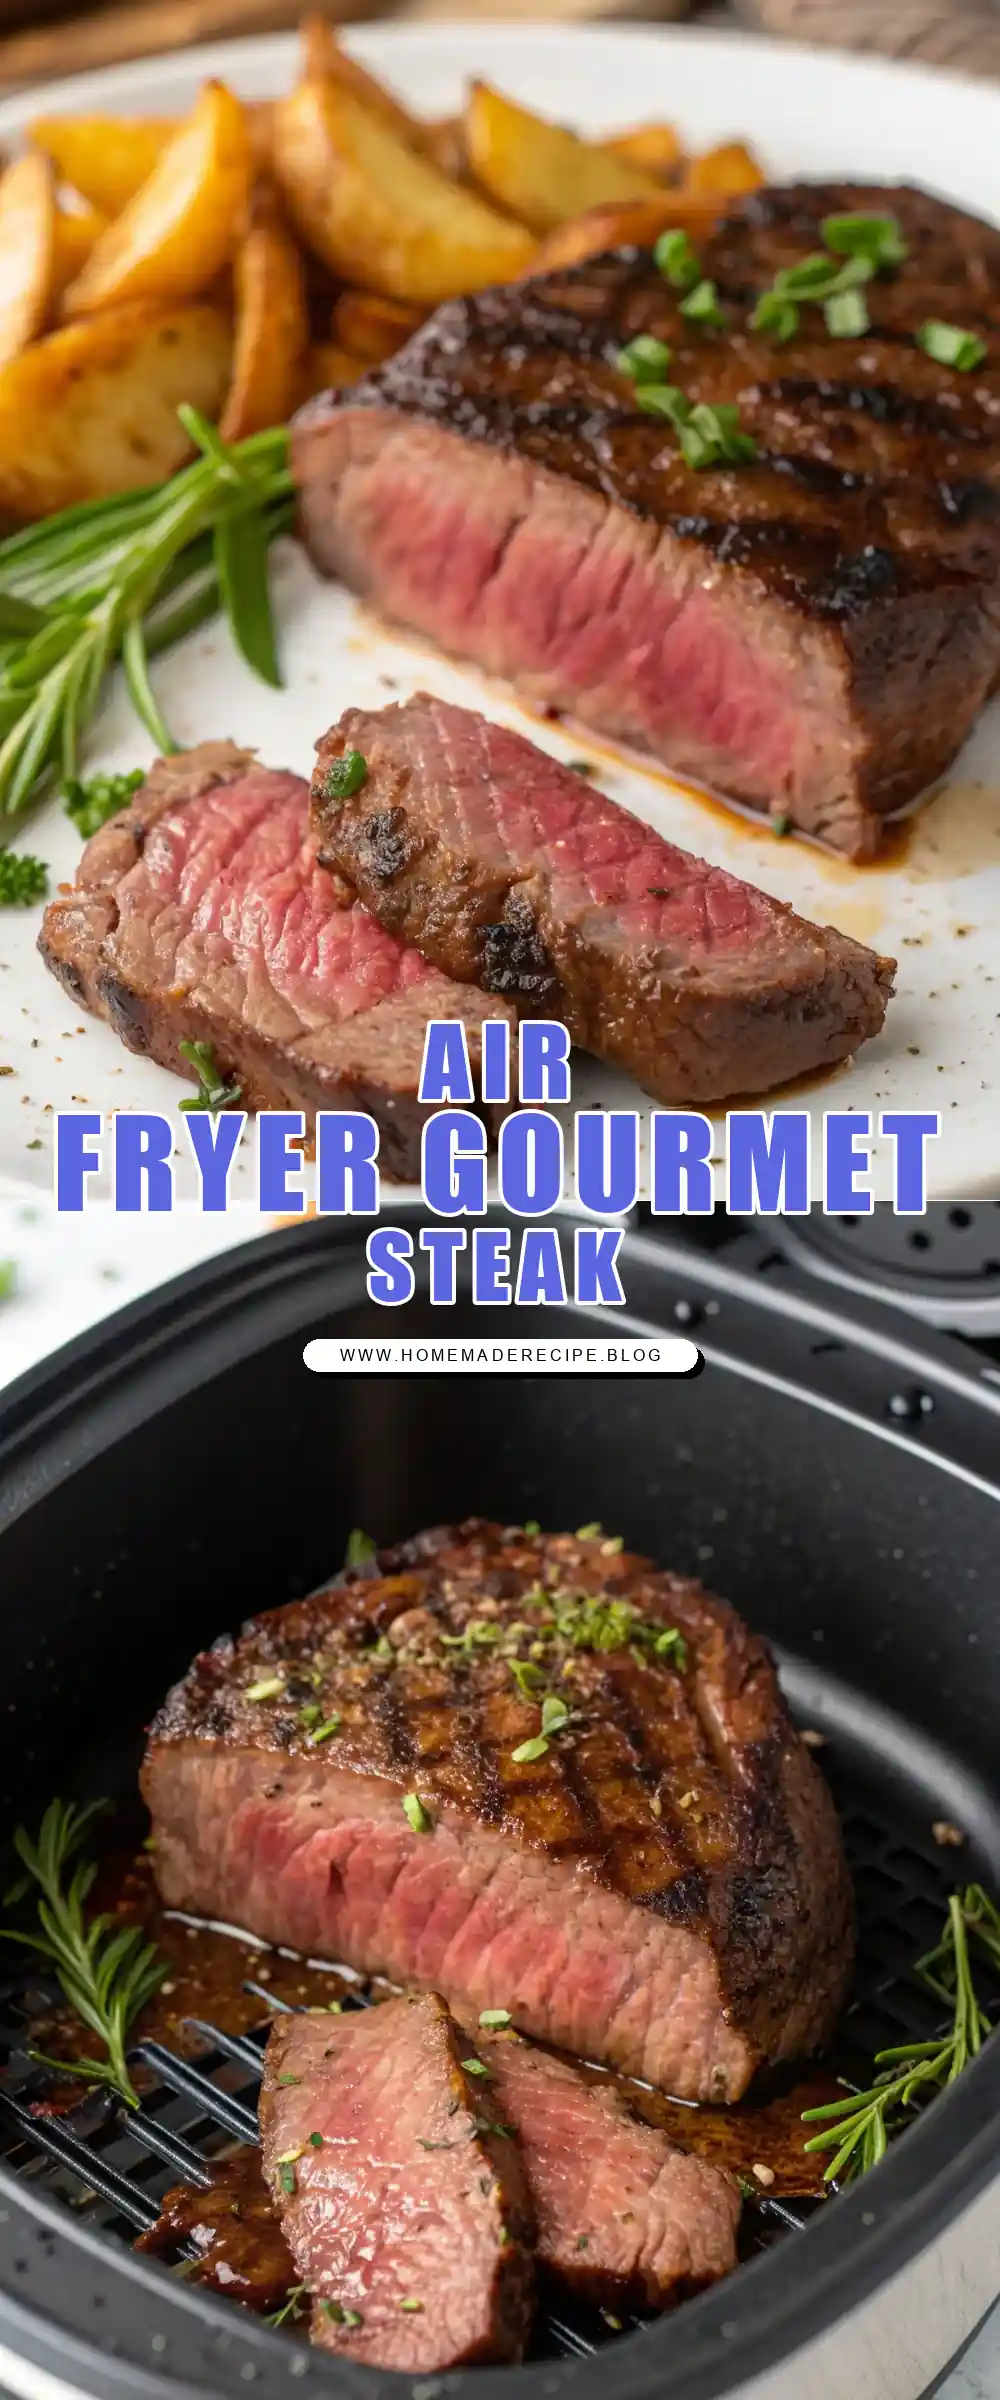

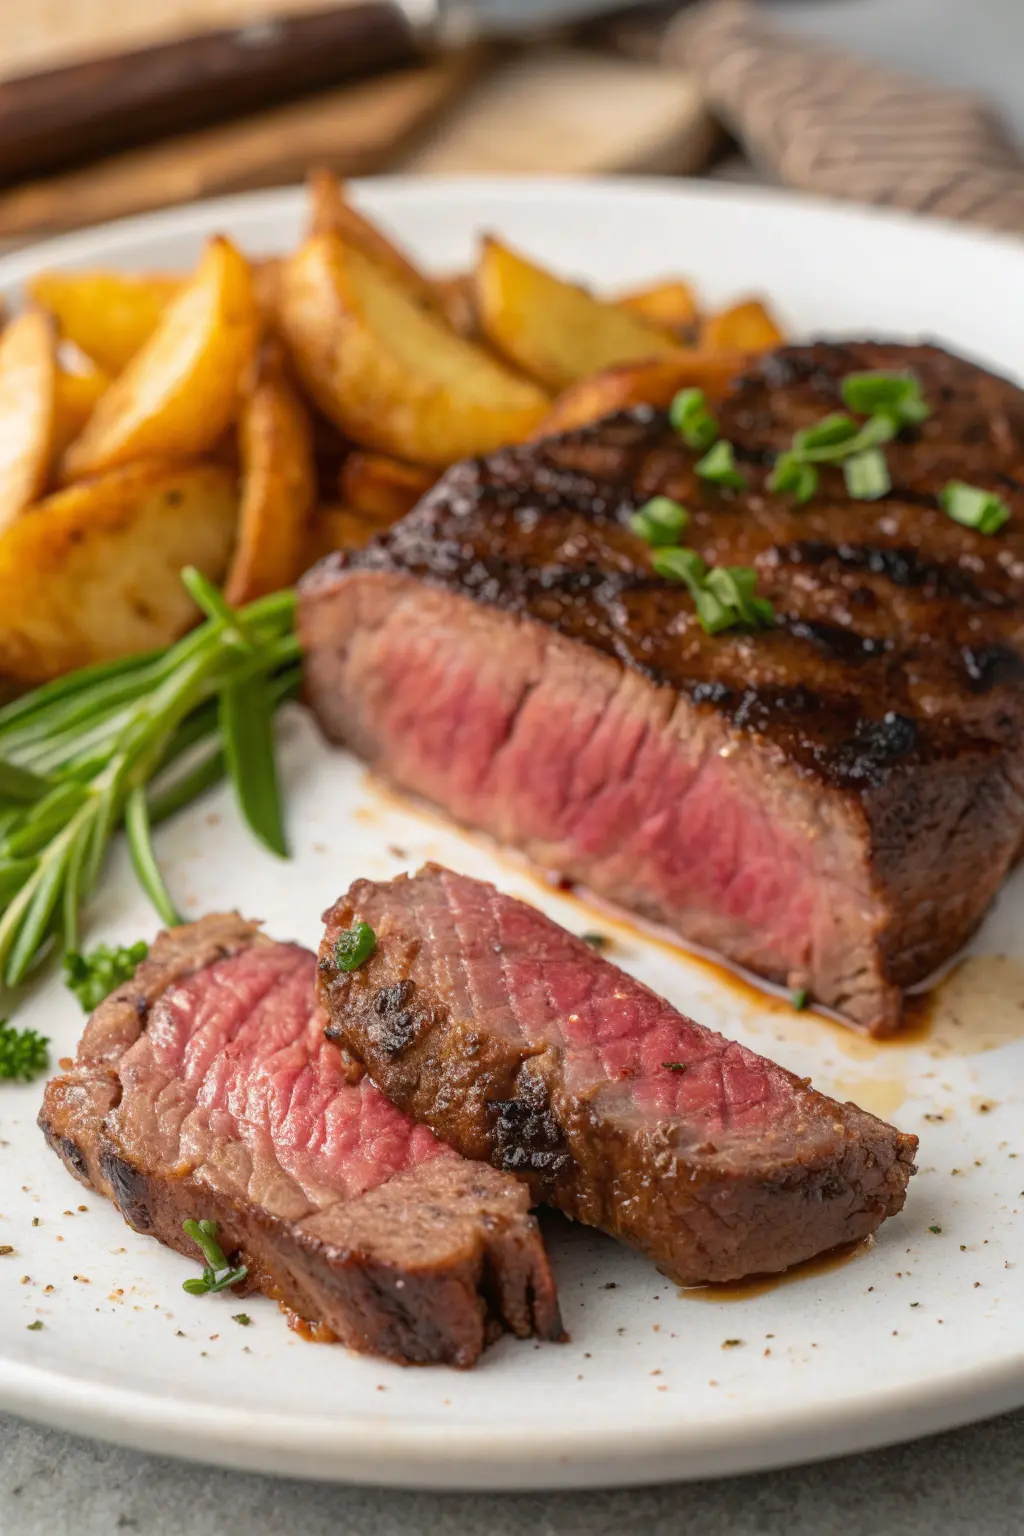
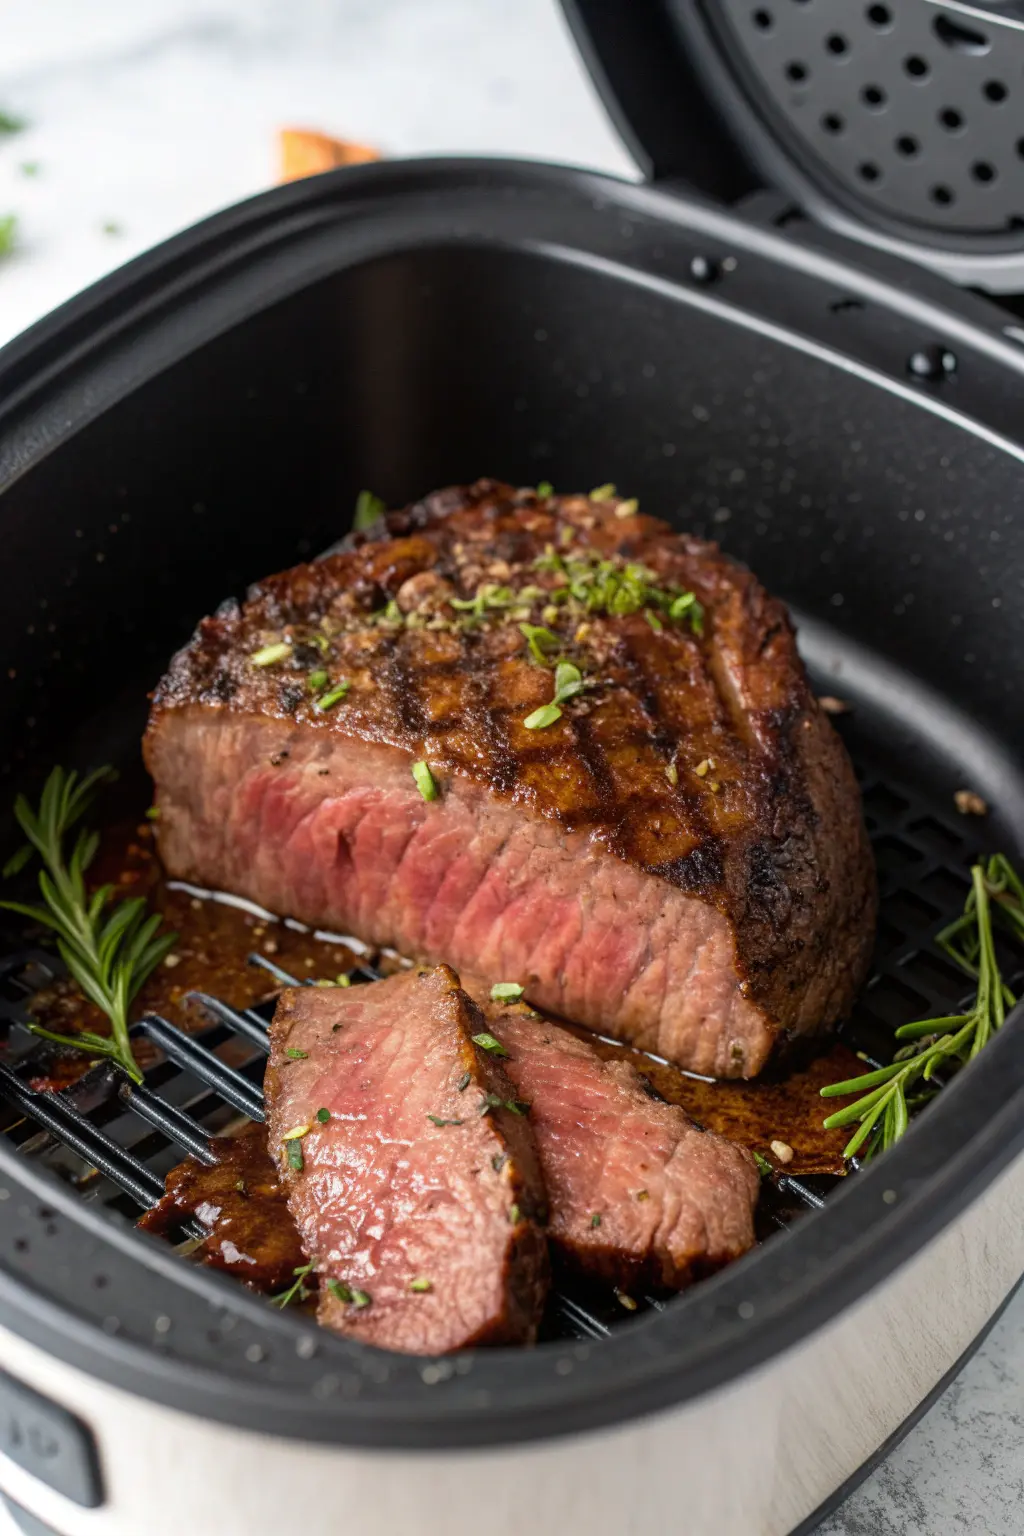
Air Fryer Ostrich Steak
Ingredients
Equipment
Method
- Preheat the air fryer to 400°F (200°C) for about 5 minutes.
- In a small bowl, mix olive oil, garlic powder, onion powder, smoked paprika, salt, and black pepper to create a marinade.
- Rub the marinade evenly over both sides of the ostrich steaks.
- Place the marinated ostrich steaks in the air fryer basket in a single layer.
- Cook for 10 minutes, flipping the steaks halfway through the cooking time.
- Check for desired doneness; if more cooking is needed, add 1-2 minutes.
- Remove from the air fryer and let rest for 2-3 minutes before serving.
- Garnish with fresh rosemary if desired.