
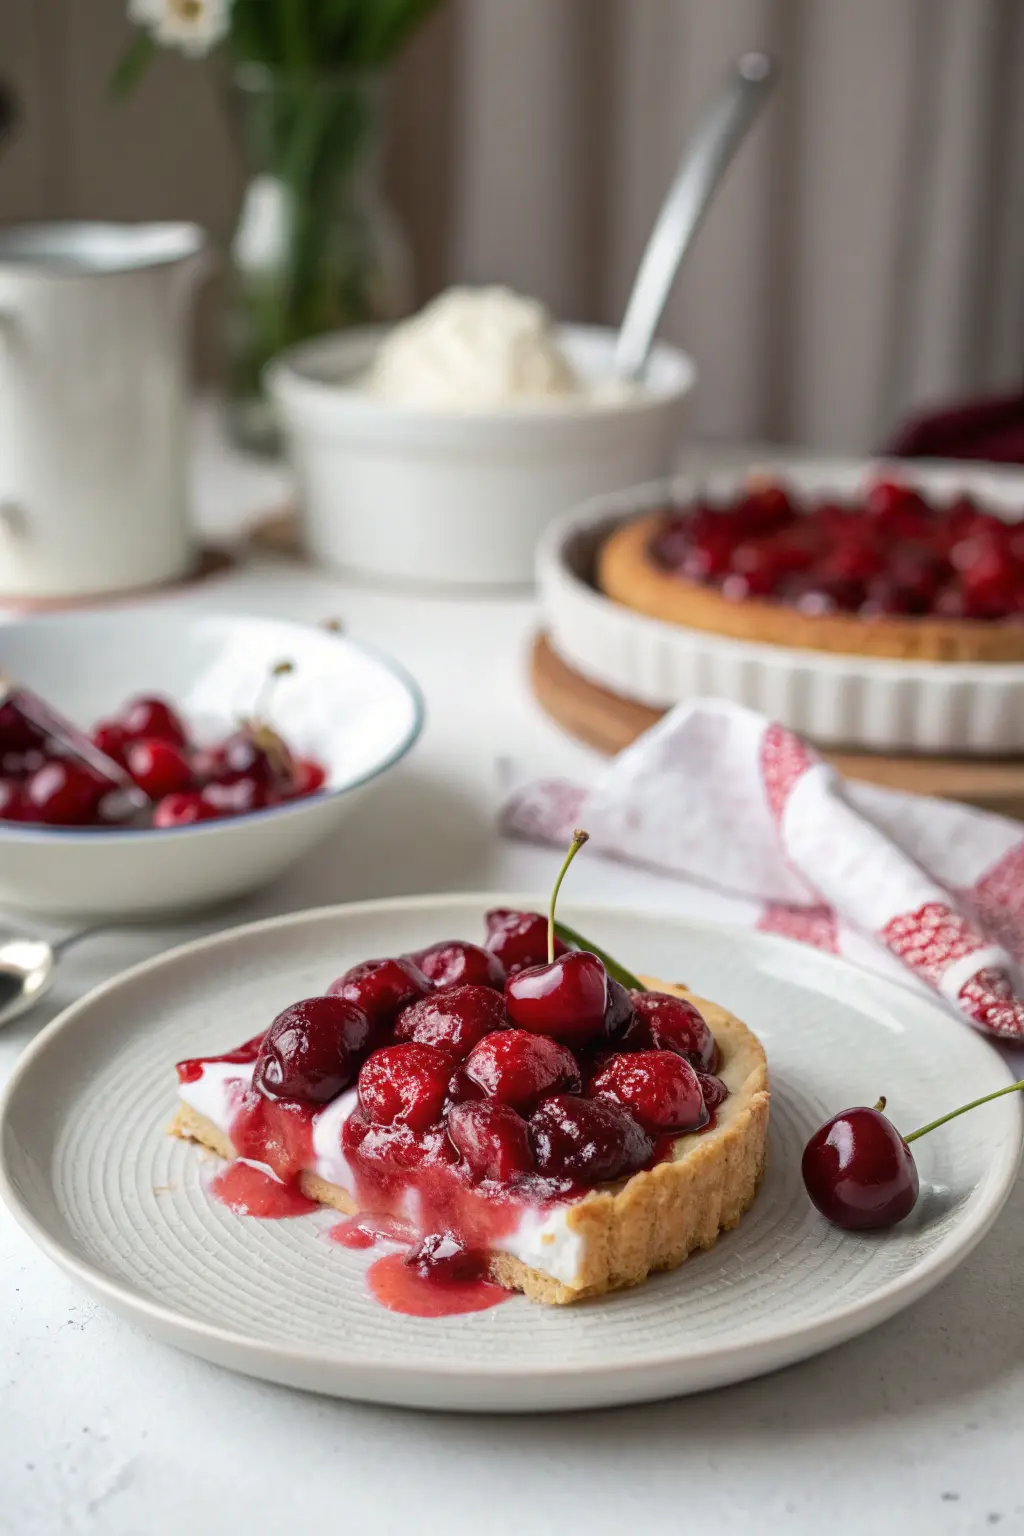
There’s something magical about biting into a homemade cherry dessert. For me, this delightful creation is more than just a dish; it’s a nostalgic trip back to summer picnics and family gatherings. I remember my mother preparing this treat with love, her apron dusted with crumbs and her laughter filling the kitchen. Every bite of the creamy, fruity dessert seemed to capture the essence of those joyful days, making it a cherished favorite in our household. Whether it was a sunny afternoon or a cozy winter evening, this cherry dessert was always met with eager anticipation and happy smiles.
Table of Contents
- Why You’ll Love This Cherry Dessert
- The Recipe
- Kitchen Tools You’ll Need
- The Benefits of Each Ingredient
- What to Serve With This Cherry Dessert
- Storage & Leftover Tips
Why You’ll Love This Cherry Dessert
Here’s why this cherry dessert will soon become a staple in your home too:
- Simple Yet Elegant: With a buttery graham cracker crust, a creamy filling, and a vibrant cherry topping, this dessert is an impressive yet easy recipe that doesn’t require hours in the kitchen. It’s the kind of dessert that looks as though it required culinary expertise but is actually straightforward to assemble. The simple ingredients come together in a way that feels sophisticated yet approachable, making it perfect for both novice and experienced bakers.
- Perfect for Any Occasion: Whether you’re hosting a family dinner or need a sweet treat for a potluck, this dessert suits all gatherings. The versatility of this recipe makes it a go-to for everything from casual get-togethers to more formal celebrations. Its vibrant appearance and delightful taste never fail to impress guests, making it a guaranteed crowd-pleaser.
- Quick to Prepare: With just 15 minutes of prep time and a total time of 20 minutes, this dessert is ideal for busy days without sacrificing flavor. The minimal prep work means more time to enjoy with family and friends. This quick preparation allows you to focus on other aspects of your event or simply relax knowing dessert is taken care of.
- Family-Friendly: Kids and adults alike will love the blend of textures and flavors, making it a crowd-pleaser. The combination of creamy, crunchy, and fruity elements ensures that each bite is delightful. You can involve children in assembling the dessert, making it a fun family activity that also teaches them basic cooking skills.
- Versatile: This cherry dessert can be easily adapted to suit dietary needs or ingredient availability. For instance, you can swap regular graham crackers for gluten-free ones or use a low-fat cream cheese to cater to different preferences. The recipe’s flexibility allows you to experiment with various ingredients to suit your taste and dietary requirements.
The Recipe
Prep Time: 15 mins
Cook Time: 5 mins
Total Time: 20 mins
Servings: 9
Calories: Approximately 320 per serving
Ingredients:
- 1 ¼ cups graham cracker crumbs
- ¾ cup margarine, melted
- 1 (8 ounce) package cream cheese
- ½ cup white sugar
- 1 dash vanilla extract
- 1 dash almond extract
- 1 cup heavy cream
- 1 (12 ounce) can cherry pie filling
Instructions:
- Preheat and Prep: Preheat your oven to 350 degrees F (175 degrees C). Grease a 9-inch pie dish to ensure easy removal of your dessert. This step is crucial to prevent the crust from sticking and to make serving a breeze. For those who prefer not to use margarine, you might consider using coconut oil as a dairy-free alternative.
- Crust Creation: In a small bowl, combine the graham cracker crumbs and melted margarine. Press the mixture firmly into your prepared dish to form an even crust. Use the back of a spoon or a flat-bottomed cup to ensure the crust is compact and evenly distributed. If you like a thicker crust, you can increase the amount of graham cracker crumbs and margarine slightly.
- Bake and Cool: Bake the crust for 5 minutes. Once baked, let it cool in the refrigerator while you prepare the filling. The brief baking time sets the crust, giving it a delightful crunch that contrasts beautifully with the creamy filling. Cooling the crust is essential as it prevents the creamy layer from melting when added.
- Creamy Layer: In a large bowl, use an electric mixer to beat the cream cheese, sugar, vanilla extract, and almond extract until smooth and creamy. Ensure the cream cheese is at room temperature for easier mixing and a smoother texture. If you forget to take it out in advance, you can microwave it on low power for 10-15 seconds.
- Whip the Cream: In a separate bowl, whip the heavy cream until stiff peaks form. Gently fold this whipped cream into the cream cheese mixture to ensure a light, airy filling. Folding ensures that the air whipped into the cream is retained, making the filling fluffy. Be careful not to overmix, as it can deflate the whipped cream.
- Assemble: Spread the creamy mixture evenly over the cooled crust. Use a spatula to smooth out the top, creating an even layer for the cherry topping. Smoothing the top ensures that the cherry filling spreads evenly and looks visually appealing.
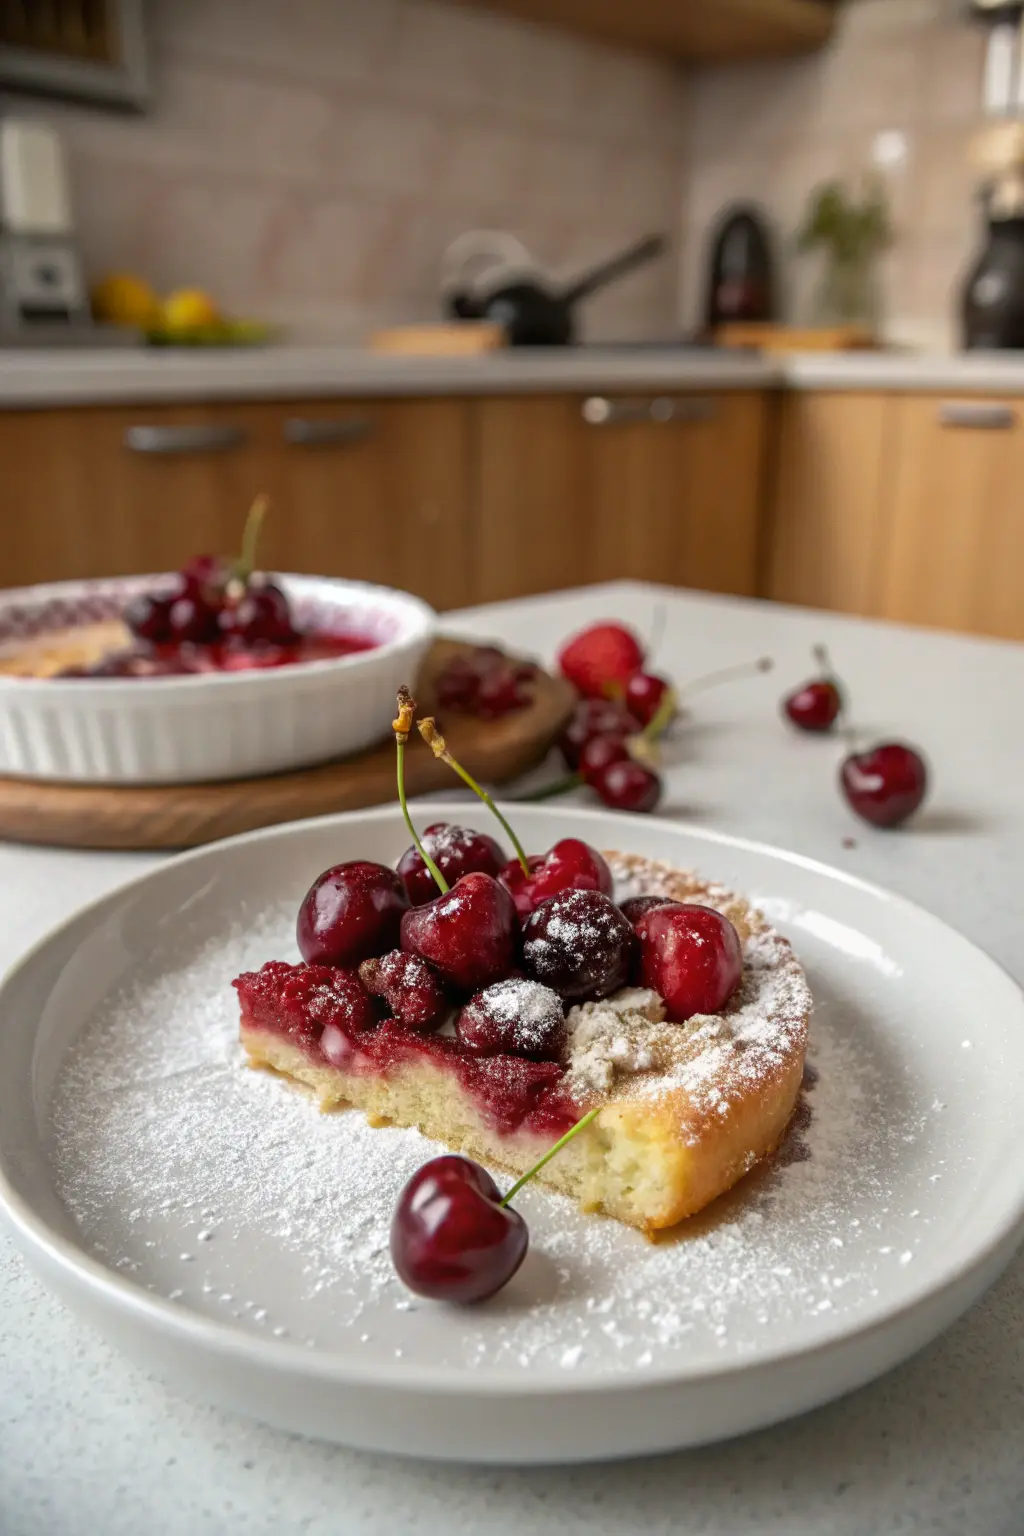
- Cherry Topping: Spoon the cherry pie filling over the top, using a knife or spatula to spread it evenly. The vibrant red cherries not only add flavor but also a visual appeal that makes this dessert irresistible. For an extra touch, sprinkle a few fresh pitted cherries on top for added freshness.
- Chill: Place the dessert in the refrigerator to chill until ready to serve. The flavors meld beautifully when given a little time to rest, allowing the crust to hold together better and the filling to firm up. Chilling also enhances the texture, making it easier to slice and serve.
Kitchen Tools You’ll Need
To make this cherry dessert, you’ll need a few basic kitchen tools:
- 9-inch pie dish: For shaping and baking the crust. A glass pie dish works well because it allows you to see when the crust is perfectly golden. If you don’t have a pie dish, a square baking dish can work as a substitute.
- Electric mixer: For effortlessly blending the cream cheese filling. A stand mixer or hand-held mixer both work well, depending on what you have on hand. If you don’t have an electric mixer, a whisk can be used, though it will require more effort.
- Mixing bowls: One large and one medium-sized for different components. Having multiple bowls makes it easier to keep ingredients separate until they’re ready to be combined. Stainless steel bowls are great as they help keep the cream cold while whipping.
- Spatula: To fold the whipped cream and spread the cherry topping. A silicone spatula is ideal for scraping down the sides of the bowl and ensuring no delicious filling goes to waste. Look for one with a flexible edge for better control.
- Measuring cups: To ensure accurate ingredient proportions. Accurate measuring is key to maintaining the balance of flavors in this dessert. Consider using nested measuring cups for dry ingredients and a liquid measuring cup for the melted margarine.
The Benefits of Each Ingredient
Every ingredient in this cherry dessert plays a crucial role:
- Graham Cracker Crumbs: These form the foundation of your dessert with a sweet, nutty flavor that complements the creamy filling. They also provide a satisfying crunch that contrasts with the softness of the toppings. You can make your own crumbs by pulsing whole graham crackers in a food processor.
- Margarine: Helps bind the crust and adds a rich, buttery taste. If you prefer, you can substitute margarine with unsalted butter for a slightly different flavor profile. Butter can enhance the richness of the crust and pairs beautifully with the graham cracker flavor.
- Cream Cheese: Offers a tangy creaminess that balances the sweetness of the cherries. For a more decadent version, you can use mascarpone cheese. Mascarpone will provide an even creamier texture and a slightly sweeter taste.
- White Sugar: Sweetens the filling, enhancing the dessert’s overall flavor. You can adjust the sugar to taste, or substitute it with a natural sweetener like honey or agave syrup. If using a liquid sweetener, reduce it slightly to maintain the filling’s consistency.
- Vanilla & Almond Extracts: These add depth and warmth, enhancing the dessert’s aroma and taste. Almond extract can be omitted if it’s not to your taste, but it adds a unique flavor that complements the cherries beautifully. Consider using pure extracts for the best flavor.
- Heavy Cream: Adds lightness and volume to the filling, ensuring a smooth texture. For a lighter version, you can use half-and-half, though it will result in a less rich filling. Ensure your cream is cold before whipping for the best volume.
- Cherry Pie Filling: The star of the dish, providing a vibrant color and a sweet-tart flavor that ties everything together. You can make your own cherry pie filling for a more homemade touch, or try other fruit toppings like blueberry or strawberry for variation. Homemade fillings allow you to control the sweetness and adjust flavors to your liking.
What to Serve With This Cherry Dessert
This cherry dessert shines on its own, but here are some delicious pairings:
- Vanilla Ice Cream: A scoop of ice cream adds a cold, creamy contrast to the dessert. The vanilla enhances the almond and cherry flavors, creating a harmonious blend. Ice cream can be served on the side or directly on top for an indulgent treat.
- Whipped Cream: A dollop of freshly whipped cream enhances the dessert’s creaminess. Consider adding a touch of vanilla or almond extract to the cream for an extra layer of flavor. Homemade whipped cream is easy to make and elevates the dessert experience.
- Mint Leaves: Garnish with a sprig of mint for a fresh pop of color and flavor. The mint provides a refreshing contrast and a lovely visual appeal. You can also finely chop the mint and sprinkle it over the cherries for a subtle flavor infusion.
For more delightful pairings, check out our Classic Vanilla Ice Cream Recipe and Perfect Whipped Cream.
Storage & Leftover Tips
Storing this dessert is easy and keeps it fresh for later enjoyment:
- Refrigeration: Cover the pie dish with plastic wrap or transfer slices to an airtight container. This dessert will stay fresh in the refrigerator for up to 3 days. Make sure it’s well covered to prevent it from absorbing any fridge odors. Keeping it in an airtight container also helps maintain the dessert’s texture.
- Freezing: For longer storage, you can freeze the dessert. Wrap it tightly in plastic wrap and foil, then freeze for up to 1 month. Thaw in the refrigerator before serving. Freezing can slightly alter the texture of the cream filling, so it’s best enjoyed fresh if possible. Consider freezing individual slices for quick, single-serving treats.
- Portioning: Consider slicing the dessert before freezing if you want to enjoy individual servings without thawing the entire pie. Flash freeze the slices on a baking sheet before wrapping to prevent them from sticking together. This method ensures you can enjoy a piece of dessert whenever the craving strikes.
In conclusion, this cherry dessert is a simple, heartwarming recipe that brings a slice of joy to any occasion. Its delightful blend of textures and flavors makes it a beloved treat in my home, and I hope it becomes a favorite in yours too. Remember, the best recipes are those shared with love, so enjoy this dessert with the ones you cherish most. Happy baking!
Cherry Dessert
Ingredients
Equipment
Method
- Preheat the oven to 350 degrees F (175 degrees C) and grease a 9-inch pie dish.
- In a small bowl, mix graham cracker crumbs and melted margarine, then press into the prepared dish.
- Bake the crust in the oven for 5 minutes, then cool in the refrigerator.
- Using an electric mixer, beat cream cheese, sugar, vanilla, and almond extract in a large bowl until smooth.
- Whip the heavy cream in a separate bowl until stiff peaks form, then fold it into the cream cheese mixture.
- Spread the creamy mixture over the cooled crust.
- Dot the top with cherry pie filling and smooth it out with a knife or spatula to cover.
- Chill the dessert in the refrigerator until ready to serve. Enjoy the delicious flavors!