
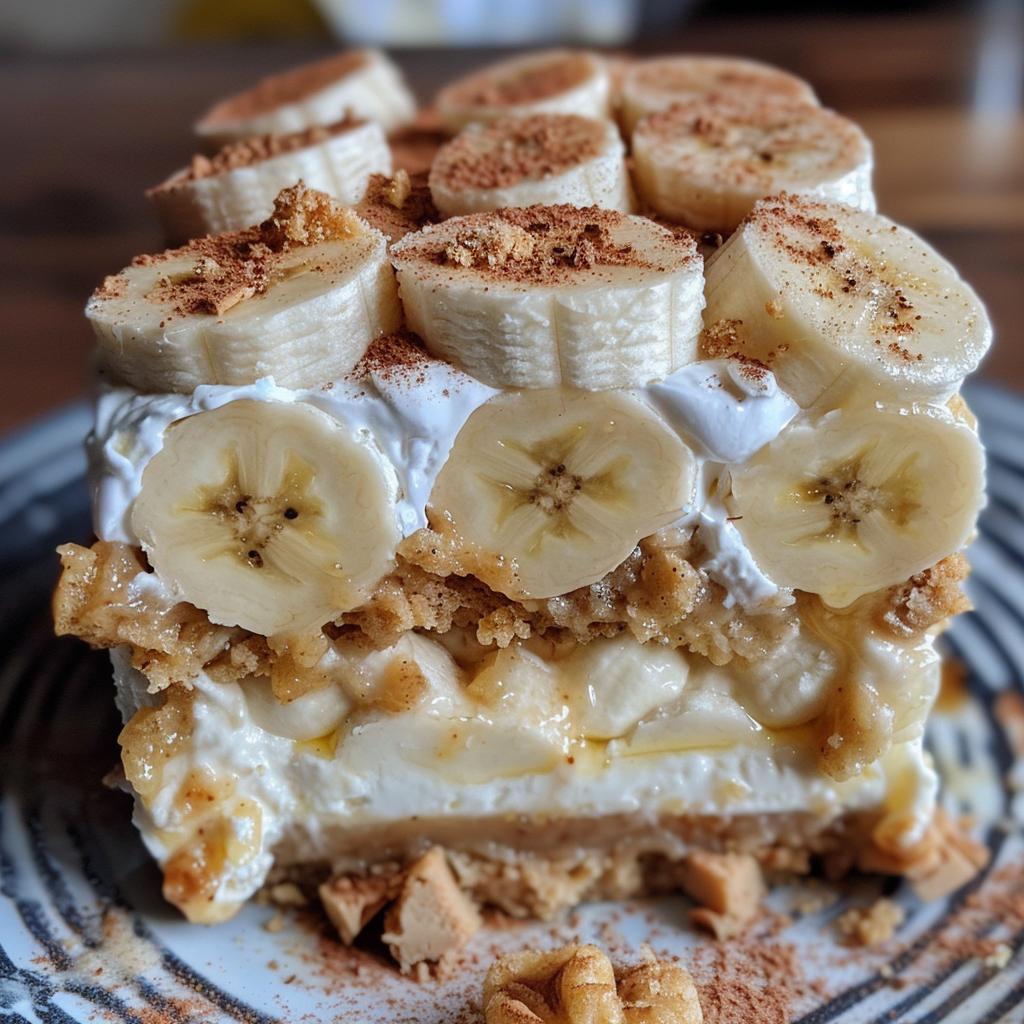
Banana pudding cheesecake squares layer a soft, buttery banana blondie crust beneath a thick, creamy banana pudding cheesecake filling, then finish with a crown of crunchy Nilla wafers. The result is a dessert bar that delivers the nostalgic comfort of banana pudding with the richness of a proper cheesecake, all in a form that slices cleanly, travels well, and disappears fast at any gathering.
| Detail | Info |
|---|---|
| Prep Time | 25 minutes |
| Cook Time | 20 minutes |
| Chill Time | 2 hours |
| Total Time | 2 hours 45 minutes |
| Servings | 9 to 12 squares |
| Difficulty | Easy to Medium |
| Cuisine | American |
Why This Recipe Works
Most banana pudding dessert bars use a graham cracker or Nilla wafer crumb crust as the base. This recipe does something better: it bakes a banana blondie instead. That single decision elevates the entire dessert. The blondie brings real banana flavor baked into the crust itself rather than just sitting on top, and it contributes a chewy, fudgy texture that a crumb crust simply cannot. Every layer is doing active flavor work rather than just providing structure.
The cheesecake topping uses instant banana pudding mix as both a flavoring and a stabilizer. The pudding mix thickens the filling as it sets, giving the layer a dense, sliceable texture without requiring gelatin or a water bath. It also intensifies the banana flavor in a way that real banana alone cannot — the concentrate in the pudding mix is designed to read as banana even through the richness of the cream cheese and heavy whipping cream.
Whipping the heavy cream to stiff peaks separately before folding it into the cream cheese mixture is the key to achieving a light, mousse-like texture in the topping rather than a dense, heavy one. The air incorporated during whipping stays trapped in the folds, and the result is a filling that feels airy and creamy rather than thick and pasty. If you beat the cream directly into the cream cheese mixture without whipping it first, you lose that lightness entirely.
Freezing rather than just refrigerating the assembled bars is what allows you to slice them into clean, defined squares. The cheesecake layer firms up much more completely in the freezer than in the refrigerator, so the knife passes through both layers without dragging or smearing. After slicing, the bars thaw quickly to a perfect serving temperature in minutes.
Adding the Nilla wafers as a garnish at serving time rather than pressing them into the topping ahead of time keeps them crunchy. Wafers placed on the cheesecake layer hours before serving absorb moisture and go soft. That crunch is an essential part of the eating experience — it’s what connects these bars back to the original banana pudding they’re inspired by.
Ingredients
| Ingredient | Quantity | Notes |
|---|---|---|
| Blondie Crust | ||
| Unsalted butter, melted | 1/2 cup | Let it cool slightly before mixing to avoid cooking the egg yolk |
| Light brown sugar, packed | 1/2 cup | The molasses in brown sugar adds depth and chewiness |
| Large egg yolk | 1 | Yolk only keeps the crust tender rather than cakey |
| All-purpose flour | 1/2 cup | Measure by spooning into the cup and leveling off |
| Salt | Pinch | Balances the sweetness of the brown sugar |
| Mashed ripe banana | 1/4 cup | About half a medium banana; the riper the better for flavor |
| Pure vanilla extract | 1 teaspoon | Pure extract, not imitation, for the cleanest flavor |
| Cheesecake Topping | ||
| Heavy whipping cream | 2/3 cup | Must be cold for proper whipping; chill your bowl and beaters too |
| Cream cheese, softened | 16 ounces | Full-fat block cream cheese; let it reach room temperature fully |
| Granulated sugar | 1 cup | Add gradually to fully incorporate without lumps |
| Instant banana pudding mix | 1 box (3.4 oz) | Instant, not cook-and-serve; adds flavor and helps set the filling |
| Milk | 1/2 cup | Whole milk gives the richest result |
| Vanilla extract | 1 teaspoon | Rounds out the banana flavor |
| Powdered sugar | To taste (optional) | Add a tablespoon at a time if you prefer a sweeter filling |
| Garnish | ||
| Nilla Wafers | As needed | Add right before serving to preserve crunch |
Step-by-Step Instructions
Phase 1: Make the Blondie Crust
- Preheat the oven to 350 degrees F. Grease an 8×8-inch baking pan and line it with parchment paper, leaving an overhang on two sides. This overhang acts as a handle that makes lifting the finished bars out of the pan easy and clean.
- In a large bowl, whisk together the melted butter and brown sugar until fully combined and smooth. Let the mixture cool for a minute or two before adding the egg yolk — adding it to very hot butter can start to cook it.
- Add the egg yolk, mashed banana, and vanilla extract. Whisk until smooth and evenly combined.
- Add the flour and salt. Switch to a spatula and fold until just combined. Do not overmix — a few strokes past “just combined” is all it takes to start developing gluten and making the crust tough.
- Spread the batter evenly into the prepared pan. It will be a thin layer; that’s correct. Use an offset spatula or the back of a spoon to push it into the corners.
- Bake for 15 to 20 minutes, until the center is just set and the edges are lightly golden. The blondie should look slightly underdone when you pull it — it will firm up as it cools, and a slightly underbaked blondie has far better texture than an overbaked one.
- Cool the crust completely in the pan on a wire rack before adding any topping. A warm crust will melt the cheesecake layer on contact.
Phase 2: Make the Cheesecake Topping
- Chill your mixing bowl and beaters in the freezer for 10 minutes. Pour in the cold heavy whipping cream and beat on high speed until stiff peaks form — the cream should hold a firm shape when the beaters are lifted. Transfer to the refrigerator and keep cold until needed.
- In a separate large bowl, beat the softened cream cheese on medium-high speed until completely smooth and fluffy, about 2 minutes. Any lumps in the cream cheese at this stage will remain in the finished filling, so take the time to get it fully smooth before adding anything else.
- With the mixer running on low, gradually add the granulated sugar, then the banana pudding mix, milk, and vanilla extract. Once everything is incorporated, increase the speed to medium and beat until the mixture is smooth, thick, and fully combined, about 1 to 2 minutes.
- Taste the filling. If you’d like it sweeter, sift in a tablespoon of powdered sugar at a time and fold it in gently until you reach your preferred sweetness level.
- Remove the whipped cream from the refrigerator. Add it to the cream cheese mixture in two additions, folding gently with a spatula using broad strokes from the bottom of the bowl. Stop folding the moment no white streaks remain — overworking the mixture deflates the whipped cream and loses the lightness you built.
Phase 3: Assemble and Freeze
- Spoon the cheesecake filling onto the cooled blondie crust. Spread it into an even layer that reaches all four corners, smoothing the top with an offset spatula.
- Cover the pan tightly with plastic wrap, pressing it gently against the surface of the filling to prevent a skin from forming.
- Freeze for at least 2 hours, until the filling is completely firm and holds its shape when pressed lightly.
- When ready to serve, lift the bars out of the pan using the parchment overhang. Place on a cutting board and slice into squares with a sharp knife. Wipe the blade clean between cuts for the sharpest edges.
- Arrange Nilla Wafers on top of each square just before serving.
Chef Tips for Perfect Results
Use the ripest bananas you can find. The banana flavor in the blondie crust comes entirely from the mashed banana in the batter. An underripe banana tastes starchy and faint; a fully ripe banana with brown spots is sweet, aromatic, and punchy. The riper the banana, the more flavor it contributes to the crust.
Bring the cream cheese to full room temperature. This is the most commonly skipped step and the one that causes the most problems. Cold cream cheese doesn’t beat smooth — it stays lumpy no matter how long you mix it. Pull it out of the refrigerator at least an hour before you plan to make the filling. Press it with your finger; it should give without resistance.
Add sliced fresh bananas between the crust and filling. Lay a single layer of banana slices over the cooled blondie crust before spreading the cheesecake filling on top. The fresh bananas add texture and a cleaner banana flavor that contrasts nicely with the pudding-mix intensity of the filling.
Use a hot, dry knife for slicing. Run your knife blade under hot water, dry it completely, and slice. The warmth helps the knife pass through the firm cheesecake layer cleanly. Wipe and re-warm the blade between each cut.
Keep the Nilla Wafers separate until serving. If you’re making these ahead, store the wafers in a sealed bag at room temperature. Place them on the squares immediately before they go to the table. Wafers placed more than 30 minutes before serving will absorb moisture from the cheesecake layer and lose their crunch.
Common Mistakes to Avoid
Adding the filling to a warm crust. The cheesecake layer needs a fully cooled surface to adhere to and set properly. A warm crust melts the bottom of the filling, creates a greasy interface between the two layers, and prevents the bars from setting up cleanly. Give the blondie at least 45 minutes at room temperature, or speed it up in the refrigerator.
Overbeating the filling after adding the whipped cream. Once the whipped cream goes in, the goal is to fold, not beat. A rubber spatula and gentle, deliberate strokes are what you need. Aggressive beating knocks the air out of the whipped cream and turns the filling dense and heavy.
Skipping the freeze. Refrigerating rather than freezing the assembled bars produces a softer filling that doesn’t slice cleanly. The squares will smear at the cut edges and lose their defined shape. The freezer is essential for the clean, restaurant-style squares this recipe promises.
Using spreadable cream cheese. The cream cheese that comes in a tub is softer and has a higher moisture content than block cream cheese. It makes the filling too loose to set properly. Use full-fat block cream cheese only.
Not scraping the bowl while mixing. Cream cheese clings to the bottom and sides of the bowl and doesn’t incorporate unless you stop the mixer and scrape down regularly. Unmixed cream cheese at the bottom of the bowl shows up as dense white lumps in the finished filling.
Variations and Substitutions
Graham cracker crust: If you’re short on time, a classic graham cracker crust works as a substitute for the blondie. Press 1.5 cups of graham cracker crumbs mixed with 6 tablespoons of melted butter into the pan and bake for 8 minutes at 350 degrees F. You lose the banana flavor in the base but gain significant time.
Chocolate banana version: Stir a quarter cup of mini chocolate chips into the blondie batter and use chocolate pudding mix in place of banana pudding mix for the filling. Garnish with chocolate-dipped Nilla wafers.
Peanut butter banana: Add two tablespoons of creamy peanut butter to the blondie batter and swirl a thin ribbon of peanut butter into the cheesecake filling before freezing. The peanut butter and banana combination is classic and pairs especially well with the Nilla wafer garnish.
Coconut banana: Replace the vanilla extract in the filling with coconut extract and fold in a quarter cup of toasted shredded coconut. Garnish with toasted coconut flakes alongside the Nilla wafers for a tropical take.
Serving Suggestions
Serve these bars directly from the freezer for the cleanest slice and a slightly frozen, almost ice cream-like texture in the filling. If you prefer a softer, more traditional cheesecake texture, let them sit at room temperature for 10 to 15 minutes after slicing before serving.
For a plated dessert presentation, place a square on the plate, add a Nilla wafer on the side, and drizzle a thin line of caramel sauce across the plate. A small dollop of additional whipped cream alongside adds height and richness.
Storage and Reheating
Refrigerator: Store cut squares in an airtight container in the refrigerator for up to 4 days. The filling will soften slightly compared to its frozen state but remains sliceable and delicious. Store Nilla wafers separately and add them fresh each time you serve.
Freezer: The whole assembled pan or individual cut squares can be frozen for up to 2 months. Wrap tightly in plastic wrap and then foil to prevent freezer burn. Thaw in the refrigerator for a few hours or let individual squares sit at room temperature for 15 minutes before serving.
Nutritional Information
| Nutrient | Per Square (based on 12 squares) |
|---|---|
| Calories | 390 |
| Protein | 5g |
| Carbohydrates | 42g |
| Fat | 23g |
| Saturated Fat | 13g |
| Fiber | 1g |
| Sodium | 310mg |
Nutritional values are estimates based on standard ingredients and will vary depending on specific brands and square size.
FAQ
Can I make these a day ahead?
Yes, and they’re actually better the next day. The flavors meld as the bars sit, and the filling firms up to a perfect, dense texture overnight in the freezer. Assemble the bars, cover tightly, and freeze overnight. Slice just before serving and add the Nilla wafers at the last moment.
Can I use a larger pan?
A 9×13-inch pan works but produces thinner layers since the same amount of batter and filling spreads over a larger area. Double the recipe if you want the same thick, generous layers in a 9×13 pan. The blondie bake time may decrease slightly in a larger pan, so start checking at 12 minutes.
What if my cheesecake filling is too soft to spread?
If the filling seems too loose after mixing, refrigerate it for 20 to 30 minutes before spreading it onto the crust. The cold firms up the cream cheese and stabilizes the whipped cream, making the filling much easier to work with. A loose filling usually indicates the cream cheese was too warm or the whipped cream was folded in too aggressively.
Can I use banana extract instead of fresh banana in the crust?
You can, but the texture of the blondie will change since the mashed banana adds both moisture and flavor. If substituting, replace the mashed banana with two tablespoons of sour cream for moisture and add half a teaspoon of banana extract for flavor. The crust will be slightly denser but still delicious.
Why do my bars have a gap between the crust and filling?
This usually happens when the filling is spread onto a crust that’s still slightly warm. The bottom layer of filling melts and pulls away from the crust as it refreezes, creating a visible gap. Make sure the blondie is completely cooled — touch it in the center; it should feel room temperature or cold before the filling goes on.
Conclusion
Banana pudding cheesecake squares give you the best of both classic desserts in one easy, make-ahead bar. The banana blondie crust, the creamy pudding cheesecake filling, and the crunchy Nilla wafer finish work together in a way that’s genuinely greater than the sum of the parts. Make them for your next gathering and don’t be surprised when people ask for the recipe before they’ve finished the first square.