
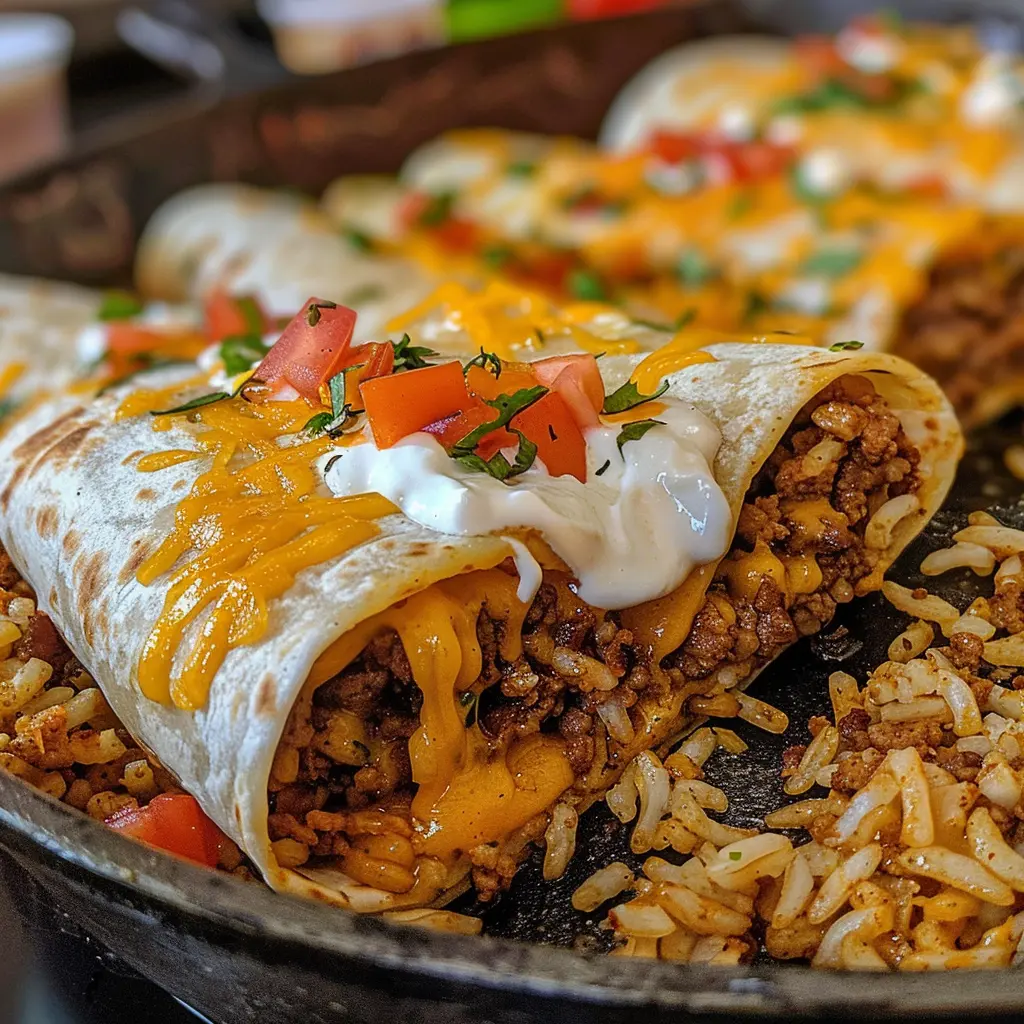
The crispy golden burrito fills a large flour tortilla with seasoned taco beef, Mexican rice, shredded cheese blend, nacho cheese sauce, sour cream, taco sauce, and crunchy tortilla strips, rolls it tight, and toasts it seam-side down in a buttered skillet until the exterior is golden, crispy, and caramelized. Sliced in half, the cross-section reveals layers of melted cheese, savory beef, and every component of a loaded Tex-Mex meal in one hand-held package that’s better than anything wrapped in foil at a fast food counter.
| Detail | Info |
|---|---|
| Prep Time | 10 minutes |
| Cook Time | 20 minutes |
| Total Time | 30 minutes |
| Servings | 4 burritos |
| Difficulty | Easy |
| Cuisine | Tex-Mex / American |
Why This Recipe Works
Toasting the assembled burrito in a buttered skillet rather than serving it as a plain wrapped burrito is the single technique that elevates this from a standard home burrito to something that rivals restaurant quality. The butter in the skillet makes direct contact with the flour tortilla’s exterior surface and, at medium heat, browns and crisps the outer layer through the Maillard reaction — the same caramelization that makes browned bread, seared meat, and toasted cheese so much more flavorful than their unbrowned counterparts. The toasted tortilla exterior develops a subtle nuttiness, a satisfying crunch, and a golden color that signals quality before anyone takes a bite. A plain, untoasted burrito wrapper is soft and neutral; a toasted one is crispy, flavorful, and structurally firmer, making the burrito easier to hold and eat without falling apart.
Placing the burrito seam-side down in the skillet first serves two critical functions simultaneously. The direct heat applied to the seam side presses and seals it closed as the butter caramelizes the tortilla surface, eliminating the risk of the burrito unrolling during cooking or when picked up to eat. A seam-side-up first placement leaves the seam open and exposed, allowing the filling’s internal pressure from heat expansion to push it open. Seam-side down locks it shut before any other side is cooked — the burrito exits the skillet permanently and reliably closed.
Nacho cheese sauce alongside the shredded Mexican cheese blend produces a filling with two distinct cheese textures and flavor profiles. The shredded Mexican cheese blend melts slowly during the toasting process and produces pockets of pulled, stringy cheese throughout the interior. The nacho cheese sauce is already melted and smooth going in, coating the surrounding ingredients and providing a uniform, creamy cheese presence between the cheese pockets. Together they ensure that every cross-section of the sliced burrito has both the melted shred experience and the smooth sauce experience simultaneously — no bite is without cheese in some form.
Crunchy tortilla strips or crushed chips inside the burrito is the textural detail that distinguishes this burrito from a standard one and makes the interior more interesting to eat. A burrito filled only with soft components — rice, beef, cheese, sour cream — has a uniform soft texture throughout that’s satisfying but one-dimensional. The tortilla strips maintain some crunch even after being enclosed in the warm filling during the brief skillet toast, providing resistance and snap against the surrounding soft components. The crunch also reinforces the Tex-Mex flavor identity of the filling — tortilla chips taste specifically of corn and salt and amplify the taco seasoning’s flavor in a way that no other crunch element would.
Mexican rice as the starch base layer beneath the beef serves multiple functions. It adds substantial volume and weight that makes the burrito a genuinely filling meal rather than a snack-sized wrap. The rice’s mild, tomato-seasoned flavor provides a neutral base that absorbs the surrounding taco sauce and nacho cheese, helping those sauces distribute throughout the filling rather than pooling in one spot. The rice also acts as a physical barrier between the tortilla and the wetter sauce and sour cream components, slowing the rate at which those liquids can migrate through to the tortilla exterior — which is particularly important for maintaining the crispiness of the toasted shell through eating.
Ingredients
| Ingredient | Quantity | Notes |
|---|---|---|
| Ground beef | 1 pound | 80/20 for best flavor; browned, drained, and simmered with taco seasoning |
| Large flour tortillas | 4 | Burrito-size (10-inch); warmed before filling to prevent cracking when rolled |
| Cooked Mexican rice or taco rice | 2 cups | Store-bought or homemade; warmed before layering |
| Taco seasoning | 1 packet (about 1 oz) | Simmered with water and beef until thick and saucy |
| Water | 1/4 cup | Added with taco seasoning to activate the thickeners |
| Taco sauce or salsa | 1/2 cup | Distributed through the filling layers |
| Shredded Mexican cheese blend | 1 cup | Melts into pockets of pulled cheese throughout the filling |
| Nacho cheese sauce | 1/2 cup | Jarred or canned; adds smooth, creamy cheese coating to the filling |
| Sour cream | 1/2 cup | Adds tangy creaminess; divided among the 4 burritos |
| Crunchy tortilla strips or crushed chips | 1 cup | Adds interior crunch; distributed through the filling |
| Butter or oil | 1 tablespoon | For toasting the burritos in the skillet; butter produces more flavor |
Step-by-Step Instructions
Phase 1: Cook the Taco Beef
- In a large skillet over medium heat, cook the ground beef, breaking it into fine crumbles, until fully browned with no pink remaining. Drain the excess grease.
- Add the taco seasoning packet and quarter cup of water. Stir to coat the beef evenly. Simmer for 3 to 5 minutes, stirring occasionally, until the liquid has absorbed and the beef is coated in thick, saucy seasoning. Remove from heat.
- Warm the Mexican rice if using refrigerated or packaged rice. Both the beef and rice should be warm — not hot — when the burritos are assembled.
Phase 2: Assemble the Burritos
- Warm the flour tortillas in the microwave for 20 to 30 seconds, covered with a damp paper towel, until pliable. Cold tortillas crack when rolled.
- Lay one warm tortilla flat on a clean surface. Spread half a cup of warm Mexican rice in the center of the tortilla, leaving about 2 inches of space on the sides and 3 inches at the top and bottom.
- Layer the taco beef over the rice (about a quarter of the beef per burrito). Add a quarter of the shredded cheese, two tablespoons of nacho cheese sauce, two tablespoons of sour cream, two tablespoons of taco sauce or salsa, and a quarter cup of tortilla strips or crushed chips.
- Fold the left and right sides of the tortilla in over the filling. Then fold the bottom edge up tightly over the filling and roll the burrito away from you, pressing firmly to keep everything compact. The tighter the roll, the more structural the finished burrito.
- Repeat with the remaining three tortillas and filling.
Phase 3: Toast and Serve
- Heat the butter or oil in a large skillet over medium heat until the butter is melted and the pan is hot. Place the burritos seam-side down in the skillet — work in batches if they don’t all fit with space between them.
- Toast for 2 to 3 minutes until the seam side is golden brown and sealed. Turn and toast each remaining side for 1 to 2 minutes until all surfaces are evenly golden and crispy. The interior should be warm and the cheeses melted by the time all sides are toasted.
- Remove from the skillet and let rest for 1 minute before slicing in half diagonally. Serve immediately with optional toppings — taco sauce, sour cream, guacamole, green onions, or jalapeños alongside.
Chef Tips for Perfect Results
Don’t overfill. The temptation to load more filling into each burrito is real, but overfilled burritos can’t be rolled tightly, the seams pop open during toasting, and the filling spills into the skillet. Divide the filling evenly among four tortillas and resist adding more than the specified amounts.
Roll as tightly as possible. A tight roll holds together through toasting and slicing. A loose roll has interior air pockets that expand during heating and can force the seam open. Press firmly at each fold and at the final roll to eliminate air pockets.
Toast all four sides. A burrito has four flat surfaces when assembled. Toasting only the seam-side and top produces two crispy sides and two soft sides. Taking the extra 2 minutes to rotate and toast all four sides produces a uniformly golden, crispy exterior on every surface.
Use a flat-bottomed pan and keep the heat at medium. High heat browns the tortilla exterior too quickly before the interior has time to warm through, producing a charred exterior with a cold center. Medium heat gives the interior time to warm and the cheeses time to melt during the same window the exterior goes golden.
Rest one minute before slicing. A burrito sliced immediately from the skillet has very hot, fluid fillings that flow out the cut end. One minute of rest allows the filling to settle slightly and the slice stays cleaner and more presentable.
Common Mistakes to Avoid
Not warming the tortillas before rolling. Cold tortillas crack at the folds and split during rolling, particularly with a full, heavy filling. Twenty seconds in the microwave makes them completely pliable.
Using too much wet filling. Sour cream, nacho cheese sauce, and taco sauce together are the wettest components. Too much of any of them saturates the tortilla from the inside and produces a soft exterior that won’t crisp properly in the skillet. Stick to the specified amounts.
Not simmering the taco seasoning. Unsimmered seasoning powder on beef produces dry, uneven flavor. The 3 to 5 minute simmer with water activates the thickeners and produces a thick, clinging, properly sauced taco filling.
Crowding the skillet during toasting. Burritos touching each other in the skillet trap steam between them and produce soft, steamed sides rather than crispy, toasted ones. Work in batches if needed.
Skipping the seam-side-down first. Always start seam-side down to seal the burrito closed before toasting the other sides. A burrito started on any other side can unroll before the seam has a chance to seal.
Variations and Substitutions
Chicken version: Replace the ground beef with two cups of shredded seasoned chicken — rotisserie chicken tossed with taco seasoning works perfectly and skips the cooking step entirely. The chicken version is lighter and equally satisfying with the same filling components.
Add refried beans: A thin spread of refried beans on the tortilla before the rice goes on adds a creamy, earthy layer that helps hold the other filling components together and makes each burrito more substantial. Refried beans are a classic burrito component that works naturally alongside every other ingredient here.
Breakfast burrito version: Replace the taco beef and rice with scrambled eggs, cooked bacon or sausage crumbles, and diced potato or hash browns. Keep the cheese blend, nacho cheese sauce, and sour cream components and toast the same way. The breakfast version is equally excellent and uses the same technique to outstanding effect.
Add jalapeños: Sliced fresh or pickled jalapeños layered into the filling add a heat element that cuts through the richness of the nacho cheese and sour cream. The heat builds through the warm filling during the toasting stage and is present throughout every bite.
Serving Suggestions
Slice each toasted burrito diagonally in half and serve cut-side up to show the layered cross-section — it’s visually impressive and signals the quality of everything inside. Serve alongside small bowls of extra taco sauce, sour cream, and guacamole for dipping. For a complete meal, add a simple green salad, Mexican rice on the side, or seasoned fries. These burritos also work as party food — made in batches and kept warm in a 200 degree F oven on a wire rack while additional batches toast.
Storage and Reheating
Refrigerator: Store untoasted assembled burritos wrapped in foil for up to 3 days. Toast in the skillet just before serving for best results. Toasted burritos stored in the refrigerator reheat well but won’t achieve the same initial crispiness.
Reheating: The skillet produces the crispiest reheat — medium heat, 2 to 3 minutes per side. The air fryer at 375 degrees F for 5 to 6 minutes also produces a very good result. The microwave reheats quickly but produces a soft exterior.
Freezer: Freeze assembled, untoasted burritos wrapped tightly in foil for up to 2 months. Thaw overnight in the refrigerator and toast in the skillet as directed. Do not freeze toasted burritos — the crispy exterior doesn’t survive freezing.
Nutritional Information
| Nutrient | Per Burrito (approx.) |
|---|---|
| Calories | 720 |
| Protein | 34g |
| Carbohydrates | 68g |
| Fat | 34g |
| Saturated Fat | 14g |
| Fiber | 4g |
| Sodium | 1180mg |
Nutritional values are estimates based on standard ingredient brands. Sodium is significant due to the taco seasoning, nacho cheese sauce, and tortilla; values will vary based on specific brands used.
FAQ
Can I make these ahead and toast them later?
Yes — and it’s the most practical approach for a weeknight dinner. Assemble all four burritos, wrap each in foil or plastic wrap, and refrigerate for up to 3 days. When ready to serve, unwrap and toast in the buttered skillet as directed. The filling will be cold going in, so add an extra minute per side to ensure the interior heats through completely before serving.
How do I keep the burrito from unrolling in the skillet?
Three things: roll as tightly as possible pressing out air at each fold, place seam-side down in the skillet immediately, and don’t move the burrito during the first 2 minutes on the seam side. The butter caramelizes the seam closed against the pan surface during that first contact. Once the seam is sealed and golden, the burrito can be turned safely without unrolling.
What’s the best nacho cheese sauce to use?
Jarred Tostitos Salsa Con Queso or Ricos nacho cheese sauce are the most commonly available and produce reliable results. Any shelf-stable nacho cheese sauce works — the key quality to look for is a sauce that’s thin enough to drizzle and distribute through the filling rather than one that’s very thick and pasty. Velveeta melted with a splash of milk is an excellent homemade alternative that produces an even smoother, more cohesive cheese sauce.
Can I use a panini press or sandwich maker instead of a skillet?
Yes. A panini press or flat sandwich maker toasts all surfaces simultaneously and produces a well-compressed, uniformly golden burrito without requiring manual turning. Press at medium heat for 3 to 4 minutes until golden on all surfaces. The panini press also compresses the filling slightly, which makes the burrito more compact and easier to eat without the filling falling out.
How do I prevent the inside from being cold when the outside is golden?
Two things prevent a cold center: warming the filling components before rolling (room temperature or slightly warm beef and rice, not cold from the refrigerator), and keeping the skillet heat at medium rather than medium-high. High heat browns the exterior too fast before the interior can warm through. Medium heat gives the 3 to 4 minutes needed for both the exterior to go golden and the interior to warm completely.
Conclusion
The crispy golden burrito is the recipe that proves what’s possible when a burrito gets a skillet treatment instead of just a foil wrap — the toasted exterior, the layered filling of seasoned beef, rice, two cheeses, sour cream, and tortilla strips, and the optional drizzle of taco sauce produce something that delivers on every texture and flavor the name promises. Make one batch and understand immediately why toasting burritos in butter is a technique worth applying to every burrito you make from now on.