
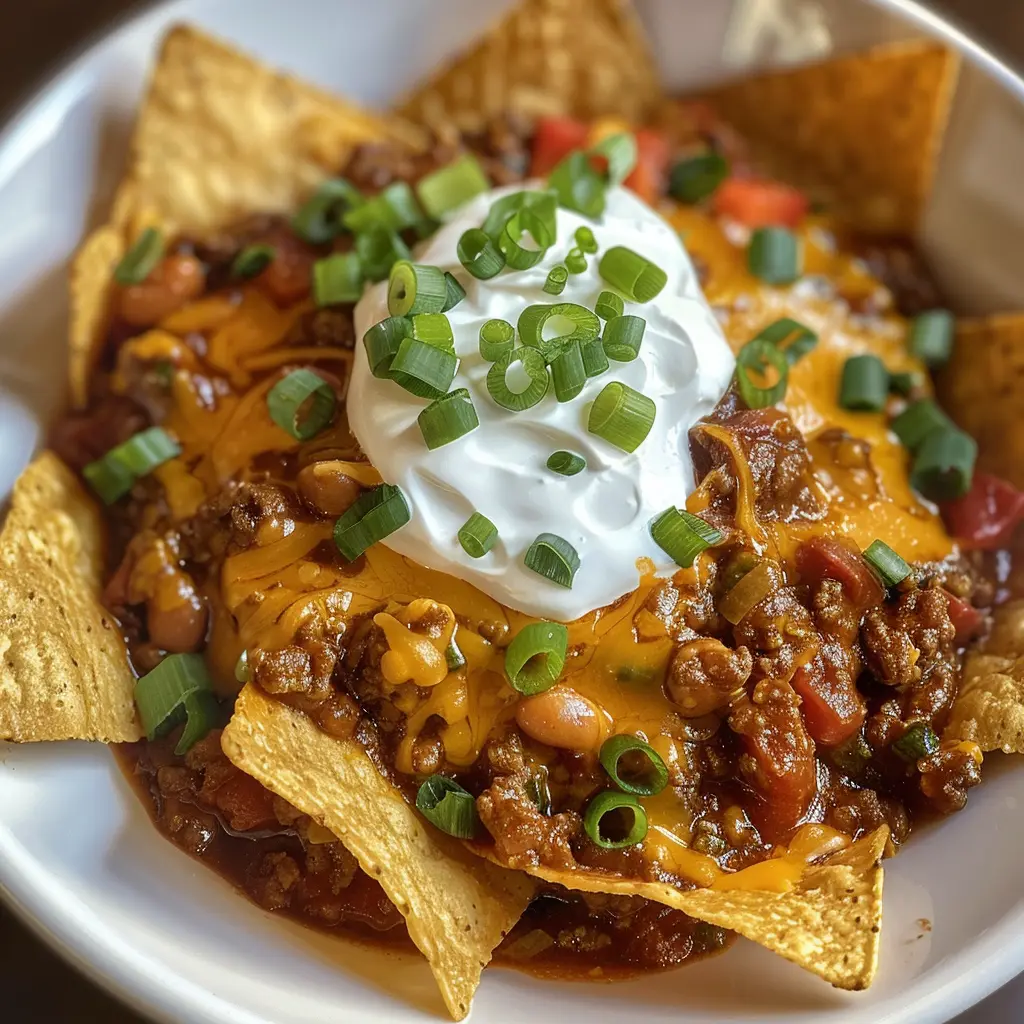
Oven-baked beef chili scoops fill scoop-style tortilla chips with a quick beef chili, top them with cheddar, and bake just long enough for the cheese to melt and the chips to warm. The result is a bite-sized appetizer with a satisfying crunch, a hearty meaty filling, and melted cheese in every single cup — set out a tray and watch them disappear before anything else on the table does.
| Detail | Info |
|---|---|
| Prep Time | 10 minutes |
| Bake Time | 8 to 10 minutes |
| Total Time | 20 minutes |
| Servings | 6 to 8 as an appetizer |
| Difficulty | Easy |
| Cuisine | American / Tex-Mex |
Why This Recipe Works
Scoop-style tortilla chips exist for exactly this application — their concave shape creates a self-contained cup that holds filling without assistance and keeps the chili and cheese in one place rather than sliding off a flat chip the moment it’s picked up. The engineered shape is the structural element that makes this appetizer practical to eat without utensils and practical to set out at a party without worrying about chips tipping over and spilling before they reach a guest’s mouth. The shape isn’t incidental; it’s what makes this recipe viable as an appetizer format rather than a messy chip-topping exercise.
Browning fresh ground beef before combining it with the canned chili produces a significantly more flavorful filling than using canned chili alone. Properly browned ground beef develops the Maillard reaction — the caramelization of protein and fat at high heat that produces the savory, deeply beefy flavor compounds responsible for the difference between well-cooked beef and barely-gray beef. When this browned beef is stirred into the canned chili, it brings that developed flavor into the sauce and elevates the whole mixture beyond what canned chili provides on its own. The addition of fresh beef makes these scoops taste homemade even though the base is a convenience product.
Heating the chili and beef together for 2 to 3 minutes before filling the chips serves two purposes. First, it ensures the chili is hot going into the chips, which means the oven time is purely for warming the chips and melting the cheese rather than also needing to heat a cold filling. Second, it allows the beef and chili to begin integrating — the beef absorbs some of the chili’s seasoning and sauce, and the chili’s liquid coats the beef pieces, producing a more unified filling rather than two distinct components sitting alongside each other.
The brief oven bake — 8 to 10 minutes at 375 degrees F — is calibrated specifically to warm the chip and melt the cheese without making the chip so hot that it loses its crunch. Tortilla chips continue to crisp slightly in the oven’s dry heat, and a chip that’s too warm for too long becomes fragile and prone to breaking under the weight of the filling when picked up. The brief bake achieves the warm, cheese-melted result without compromising the structural integrity that makes these scoops satisfying to eat.
Shredded cheddar rather than processed cheese is the finishing choice that makes these scoops look and taste genuinely appealing rather than like party nachos with processed topping. Sharp cheddar’s bold flavor cuts through the richness of the chili and beef, and its natural melting produces the bubbled, slightly browned cheese surface that looks like something made with care. Pre-shredded cheddar works; freshly shredded from a block melts slightly more evenly and cleanly. Either way, cheddar is what makes the scoop look like an appetizer worth eating.
Ingredients
| Ingredient | Quantity | Notes |
|---|---|---|
| Ground beef | 1 pound | 80/20 blend; drain excess fat after browning |
| Canned chili with beans | 1 can (15 oz) | Any brand; choose a style you enjoy since it defines the filling flavor |
| Scoop-style tortilla chips | 1 bag | Tostitos Scoops or equivalent; the concave shape is non-negotiable for this format |
| Shredded cheddar cheese (optional) | 1 cup | Sharp cheddar for the most flavor; listed optional but strongly recommended |
| Suggested Toppings (optional) | ||
| Sour cream | To taste | Added after baking; provides cool, tangy contrast |
| Diced tomatoes | To taste | Added after baking for freshness |
| Sliced green onions | To taste | Adds color and mild onion flavor |
| Sliced jalapeños | To taste | Fresh or pickled; adds heat for those who want it |
Step-by-Step Instructions
Phase 1: Make the Chili Filling
- Preheat the oven to 375 degrees F. Line one or two baking sheets with parchment paper or aluminum foil for easy cleanup.
- Cook the ground beef in a skillet over medium heat, breaking it into crumbles, until fully browned with no pink remaining, about 6 to 8 minutes. Drain the excess fat.
- Add the canned chili to the skillet and stir to combine with the browned beef. Cook over medium heat for 2 to 3 minutes until heated through and the filling is thick and cohesive. A thick filling is important — filling that’s too loose and soupy will soak through the chip and make it soft before anyone can eat it. If the filling seems thin, let it simmer for an extra minute to reduce.
Phase 2: Fill and Bake
- Arrange the scoop-style chips in a single layer on the prepared baking sheets. Fill each chip with approximately one to one and a half teaspoons of the beef chili mixture. The filling should sit just below the rim of the chip — overfilled scoops are difficult to eat without spilling and can make the chip collapse under the weight.
- Sprinkle a small amount of shredded cheddar over each filled chip — enough to cover the filling and form a thin layer over the top of each scoop.
- Bake for 8 to 10 minutes until the cheese is melted and the chips are warm. Watch them at the 8-minute mark — the difference between properly baked and over-baked chips that have lost their crunch is only a minute or two.
- Remove from the oven and top with sour cream, diced tomatoes, green onions, jalapeños, or other toppings of choice. Serve immediately while the cheese is still melted and the chips are still crisp.
Chef Tips for Perfect Results
Make the filling thicker than seems necessary. A thick filling sits in the cup of the chip without flowing out the bottom or soaking into the chip and making it soft. If the combined beef and chili mixture seems loose, reduce it over medium heat for an extra minute. The filling should mound slightly in the chip rather than leveling flat and thin.
Don’t overfill the chips. An overfilled scoop is structurally unstable and collapses when picked up, depositing the filling on a shirt rather than in a mouth. One to one and a half teaspoons per chip is the right volume — enough to fill the cup and show over the rim but not so much that the chip can’t support it.
Work in batches for a large crowd. Filled, cheese-topped chips sitting on the baking sheet for 20 minutes before they go into the oven will have chips that have softened from the heat of the filling below. Prepare only as many as can be baked and served immediately, and make additional batches as needed throughout the event.
Set up a topping station. Rather than adding all the toppings before baking, set out small bowls of sour cream, diced tomatoes, green onions, and jalapeños alongside the baked scoops and let guests add their own. This keeps the toppings fresh, accommodates different preferences, and is more practical for a large batch than individually garnishing each chip.
Use thick, restaurant-style canned chili. Thinner or more broth-based canned chilis produce a filling that soaks through the chip faster. Look for a chili that looks thick and stew-like in the can. Hormel and Wolf Brand are consistently thick; some organic or natural brands are thinner — check the consistency before combining with the beef.
Common Mistakes to Avoid
Filling the chips too far in advance. Even with a thick filling, chips filled more than 10 to 15 minutes before baking will soften from the moisture and heat of the filling below them. Fill immediately before baking for chips that retain their crunch.
Baking too long. Eight to ten minutes is the correct window. Beyond that, the chips become fragile and break when picked up. Check at 8 minutes and remove as soon as the cheese is melted.
Adding cold toppings before baking. Sour cream, fresh tomatoes, and green onions should always be added after baking — they don’t benefit from heat and become wilted or watery if baked. Always garnish after the oven.
Using a thin or liquid chili. A thin filling is the primary structural failure mode of this recipe. Drain some of the excess liquid from a thinner canned chili before using, or reduce it with the beef for a few extra minutes.
Not draining the beef fat. Excess rendered fat from the ground beef will make the filling greasy and can cause it to flow out of the chip before it reaches anyone’s mouth. Always drain before adding the chili.
Variations and Substitutions
Pulled pork version: Replace the ground beef with warmed leftover pulled pork or store-bought pulled pork, combined with the canned chili. The slightly smoky, tender pork against the chili sauce and cheddar is a crowd-pleasing variation.
Vegetarian version: Omit the ground beef and use a can of vegetarian chili or two cans of chili with beans for a fully meatless filling. Add a teaspoon of taco seasoning to amp up the flavor without the beef.
Add jalapeño pepper jack: Replace some or all of the cheddar with pepper jack cheese for a filling with more heat and a creamier melt. Pepper jack’s built-in chile heat works particularly well with a mild canned chili.
Add guacamole: A small dollop of guacamole added after baking alongside the sour cream adds a creamy, rich avocado note that makes the scoop more substantial as an appetizer.
Serving Suggestions
Serve immediately from the baking sheet with a topping station alongside. These work best as a passed appetizer or set out buffet-style where guests can help themselves quickly — the window of peak crunchiness is about 5 minutes after baking. For a game day spread, keep the filling warm in a slow cooker on the warm setting and bake chips in small batches every 15 minutes so there’s always a fresh tray ready. Pair with beer, margaritas, or soft drinks.
Storage
Assembled scoops: Do not store assembled scoops. They should be eaten immediately after baking.
Filling: The beef chili filling stores in an airtight container in the refrigerator for up to 4 days. Reheat in a skillet or microwave before filling fresh chips for a quick second batch.
Freezer: The filling freezes well for up to 2 months. Thaw overnight in the refrigerator and reheat before using.
Nutritional Information
| Nutrient | Per Serving (approx., based on 7 servings) |
|---|---|
| Calories | 310 |
| Protein | 18g |
| Carbohydrates | 22g |
| Fat | 17g |
| Saturated Fat | 6g |
| Fiber | 3g |
| Sodium | 540mg |
Nutritional values are estimates based on standard ingredient brands without optional toppings. Values will vary based on the specific canned chili brand used.
FAQ
Can I make the filling ahead of time?
Yes — and it’s the smart approach for a party. The beef chili filling can be made up to 3 days ahead and refrigerated, then reheated in a skillet or microwave before filling the chips. Having the filling ready means assembly and baking take under 15 minutes whenever guests are ready for a fresh batch.
What’s the best way to keep these warm during a party?
These are at their absolute best in the 5 minutes after baking when the chips are still crisp. For a party setting, bake in small batches every 15 minutes rather than making one large batch that sits out. Keep the filling warm in a slow cooker and assembly takes under 2 minutes per tray. Chips that have been sitting for more than 10 minutes after baking will have softened — still tasty, but not the same satisfying crunch.
Can I make these without baking them?
Yes. Fill the chips with warm chili filling, top with cheese, and serve immediately without baking. The cheese won’t be melted, but the warm filling against the crisp room-temperature chip is still excellent and removes the oven step entirely for an even faster version. The filling just needs to be hot enough to slightly soften (though not melt) the cheese as it sits.
Do I need to use brand-name scoop chips?
Tostitos Scoops is the most consistent in size and cup depth, but any store-brand equivalent with a true concave shape works equally well. Avoid flat chips with only a slight curve — the scoop shape needs to be deep enough to contain the filling without it flowing over the sides.
Can I add extra spice to the filling?
Yes. A teaspoon of taco seasoning, a pinch of cumin, a dash of chili powder, or a few drops of hot sauce stirred into the beef and chili mixture during the stovetop cook adds heat and depth without changing the recipe’s convenience. Taste and adjust before filling the chips.
Conclusion
Oven-baked beef chili scoops are the appetizer that earns its reputation by being genuinely easy, genuinely crowd-pleasing, and gone before anything else on the table. Three ingredients, 20 minutes, and a tray of warm, cheesy, bite-sized bites that guests reach for repeatedly until the baking sheet is empty. Make a double batch.