
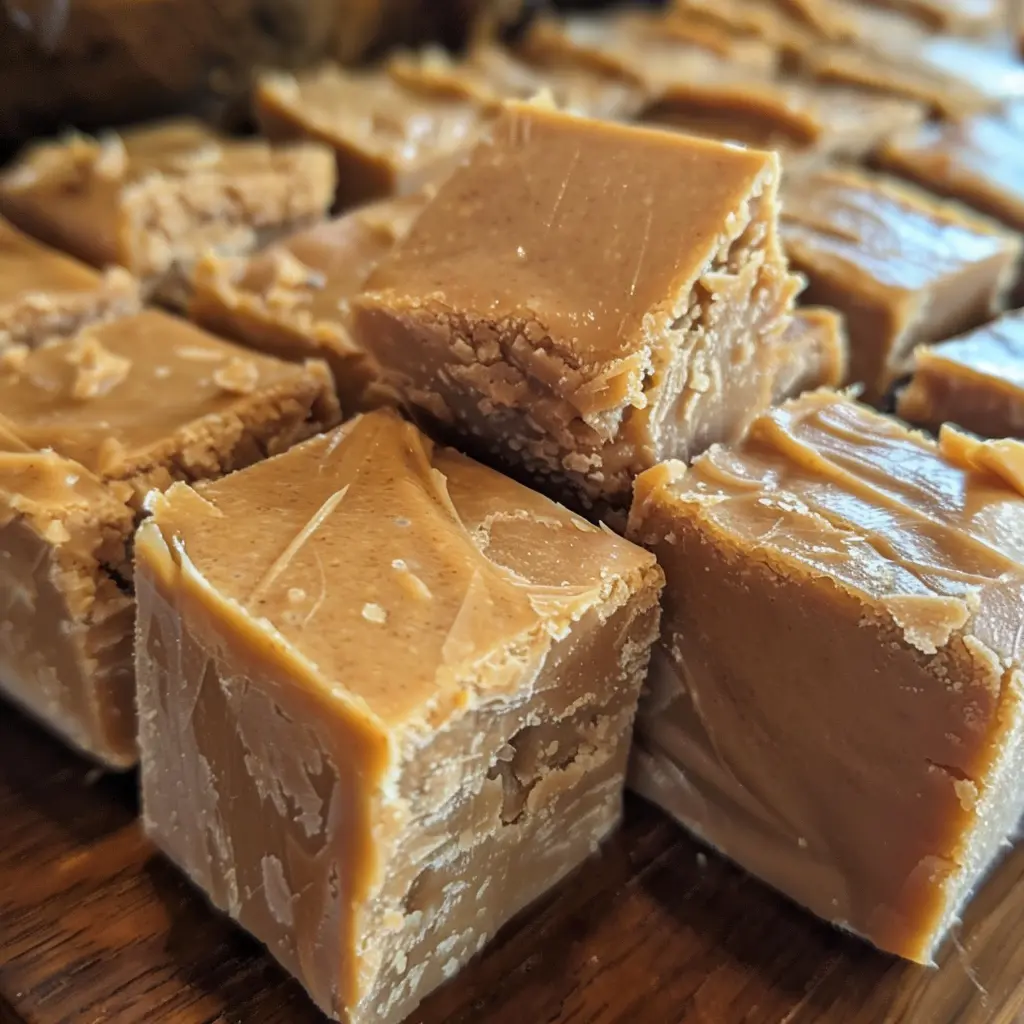
Old-fashioned peanut butter fudge boils sugar and milk together, pulls the pan off the heat, stirs in peanut butter, butter, and vanilla, pours it into a lined pan, and lets it set at room temperature into a firm, creamy, melt-in-your-mouth candy that tastes exactly like something pulled from a holiday tin at a grandparent’s house. Five ingredients, one saucepan, and a result that tastes far more complex and impressive than the method suggests.
| Detail | Info |
|---|---|
| Prep Time | 10 minutes |
| Cook Time | 10 minutes |
| Total Time | 20 minutes active (plus cooling) |
| Servings | 16 pieces |
| Difficulty | Easy |
| Cuisine | American |
Why This Recipe Works
Boiling the sugar and milk together without stirring after the initial dissolve is the most important technique in the recipe and the one that produces fudge rather than grainy candy. When sugar syrup is stirred while boiling, sugar crystals can form on the sides of the pan and seed the rest of the batch, causing the entire mixture to crystallize into a gritty, sandy texture rather than the smooth, creamy fudge the recipe promises. The 2 to 3 minutes of undisturbed boiling allows the sugar to concentrate in the milk without any crystallization trigger. Patience at this stage is the difference between silky fudge and a grainy, crumbly result.
Removing the pan from heat before stirring in the peanut butter, butter, and vanilla is the technique that preserves the smooth, creamy texture of the finished fudge. Adding the remaining ingredients while the sugar syrup is still at active boil temperature agitates the supersaturated sugar solution at exactly the moment it’s most prone to crystallization, increasing the risk of the batch turning grainy. Off the heat, the syrup cools just enough that the addition of the fat-rich peanut butter and butter stabilizes the sugar solution before it can crystallize, producing a smooth, homogeneous mixture that sets to a firm, creamy fudge rather than a crumbly one.
Peanut butter is the functional ingredient that does the most work in this fudge beyond flavor. Natural peanut oil in the peanut butter acts as a crystallization inhibitor in the concentrated sugar syrup — the fat molecules interfere with sugar crystal formation in the same way that cream and butter inhibit crystallization in traditional chocolate fudge. The peanut butter’s protein and fat create a matrix that traps the sugar molecules and prevents them from organizing into the large crystals responsible for grainy fudge. This is why peanut butter fudge made with a simple boiled sugar base produces reliably smooth results without the extensive beating and precise temperature control that chocolate fudge requires.
Butter added alongside the peanut butter contributes richness and a final smoothness to the fudge that peanut butter alone doesn’t quite achieve. Butter’s milk fat rounds out the sweetness of the sugar base and produces the characteristic “melt in your mouth” quality that distinguishes good fudge from candy that merely tastes sweet. Two tablespoons is the right amount — enough to add richness and improve the texture without making the fudge oily or preventing it from setting firmly at room temperature.
Cooling at room temperature rather than in the refrigerator is the finishing step that produces the right final texture. Fudge cooled in the refrigerator sets too quickly and can develop a slightly grainy, crumbly texture as the rapid temperature drop encourages some crystallization. Room temperature cooling allows the fudge to set gradually over the course of an hour or two, giving the sugar molecules time to form the fine, even crystal structure that produces a smooth, dense, sliceable fudge rather than a brittle or grainy one.
Ingredients
| Ingredient | Quantity | Notes |
|---|---|---|
| Granulated sugar | 2 cups | White granulated; the base of the candy |
| Milk | 1/2 cup | Whole milk for the richest result; the cooking liquid that carries the sugar to temperature |
| Peanut butter | 1/2 cup | Creamy, commercial-style (like Jif or Skippy); natural peanut butter with separated oil can produce inconsistent results |
| Vanilla extract | 1 teaspoon | Added off the heat; pure vanilla for the best flavor |
| Unsalted butter | 2 tablespoons | Added off the heat alongside the peanut butter; adds richness and improves the melt |
Step-by-Step Instructions
Phase 1: Prepare the Pan
- Line an 8×8-inch baking dish with parchment paper, pressing it into the corners and leaving overhang on the sides to use as handles for lifting the fudge out later. Lightly grease the parchment with butter or cooking spray.
Phase 2: Cook the Sugar Syrup
- Combine the sugar and milk in a medium heavy-bottomed saucepan. Cook over medium heat, stirring constantly, until the sugar is completely dissolved and the mixture comes to a full boil.
- Once boiling, stop stirring. Do not stir the mixture again during the boil. Allow it to boil undisturbed for exactly 2 to 3 minutes. Watch the heat — adjust if needed to maintain a steady boil without the mixture climbing dangerously high in the pan.
Phase 3: Add Remaining Ingredients
- Remove the saucepan from the heat immediately after the 2 to 3 minute boil. Working quickly, add the peanut butter, butter, and vanilla extract all at once.
- Stir vigorously and continuously until the mixture is completely smooth, creamy, and uniform — no streaks of peanut butter or unmelted butter remaining. This should take about 1 to 2 minutes of active stirring. The mixture will thicken noticeably as it cools and the ingredients combine.
Phase 4: Pour and Cool
- Immediately pour the fudge mixture into the prepared pan and spread evenly with a spatula. Work quickly — the fudge sets fast as it cools and becomes difficult to spread if you wait too long.
- Let cool completely at room temperature, undisturbed, for 1 to 2 hours until fully firm. Do not refrigerate during this stage.
- Once firm, use the parchment overhang to lift the fudge out of the pan and onto a cutting board. Cut into 16 squares with a sharp knife and serve.
Chef Tips for Perfect Results
Use a heavy-bottomed saucepan. Thin saucepans develop hot spots that can cause the sugar to scorch on the bottom before the rest of the mixture has reached the right temperature. A heavy-bottomed saucepan distributes heat evenly and produces consistent results. If only a thin pan is available, keep the heat at medium-low rather than medium and watch carefully.
Don’t stir after it boils. This is the rule that separates successful fudge from grainy fudge. Once the mixture reaches a full boil, put the spoon down and leave it there until the pan comes off the heat. Even one stir during the boil can seed the mixture and produce crystallization.
Have everything measured and ready before you start. Once the sugar syrup comes off the heat, the peanut butter, butter, and vanilla need to go in immediately and be stirred in quickly before the mixture begins to set. Pre-measuring everything into a small bowl so it can be added in one motion rather than measured one at a time makes the off-heat stage faster and more controlled.
Use commercial creamy peanut butter. Jif, Skippy, or any commercial creamy peanut butter produces reliable results because the oil is fully homogenized and stable. Natural peanut butter with separated oil can introduce instability into the sugar mixture and produce inconsistent texture. For this recipe, commercial is the better choice.
Work fast when pouring into the pan. Peanut butter fudge sets quickly — within minutes of being poured. Get it into the prepared pan and smoothed out as soon as it’s fully combined. If it begins to thicken in the saucepan before you can get it spread evenly, work quickly with a greased spatula to distribute it before it sets completely.
Common Mistakes to Avoid
Stirring the syrup during the boil. This is the single most common cause of grainy fudge. Do not stir after the boil begins, period.
Refrigerating to speed up setting. The refrigerator sets the fudge too quickly and encourages crystallization that produces a grainy texture. Room temperature setting produces the smooth, dense, creamy fudge this recipe is known for. Plan for the 1 to 2 hour room temperature set time rather than rushing it.
Not stirring vigorously enough off the heat. The peanut butter and butter need to be fully incorporated into the sugar syrup before the mixture begins to set. Hesitant, slow stirring allows some of the mixture to cool and begin setting before everything is combined, producing an uneven texture. Stir fast and continuously.
Using natural peanut butter with oil separation. The separated oil in natural peanut butter introduces an unstable fat element into the mixture that can prevent the fudge from setting properly or produce a greasy texture. Always use a fully homogenized commercial peanut butter.
Waiting too long to pour into the pan. Every second of stirring after the mixture is fully combined is a second the fudge is cooling and beginning to set in the saucepan rather than in the prepared pan. Pour as soon as smooth and even.
Variations and Substitutions
Add chocolate chips: Stir a quarter cup of semi-sweet chocolate chips into the hot fudge just before pouring into the pan. They melt partially and create chocolate swirls throughout the peanut butter fudge — a flavor combination that needs no introduction.
Add a pinch of salt: A quarter teaspoon of flaky sea salt stirred into the mixture or sprinkled over the top of the fudge immediately after pouring intensifies the peanut butter flavor and cuts through the sweetness. Salted peanut butter fudge is significantly more complex in flavor than the plain version.
Use brown sugar for a deeper flavor: Replace half or all of the granulated sugar with packed brown sugar for a fudge with a richer, slightly caramel-like base flavor that pairs particularly well with peanut butter. The texture is slightly softer and the color deeper than the white sugar version.
Add chopped peanuts: A quarter cup of roughly chopped roasted peanuts folded into the mixture just before pouring adds crunch and intensifies the peanut flavor. Scatter a few extra over the top before the fudge sets for visual appeal.
Serving Suggestions
Cut into 16 squares and serve at room temperature — fudge served cold from the refrigerator loses some of the creamy, melt-in-your-mouth quality that makes it special. Arrange in a single layer on a serving plate or stack in a holiday tin lined with parchment paper. This fudge is an excellent homemade gift — it holds at room temperature for several days and ships well if individually wrapped in wax paper.
Storage
Room temperature: Store in an airtight container separated by parchment or wax paper layers for up to 1 week. Keep away from heat and humidity, which can cause the fudge to become sticky.
Refrigerator: Store in an airtight container for up to 3 weeks. Let come to room temperature before serving for the best texture and flavor.
Freezer: Wrap individual pieces in wax paper and store in an airtight container or zip bag for up to 3 months. Thaw at room temperature for 30 minutes before serving.
Nutritional Information
| Nutrient | Per Piece (approx.) |
|---|---|
| Calories | 145 |
| Protein | 2g |
| Carbohydrates | 26g |
| Fat | 4g |
| Saturated Fat | 1g |
| Fiber | 0g |
| Sugar | 25g |
| Sodium | 35mg |
Nutritional values are estimates based on standard ingredient brands. Values will vary based on specific peanut butter brand used.
FAQ
Why did my fudge turn out grainy?
Grainy fudge is almost always caused by one of two things: stirring the sugar syrup during the boil, which seeds the mixture with sugar crystals and causes the whole batch to crystallize, or adding the peanut butter and butter while the mixture was still at full boil temperature, which agitates the supersaturated solution at its most unstable point. Next time, don’t stir after the boil begins, remove the pan from heat completely before adding any ingredients, and stir in the additions quickly and vigorously.
How do I know when the sugar syrup is ready without a candy thermometer?
The 2 to 3 minute boil in this recipe is calibrated for medium heat and produces a syrup at approximately the soft-ball stage (235 to 240 degrees F) — the stage needed for fudge. If you want to verify without a thermometer, drop a small amount of the boiling syrup into a glass of cold water after 2 minutes. If it forms a soft, pliable ball that you can shape with your fingers, it’s ready. If it disperses immediately, boil for another 30 seconds and test again.
Can I double the recipe?
Yes, though use a larger saucepan to allow for the increased volume during boiling, and use a 9×13-inch pan rather than an 8×8. The boil time may need to increase slightly for the larger volume of liquid — use the cold water test to confirm doneness rather than relying on time alone.
Can I use almond butter or another nut butter?
Yes. Almond butter, cashew butter, or sunflower seed butter all work in place of peanut butter with the same quantity. Use a commercial, homogenized version rather than natural to ensure consistent results. The flavor will reflect whichever nut butter you use — almond butter produces a milder, slightly more delicate fudge; cashew butter produces a very creamy, rich result.
My fudge didn’t set and is still soft after 2 hours. What happened?
Fudge that doesn’t set was likely undercooked — the sugar syrup didn’t reach soft-ball stage before the pan was removed from heat. You can attempt to rescue it by returning it to the saucepan, adding a tablespoon of milk, reheating to a boil, and boiling for another 1 to 2 minutes before removing from heat and adding the peanut butter and butter again. Alternatively, refrigerate the soft fudge — it won’t have the ideal texture but will firm enough to eat.
Conclusion
Old-fashioned peanut butter fudge is the recipe that proves five pantry ingredients and 20 minutes of active time can produce a homemade candy that tastes like it came from someone who has been making it for decades. The technique is simple but precise — don’t stir during the boil, add everything off the heat, stir fast, pour immediately — and the result is a smooth, creamy, deeply peanut-buttery fudge that disappears from the plate faster than almost anything else you could set out. Make it once and it becomes the recipe people request by name every holiday season.