
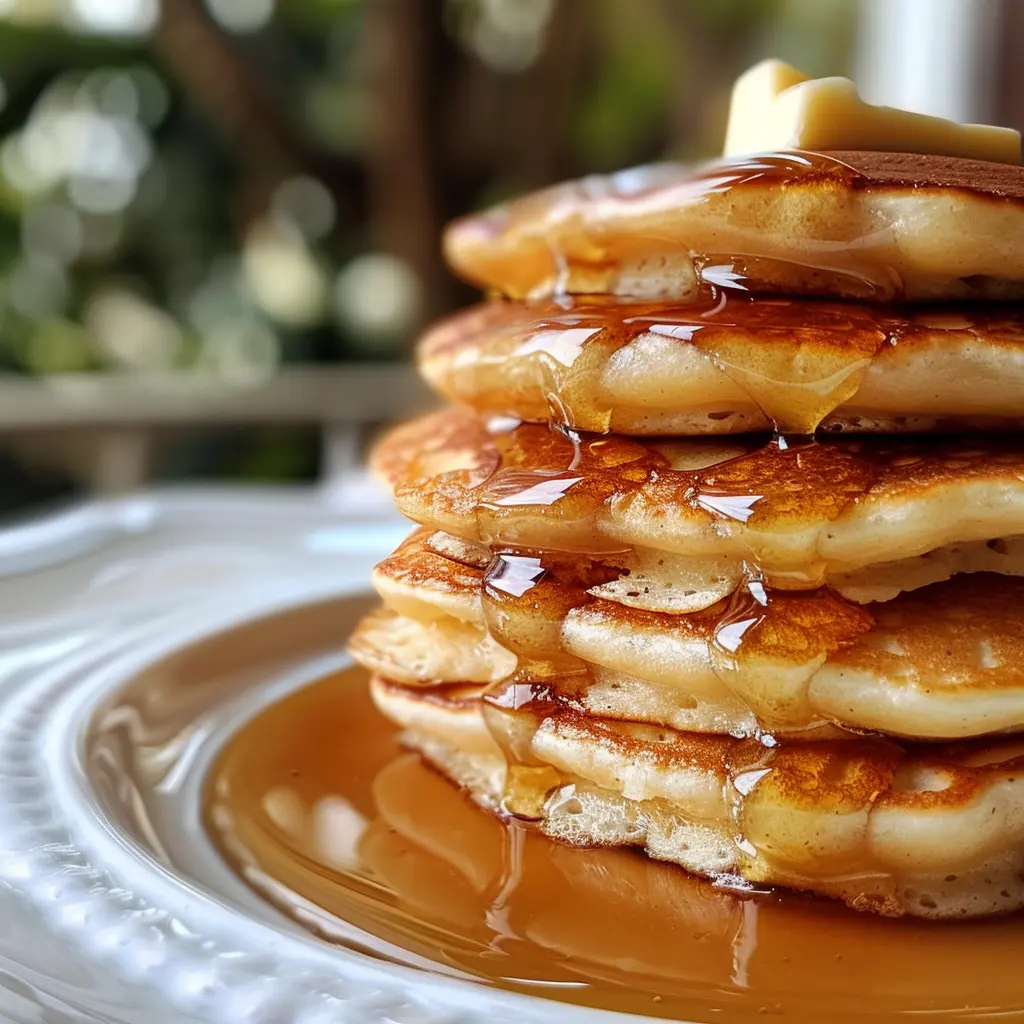
Fluffy pancakes made from scratch with real baking powder, a proper batter technique, and butter-cooked on a medium-heat griddle produce stacks that are thick, tender, and golden-edged in a way that boxed mixes consistently fail to replicate. The ingredient list is short, the method is straightforward, and the result is the kind of pancake that makes weekend mornings feel like an occasion.
| Detail | Info |
|---|---|
| Prep Time | 10 minutes |
| Cook Time | 15 to 20 minutes |
| Total Time | 30 minutes |
| Servings | 8 to 10 pancakes |
| Difficulty | Easy |
| Cuisine | American |
Why This Recipe Works
The amount of baking powder in this recipe — three and a half teaspoons for one and a half cups of flour — is significantly higher than what most people expect, and it’s exactly what produces the thick, dramatic rise that defines a genuinely fluffy pancake. Baking powder is a chemical leavener that releases carbon dioxide gas when it comes into contact with liquid and heat. More gas means more bubbles forming in the batter during cooking, and more bubbles means a lighter, more open, more risen pancake. Recipes that use less baking powder produce thinner, denser pancakes that are still pleasant but lack the architectural height that makes a fluffy pancake stack so visually and texturally satisfying.
Not overmixing the batter is the single most important technique instruction in the recipe, and the one most frequently violated. When flour is mixed with liquid, the proteins in the flour combine and form gluten — the elastic network that gives bread its chew. In a bread dough, extensive gluten development is desirable. In a pancake batter, it’s the enemy of fluffiness. Overmixed pancake batter develops too much gluten, which tightens the structure of the batter and prevents the leavening gas from expanding freely during cooking. The result is a flat, rubbery, chewy pancake. A batter stirred just until the flour disappears — with visible lumps still present — has minimal gluten development and produces a tender, cloud-like pancake. The lumps cook out during frying. They are not a flaw.
Melted butter in the batter rather than oil produces a pancake with a subtly richer, more nuanced flavor. Butter contains milk solids alongside its fat, and those solids contribute a gentle toasty, dairy flavor that neutral cooking oil completely lacks. The vanilla extract, listed as optional but genuinely worth including, adds a warm, bakery-style aroma that elevates the finished pancake from breakfast food to something that smells and tastes intentionally crafted.
Cooking in butter rather than oil or cooking spray produces the golden, slightly lacy, caramelized edges that are the hallmark of a properly cooked pancake. Butter’s milk solids brown at the edges of each pancake as it cooks, creating that characteristic golden ring and adding flavor that oil or spray can’t replicate. The key is using butter at medium heat — high heat burns butter and produces bitter, dark-edged pancakes before the center has a chance to cook through.
The bubble test for flipping is a reliable, visual doneness cue that removes the guesswork from pancake timing. As the bottom of the pancake cooks and sets, carbon dioxide released by the baking powder works its way upward through the batter, creating visible bubbles on the surface. When those bubbles have formed across the entire surface and the edges of the pancake look matte and set rather than wet and shiny, the bottom is golden and the pancake is structurally ready to flip without falling apart. Flip too early and the pancake tears. Wait for the bubbles.
Ingredients
| Ingredient | Quantity | Notes |
|---|---|---|
| All-purpose flour | 1.5 cups | Spoon into the cup and level; don’t scoop directly from the bag |
| Baking powder | 3.5 teaspoons | The higher quantity is what produces genuine fluffiness |
| Granulated sugar | 1 tablespoon | Adds a touch of sweetness and promotes golden browning |
| Salt | 1/4 teaspoon | Balances the sweetness and sharpens all the other flavors |
| Milk | 1.25 cups | Whole milk for the richest flavor; 2% works well too |
| Egg | 1 large | Room temperature incorporates more smoothly into the batter |
| Butter, melted | 3 tablespoons | Plus extra for cooking; adds flavor the batter and golden edges during cooking |
| Vanilla extract (optional) | 1 teaspoon | Highly recommended; adds warmth and a bakery-style aroma |
Step-by-Step Instructions
Phase 1: Mix the Batter
- In a large bowl, sift or whisk together the flour, baking powder, sugar, and salt until evenly combined. Sifting the baking powder through the flour ensures it’s evenly distributed and prevents any pockets of concentrated leavener in the finished pancakes.
- In a separate bowl, whisk together the milk, egg, melted butter, and vanilla extract until smooth and fully combined. Make sure the melted butter has cooled slightly before mixing it with the egg — very hot butter added directly to a cold egg can partially scramble it.
- Pour the wet ingredients into the bowl of dry ingredients. Stir gently with a spatula or wooden spoon until just combined — this should take no more than 10 to 15 stirs. The batter will be lumpy. This is correct and necessary. Stop mixing the moment no dry flour streaks remain. Resist every instinct to keep stirring.
- Let the batter rest for 3 to 5 minutes while the pan heats. This brief rest allows the flour to fully hydrate and the baking powder to begin activating, which produces a slightly thicker batter that holds its shape better when poured onto the griddle.
Phase 2: Cook the Pancakes
- Heat a non-stick skillet or griddle over medium heat. Add a small knob of butter and let it melt, swirling to coat the surface. The butter should foam gently but not brown immediately — if it browns the moment it hits the pan, the heat is too high. Reduce to medium-low and try again.
- Pour approximately a quarter cup of batter per pancake onto the griddle, leaving space between each one. The batter will spread slightly as it hits the pan — this is normal.
- Cook without moving until bubbles form across the entire surface of the pancake and the edges look set and matte rather than wet and shiny. This takes 2 to 3 minutes. Flip once with a confident, decisive motion — don’t hesitate or the pancake may fold.
- Cook the second side for 1 to 2 minutes until golden brown. The second side cooks faster than the first since the batter structure has already partially set. Don’t press the pancake down with the spatula — this deflates the rise the leavening worked to create.
- Transfer to a warm oven (200 degrees F) to keep warm while you cook the remaining batter. Add fresh butter to the pan between batches.
Chef Tips for Perfect Results
Rest the batter before cooking. Three to five minutes of rest after mixing allows the baking powder to activate and the flour to hydrate fully. Batter cooked immediately after mixing produces slightly flatter pancakes than batter that’s had a brief rest. This is a small but noticeable difference.
Keep the heat at medium, not medium-high. Medium heat gives the pancake time to cook through from the surface to the center before the bottom burns. Medium-high heat produces a darkly browned bottom before the top is ready to flip, resulting in a pancake that’s undercooked in the center with an over-browned exterior. If your pancakes are browning faster than the bubbles can form, lower the heat.
Use a quarter-cup measure for consistent size. A consistent pour size ensures all the pancakes cook in the same time and stack evenly. A quarter-cup measure dipped into the batter and leveled off produces reliable, uniform pancakes every time.
Don’t press the pancake after flipping. Pressing a pancake flat with the spatula immediately after flipping is a common instinct and a direct route to a dense, flat result. The air incorporated by the leavening is still expanding in the second half of cooking — pressing destroys the structure being built.
Add buttermilk for extra tang and fluffiness. Replace the milk with an equal amount of buttermilk for pancakes with a slightly tangy flavor and an even more dramatic rise. The acidity of the buttermilk reacts with the baking powder to produce additional carbon dioxide, creating an even lighter, more open crumb.
Common Mistakes to Avoid
Overmixing the batter. This is the most common pancake mistake and produces tough, flat, chewy pancakes. Stop mixing the moment the flour disappears into the liquid. Lumps are correct. Smooth batter is overmixed batter.
Cooking on heat that’s too high. High heat produces a dark exterior and raw center. Medium heat is the correct setting for pancakes cooked through to a fluffy, tender interior with a golden, evenly browned surface.
Flipping before the bubbles appear. Flipping too early — before the surface bubbles have formed and the edges have set — produces pancakes that are raw and liquid in the center and tear during the flip. The bubble test is reliable. Wait for it.
Flipping more than once. Every additional flip after the first deflates the rise the leavening created. Flip once, cook the second side until golden, and remove. Pancakes are not meant to be flipped repeatedly like burgers.
Scooping flour directly from the bag. Scooping compacts the flour and can measure 20 to 30 percent more than the recipe intends, producing a thick, stodgy batter and dense, heavy pancakes. Spoon the flour into the measuring cup and level off the top for an accurate measurement.
Variations and Substitutions
Blueberry pancakes: Fold a cup of fresh or frozen blueberries gently into the finished batter. Don’t stir them in — fold with two or three light sweeps of the spatula to distribute them without breaking them or overmixing the batter. Frozen blueberries can bleed purple color into the batter; rinse and dry them first to minimize this.
Chocolate chip pancakes: Scatter a small handful of mini chocolate chips onto each pancake immediately after pouring it onto the griddle, before the batter sets. This distributes them more evenly than stirring into the batter, which causes them to sink to the bottom.
Banana pancakes: Mash one ripe banana and whisk it into the wet ingredients before combining with the dry. The banana adds natural sweetness, a subtle flavor, and a slightly denser, more tender crumb. Reduce the sugar to a teaspoon if using a very ripe banana.
Buttermilk version: Replace the milk with an equal amount of buttermilk and reduce the baking powder to 2 teaspoons, adding half a teaspoon of baking soda instead. The buttermilk’s acidity reacts with the soda for extra lift and adds a tangy depth that many people prefer to the plain milk version.
Serving Suggestions
Stack three to four pancakes high on a warm plate and serve with softened butter and warm maple syrup as the classic combination. Fresh berries alongside add color and a tart contrast to the rich, buttery pancakes. Whipped cream, sliced bananas, or a dusting of powdered sugar are equally excellent toppings. For a more indulgent weekend breakfast, serve alongside crispy bacon or sausage for the salt-sweet contrast that makes breakfast feel like the best meal of the day.
Storage and Reheating
Refrigerator: Store cooled pancakes in an airtight container or zip-lock bag for up to 3 days. Stack with parchment paper between each to prevent sticking.
Freezer: Freeze in a single layer on a baking sheet until solid, then transfer to a freezer bag with parchment between each pancake. Freeze for up to 2 months. Reheat directly from frozen in the toaster for the best texture, or in a 350 degree F oven for 5 minutes.
Reheating: The toaster is the best reheating method for pancakes — it restores some of the exterior crispness that the refrigerator or microwave can’t. The microwave works in 20 to 30 second bursts and produces a softer result.
Nutritional Information
| Nutrient | Per Pancake (approx., without toppings) |
|---|---|
| Calories | 130 |
| Protein | 3g |
| Carbohydrates | 18g |
| Fat | 5g |
| Saturated Fat | 3g |
| Fiber | 0g |
| Sugar | 2g |
| Sodium | 200mg |
Nutritional values are estimates based on 9 pancakes per batch without toppings. Values will vary based on size and specific brands used.
FAQ
Why are my pancakes flat despite following the recipe?
Flat pancakes almost always come from one of three causes: overmixed batter that developed too much gluten and couldn’t rise, old baking powder that has lost its leavening power, or heat that was too high and set the batter before the leavening could expand it. Check your baking powder by dropping a teaspoon in hot water — it should bubble vigorously. If it doesn’t, it’s time for a fresh can.
Can I make the batter ahead of time?
The batter is best used immediately or within 30 minutes of mixing, while the baking powder is at its most active. Batter refrigerated overnight loses significant leavening power as the baking powder gradually exhausts itself in the cold liquid environment. If you want to prep ahead, measure and mix the dry ingredients and the wet ingredients separately the night before and combine them in the morning.
Can I make these dairy-free?
Yes. Replace the milk with an equal amount of oat milk, almond milk, or soy milk — oat milk produces the most similar result to whole milk in terms of richness and browning. Replace the butter in the batter with a neutral-flavored coconut oil or vegan butter, and cook in coconut oil or vegan butter instead of dairy butter. The pancakes will be slightly less rich but structurally identical.
Why do my pancakes stick to the pan?
Sticking usually means the pan wasn’t hot enough when the batter went in, the pan wasn’t properly buttered, or the pancake was flipped before it was ready to release naturally. A properly set pancake bottom releases cleanly from the pan on its own — if you have to force the spatula under it, it needs another 30 to 60 seconds before flipping.
How do I keep pancakes warm for a group?
Place a baking sheet in an oven set to 200 degrees F. Transfer finished pancakes directly onto the baking sheet in a single layer as they come off the griddle. They stay warm and maintain their texture for up to 30 minutes at this temperature without continuing to cook or drying out significantly.
Conclusion
Fluffy pancakes made from scratch take about the same time as opening a box and following the package directions, and they produce something noticeably better in flavor, texture, and rise. The technique is simple — dry in one bowl, wet in another, combine without overmixing, cook on medium heat and wait for the bubbles — and once it’s learned it becomes second nature. Make a batch on a weekend morning and you’ll find yourself reaching for this recipe instead of the box every time after that.